Studio
The Studio is your dynamic learning hub within watsonx Workshop, designed to help you deepen your knowledge, sharpen your skills, and prepare for real-world sales scenarios. Located to the right of the Chat, it offers a suite of tools that support different learning styles and use cases, whether you’d like to engage in a conversational podcast, prep for a client meeting, or perfect your pitch. The Studio features four core tools, each tailored to help you learn in a way that suits your workflow and preferences.
Interactive Podcast
watsonx Workshop’s Interactive Podcast transforms your uploaded materials into a multi-person audio discussion that you can listen to on-the-go.
Key Features
- Customizable length and focus
- Ability to ask questions mid-podcast and receive AI-generated responses
- Downloadable and shareable internally (not for client use)
- Supported on mobile devices
Getting Started
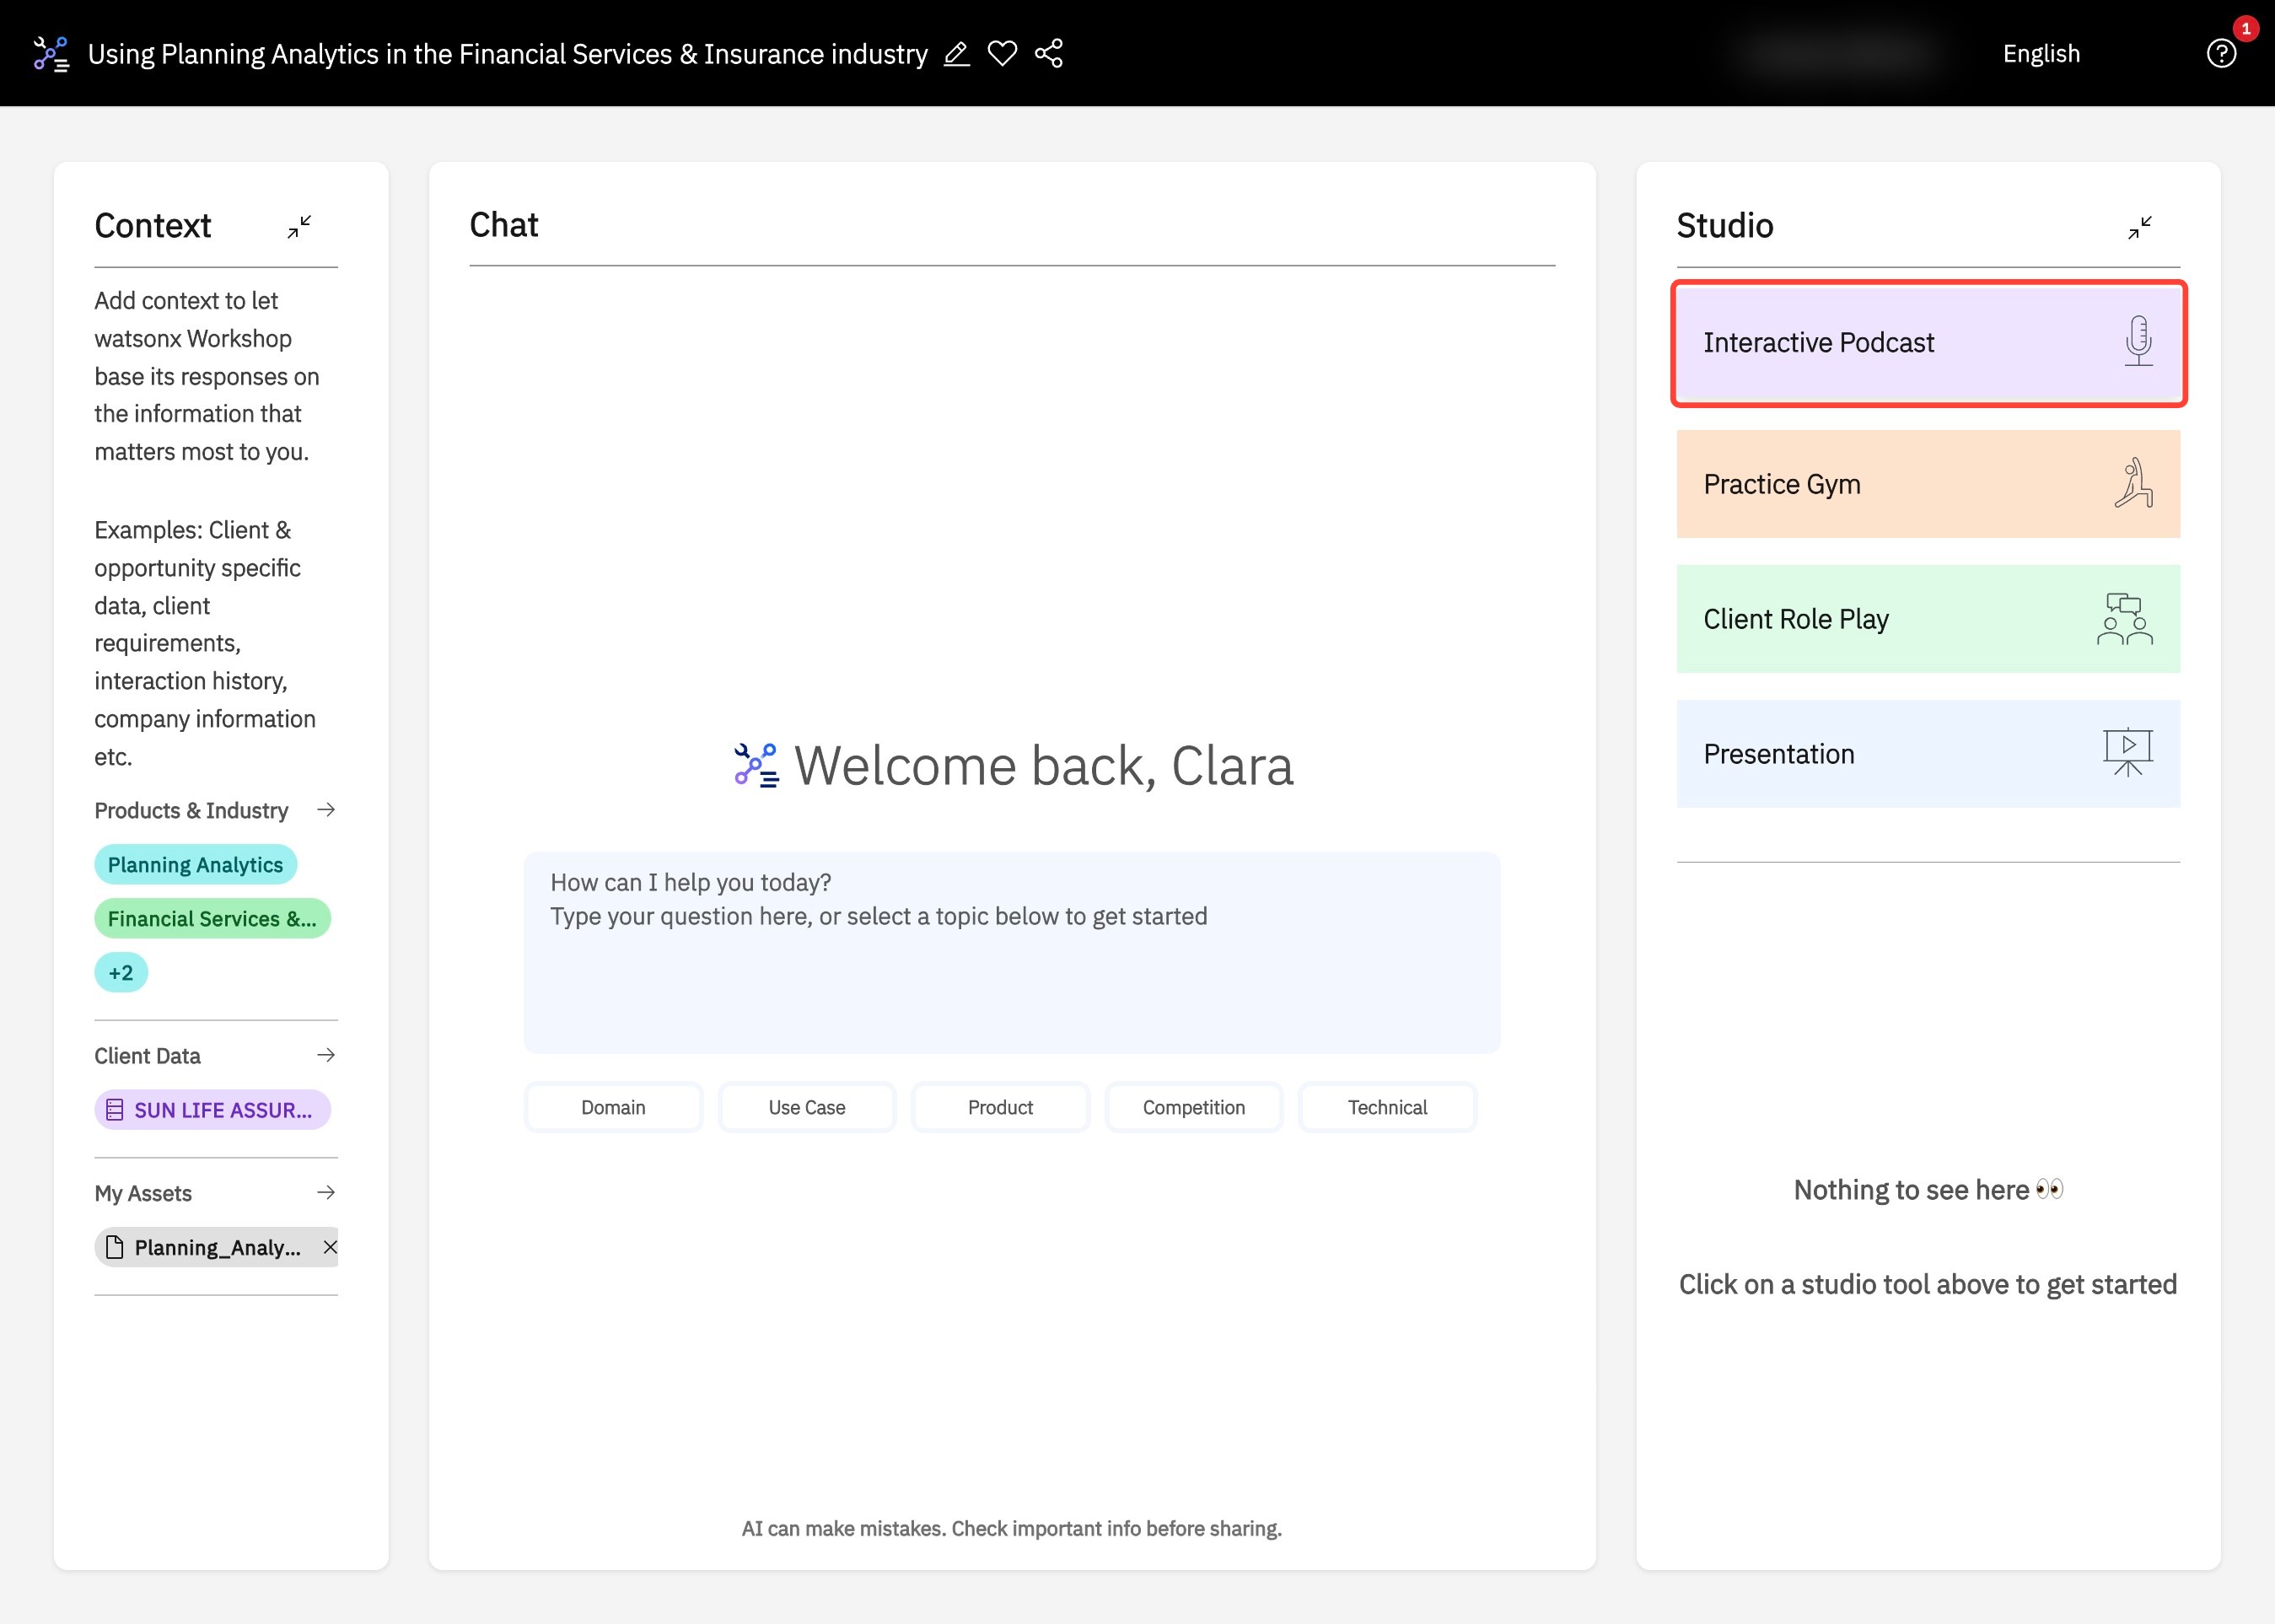
- During a watsonx Workshop session, the Studio panel will appear on the right side of the screen, next to the Chat. To get started, click Interactive Podcast within the Studio to open the Generate Podcast menu.
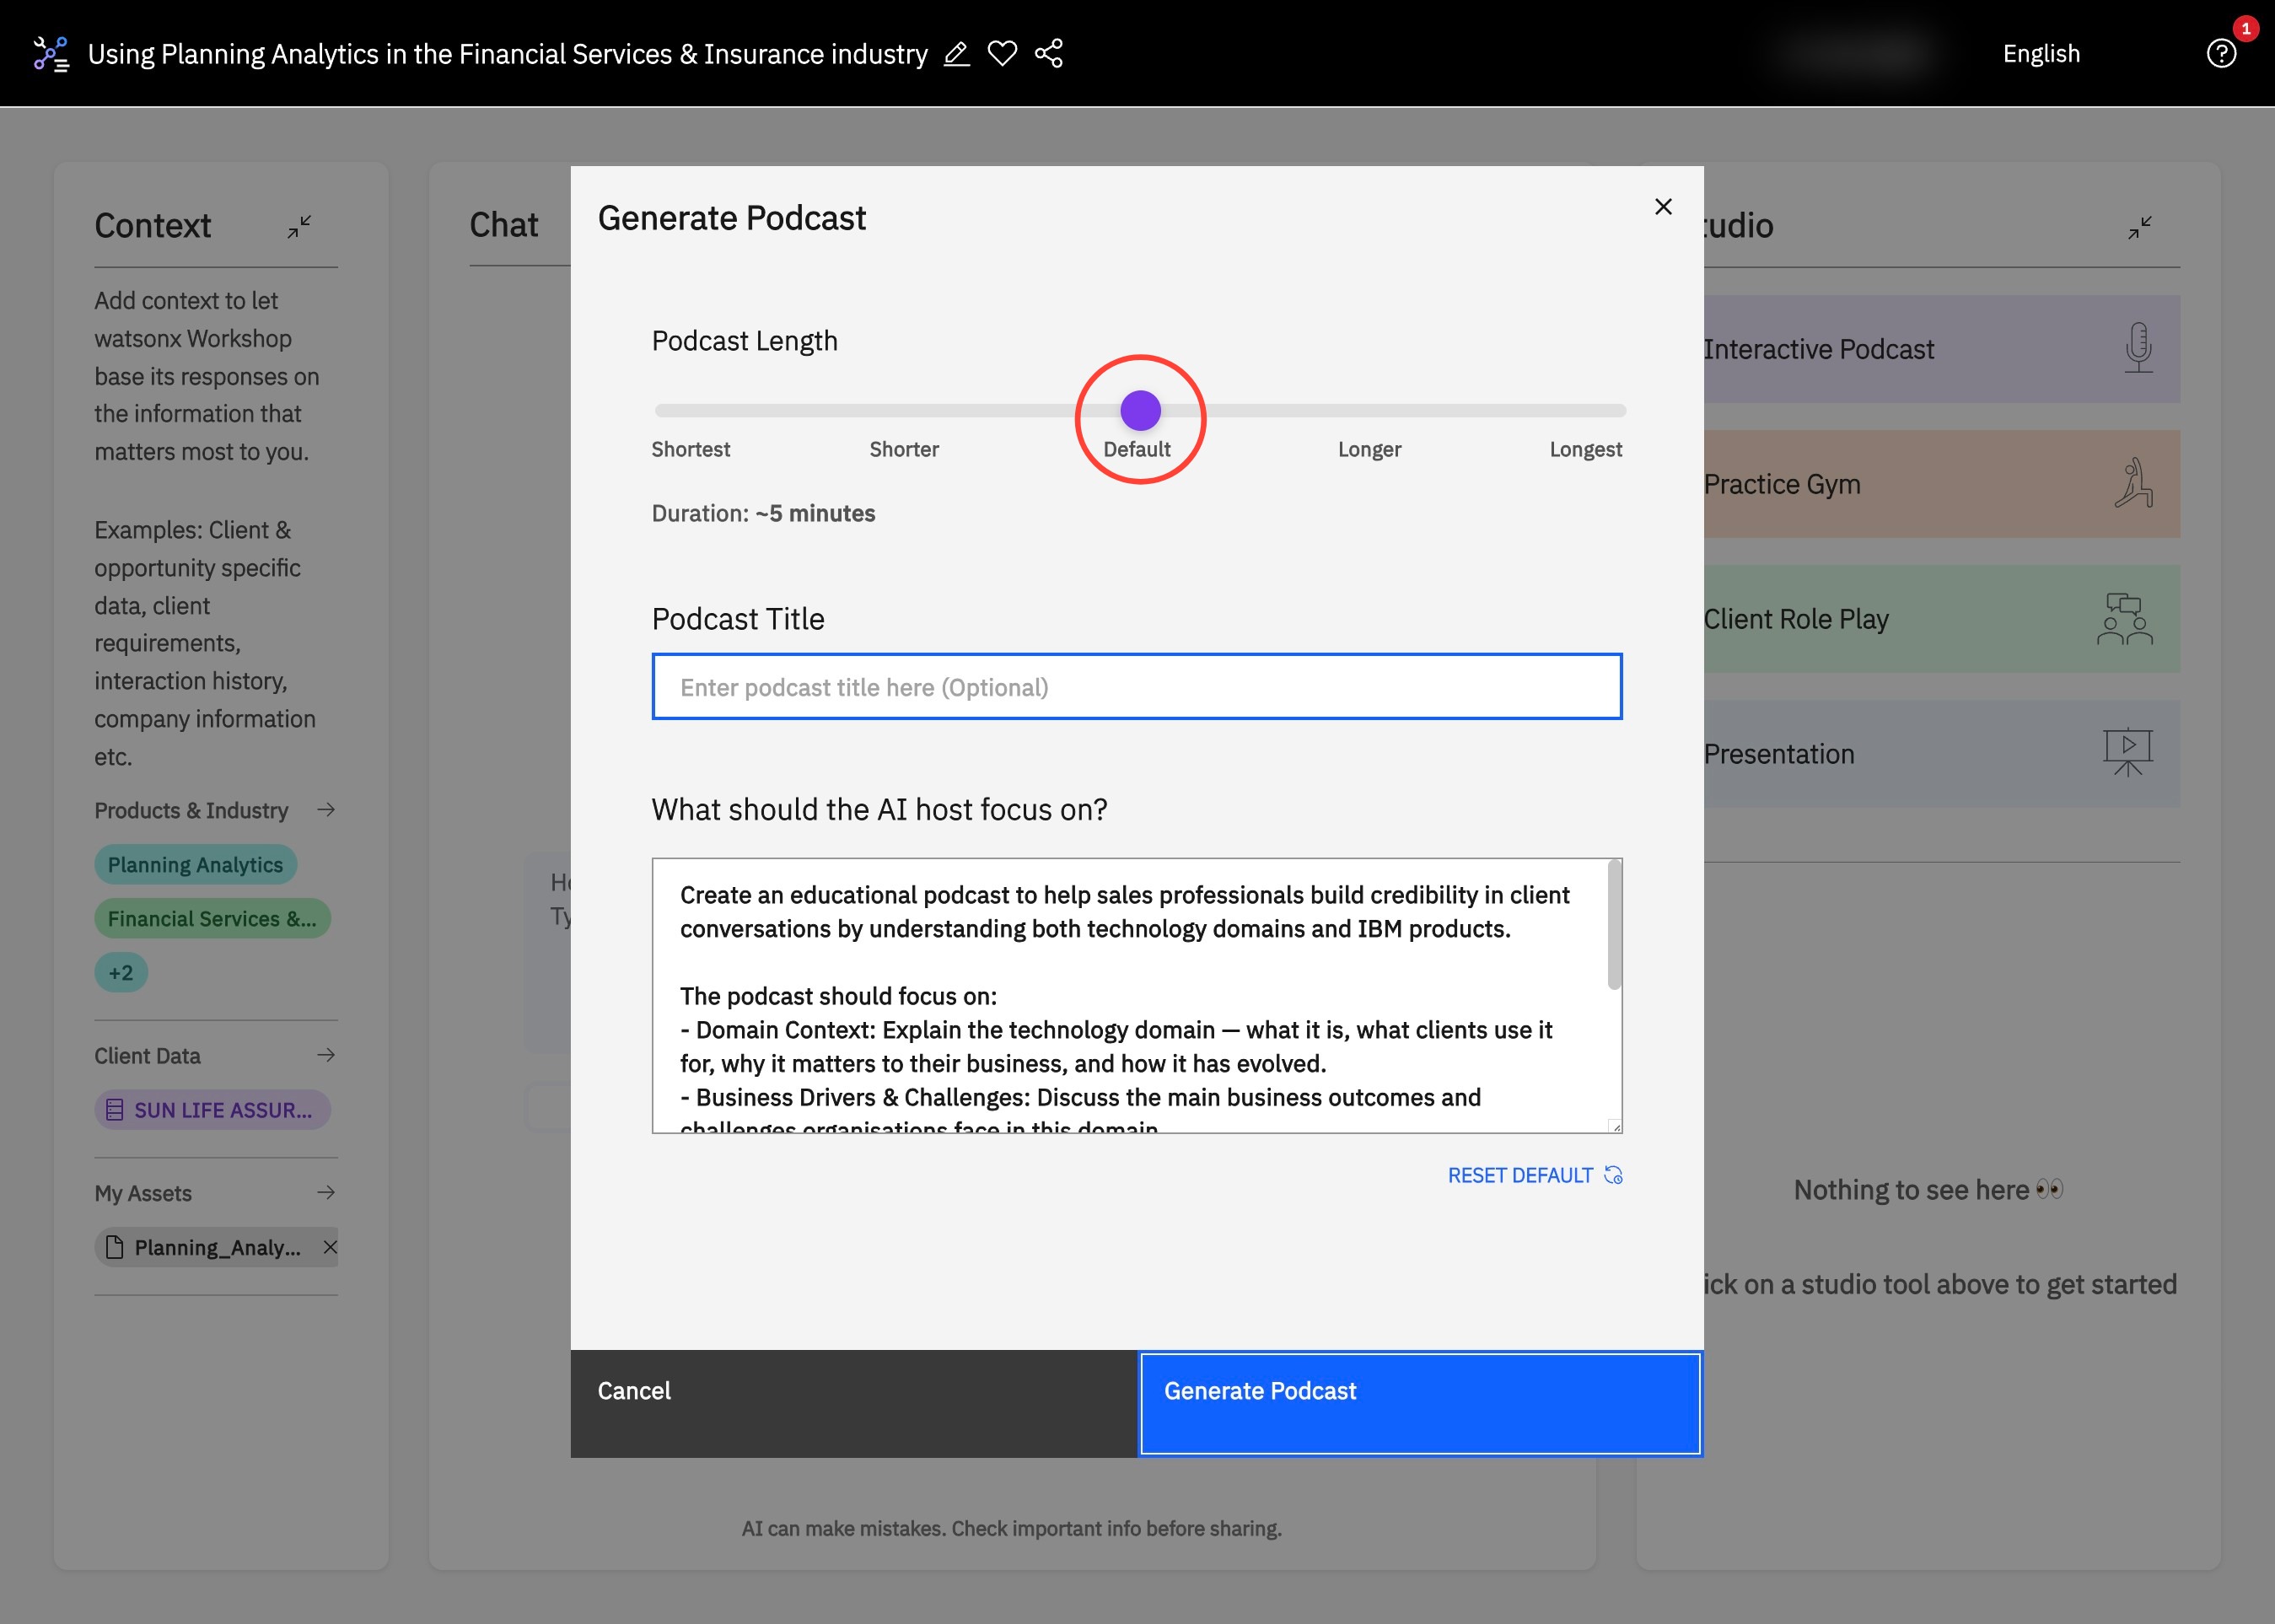
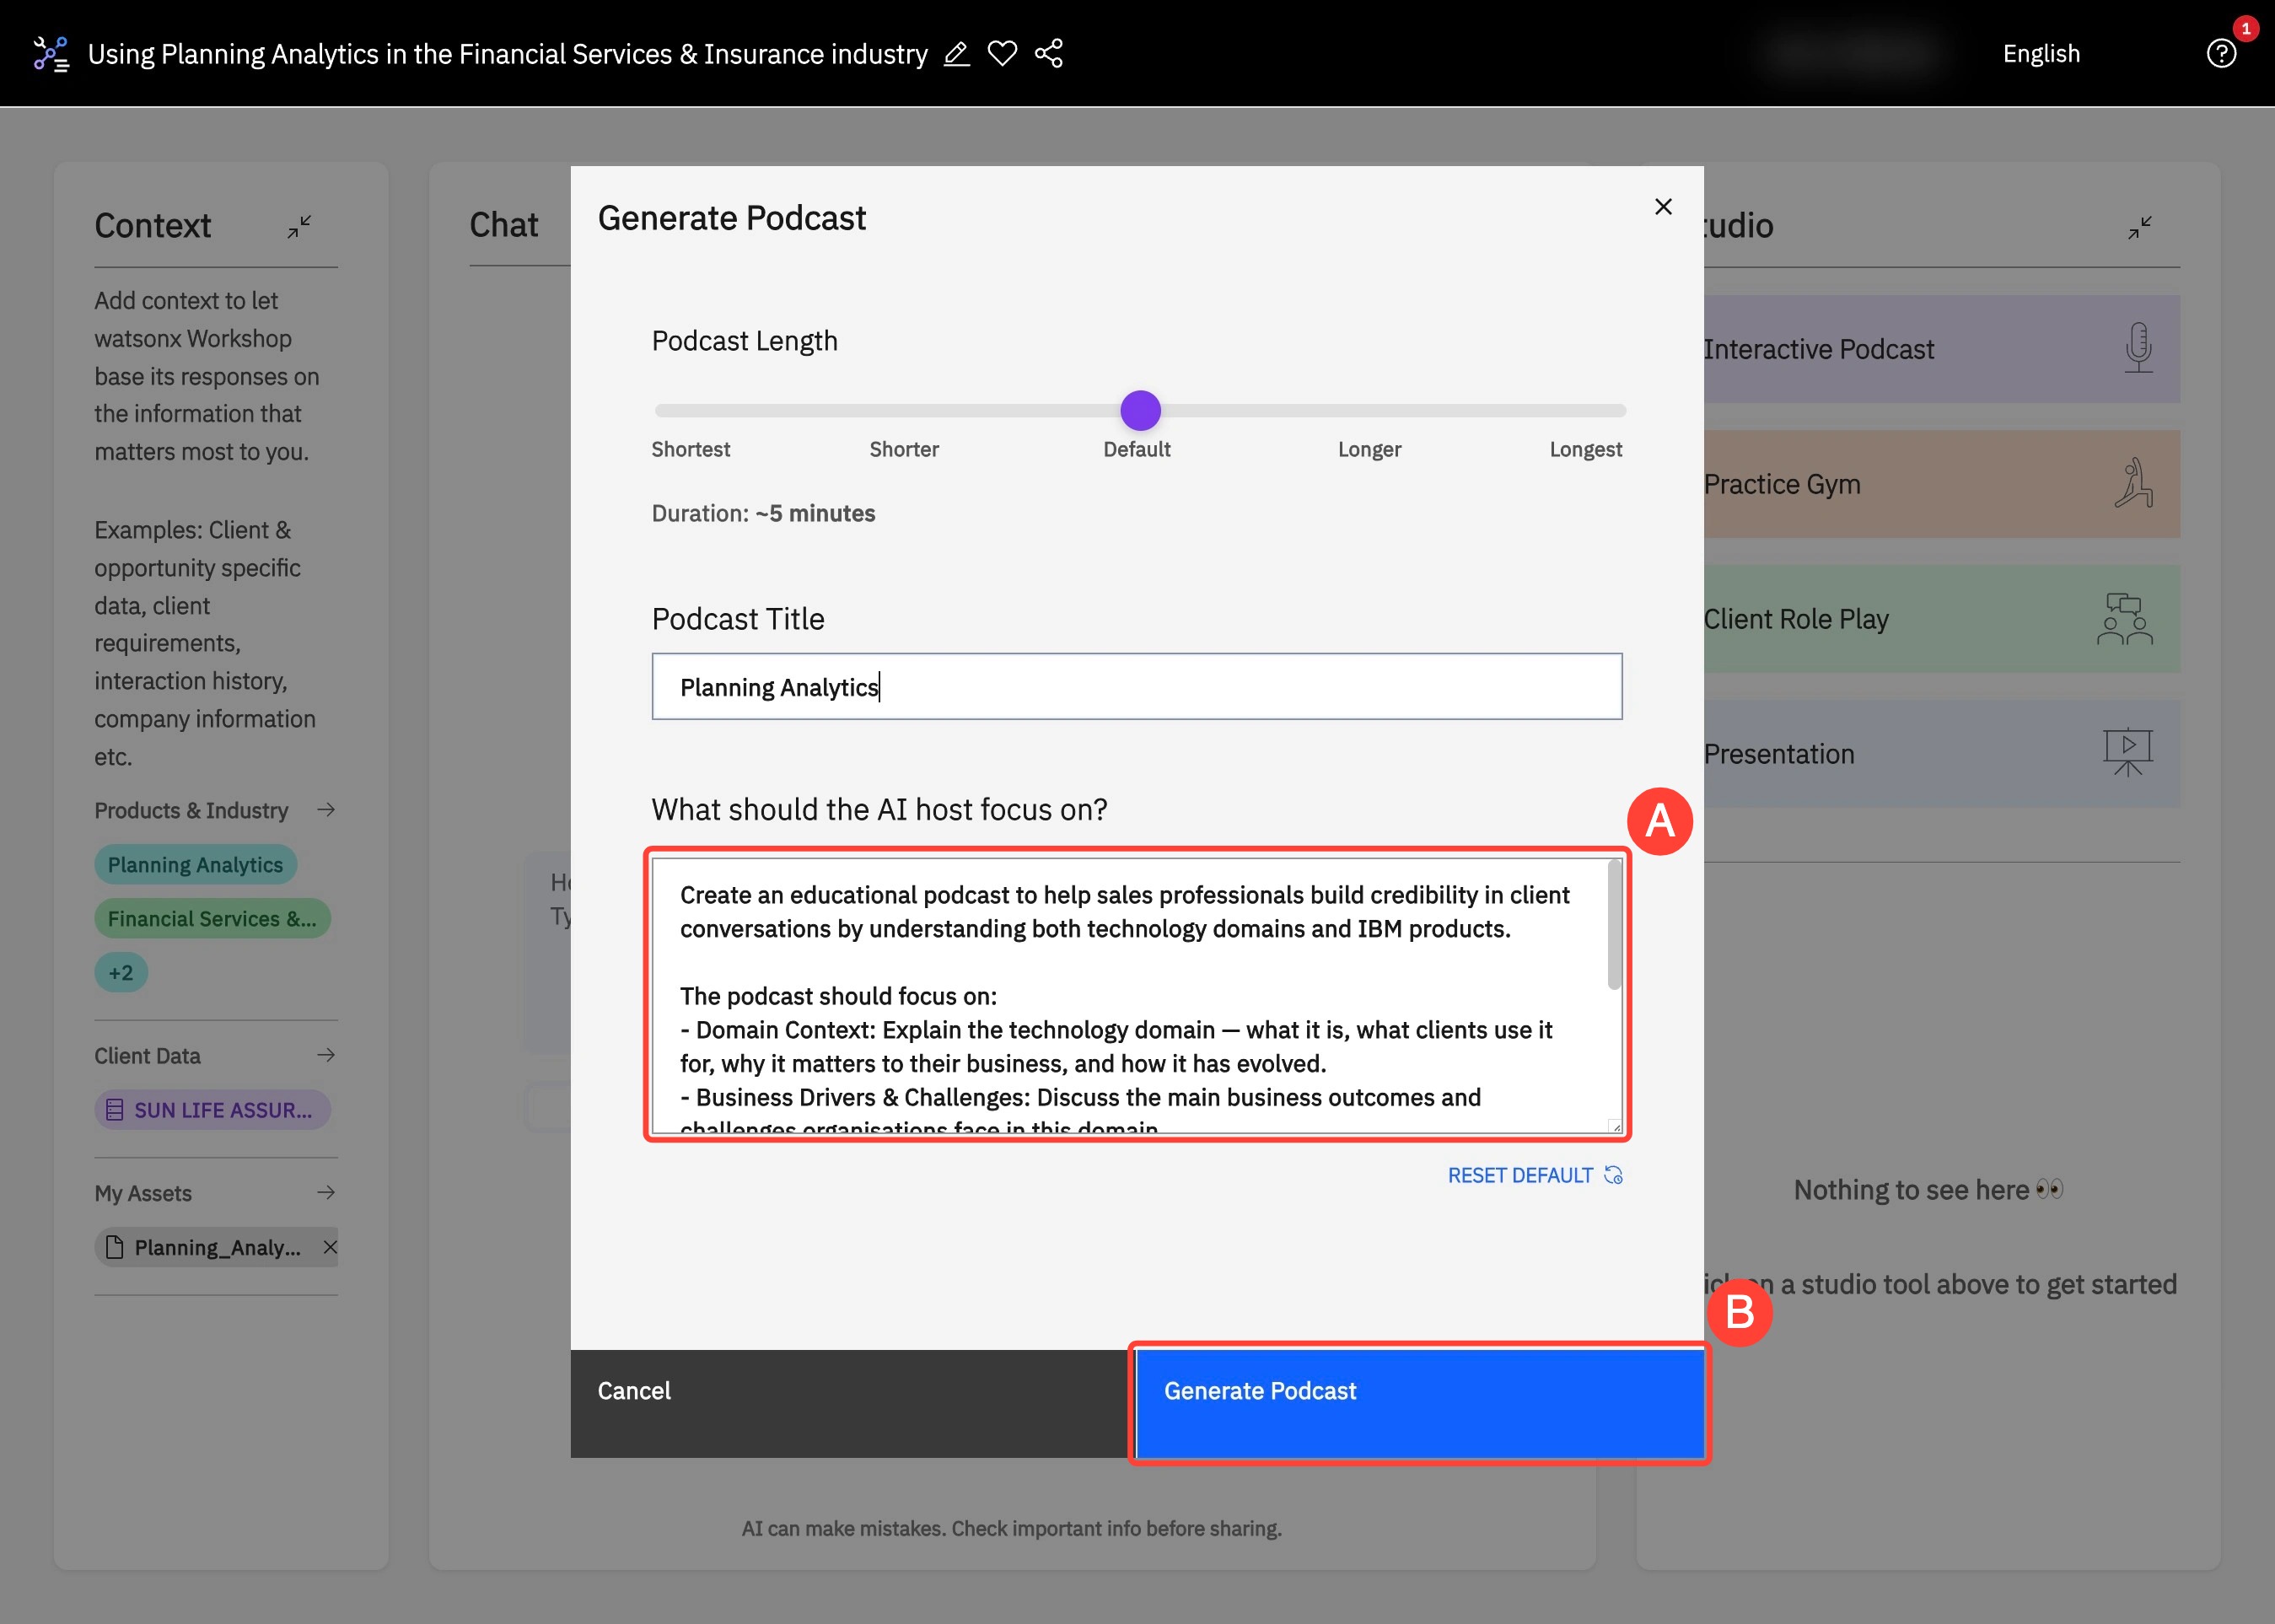
- Use the slider at the top of the menu to set the Podcast Length. The estimated Duration appears below, with a default of approximately 5 minutes.
- Enter the Podcast Title. This makes it easy to organize and identify different podcasts later.
- The focus of the podcast can be adjusted by editing the textbox under What should the AI host focus on? By default, you’ll see a list of suggested discussion topics. You can modify this list to fit your needs. For example:
- Add a focused prompt like: “What are a client’s main concerns in this domain?”
- Reshape the entire conversation with a broader prompt, such as: “Make this discussion about IBM’s future impact in this industry.” To revert to the original suggestions, click RESET DEFAULT below the textbox.
- After configuring the details, click Generate Podcast at the bottom right.
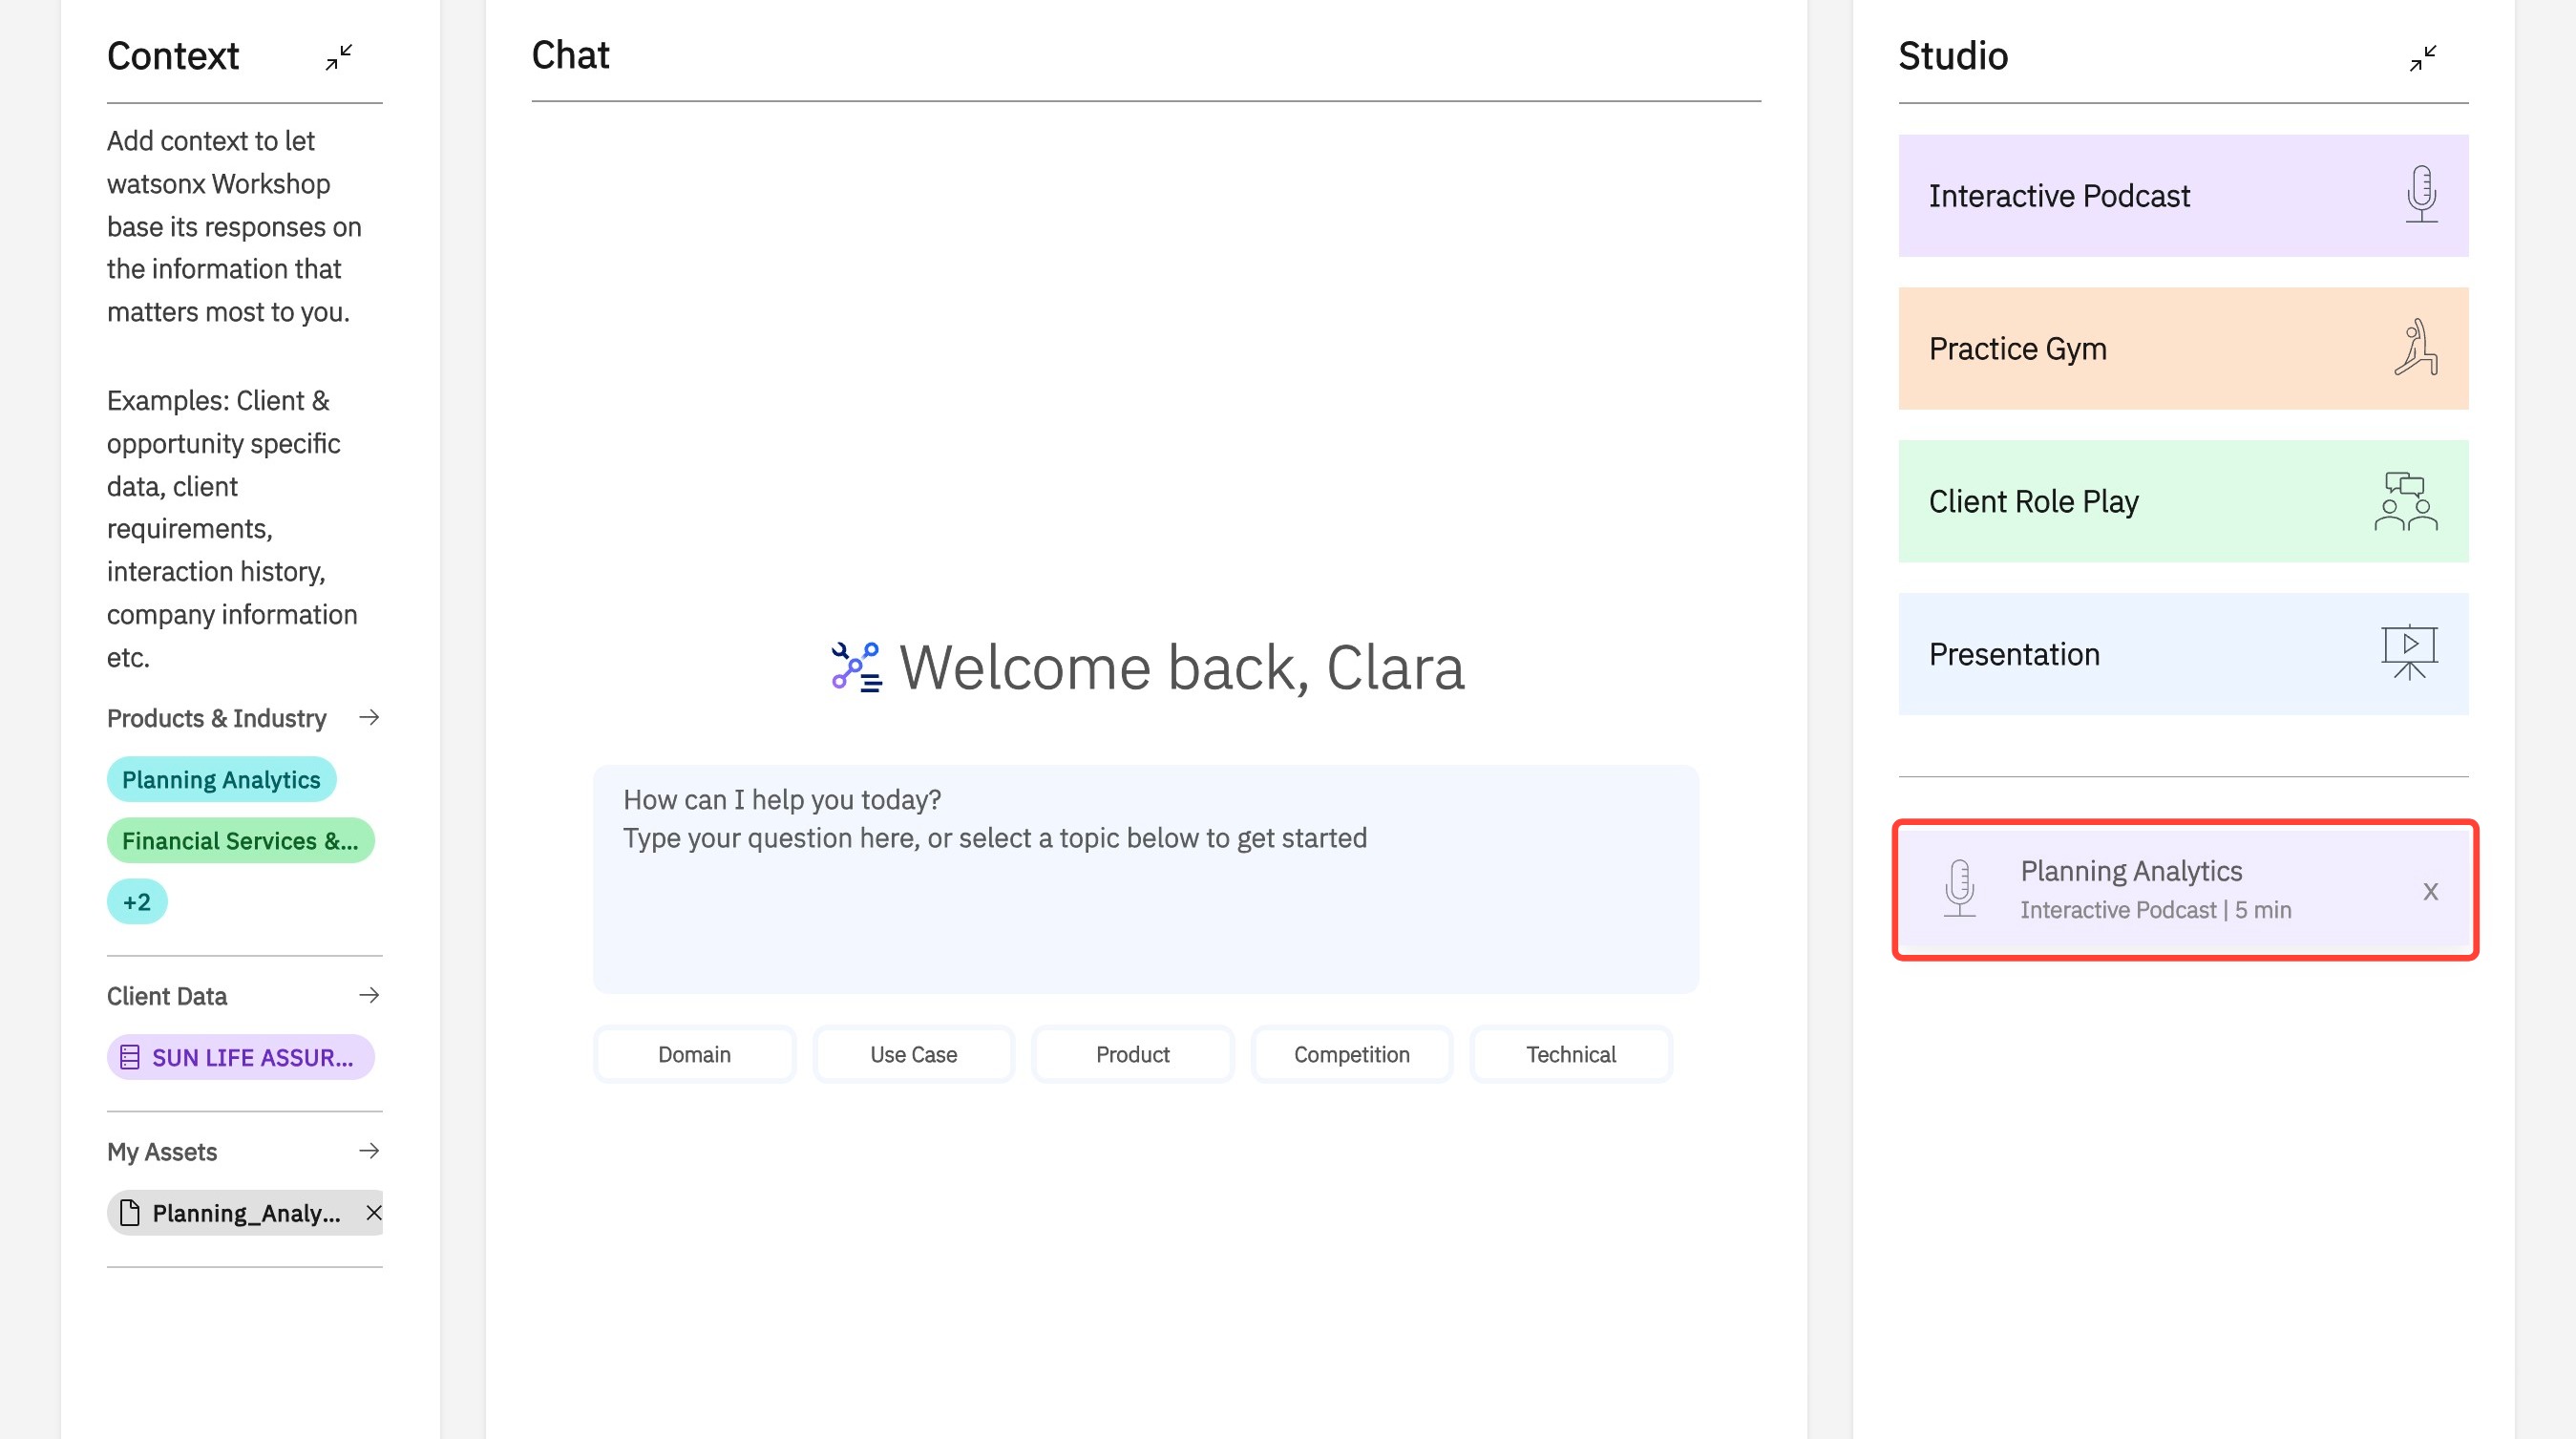
- In the Studio, open the new podcast and press play.
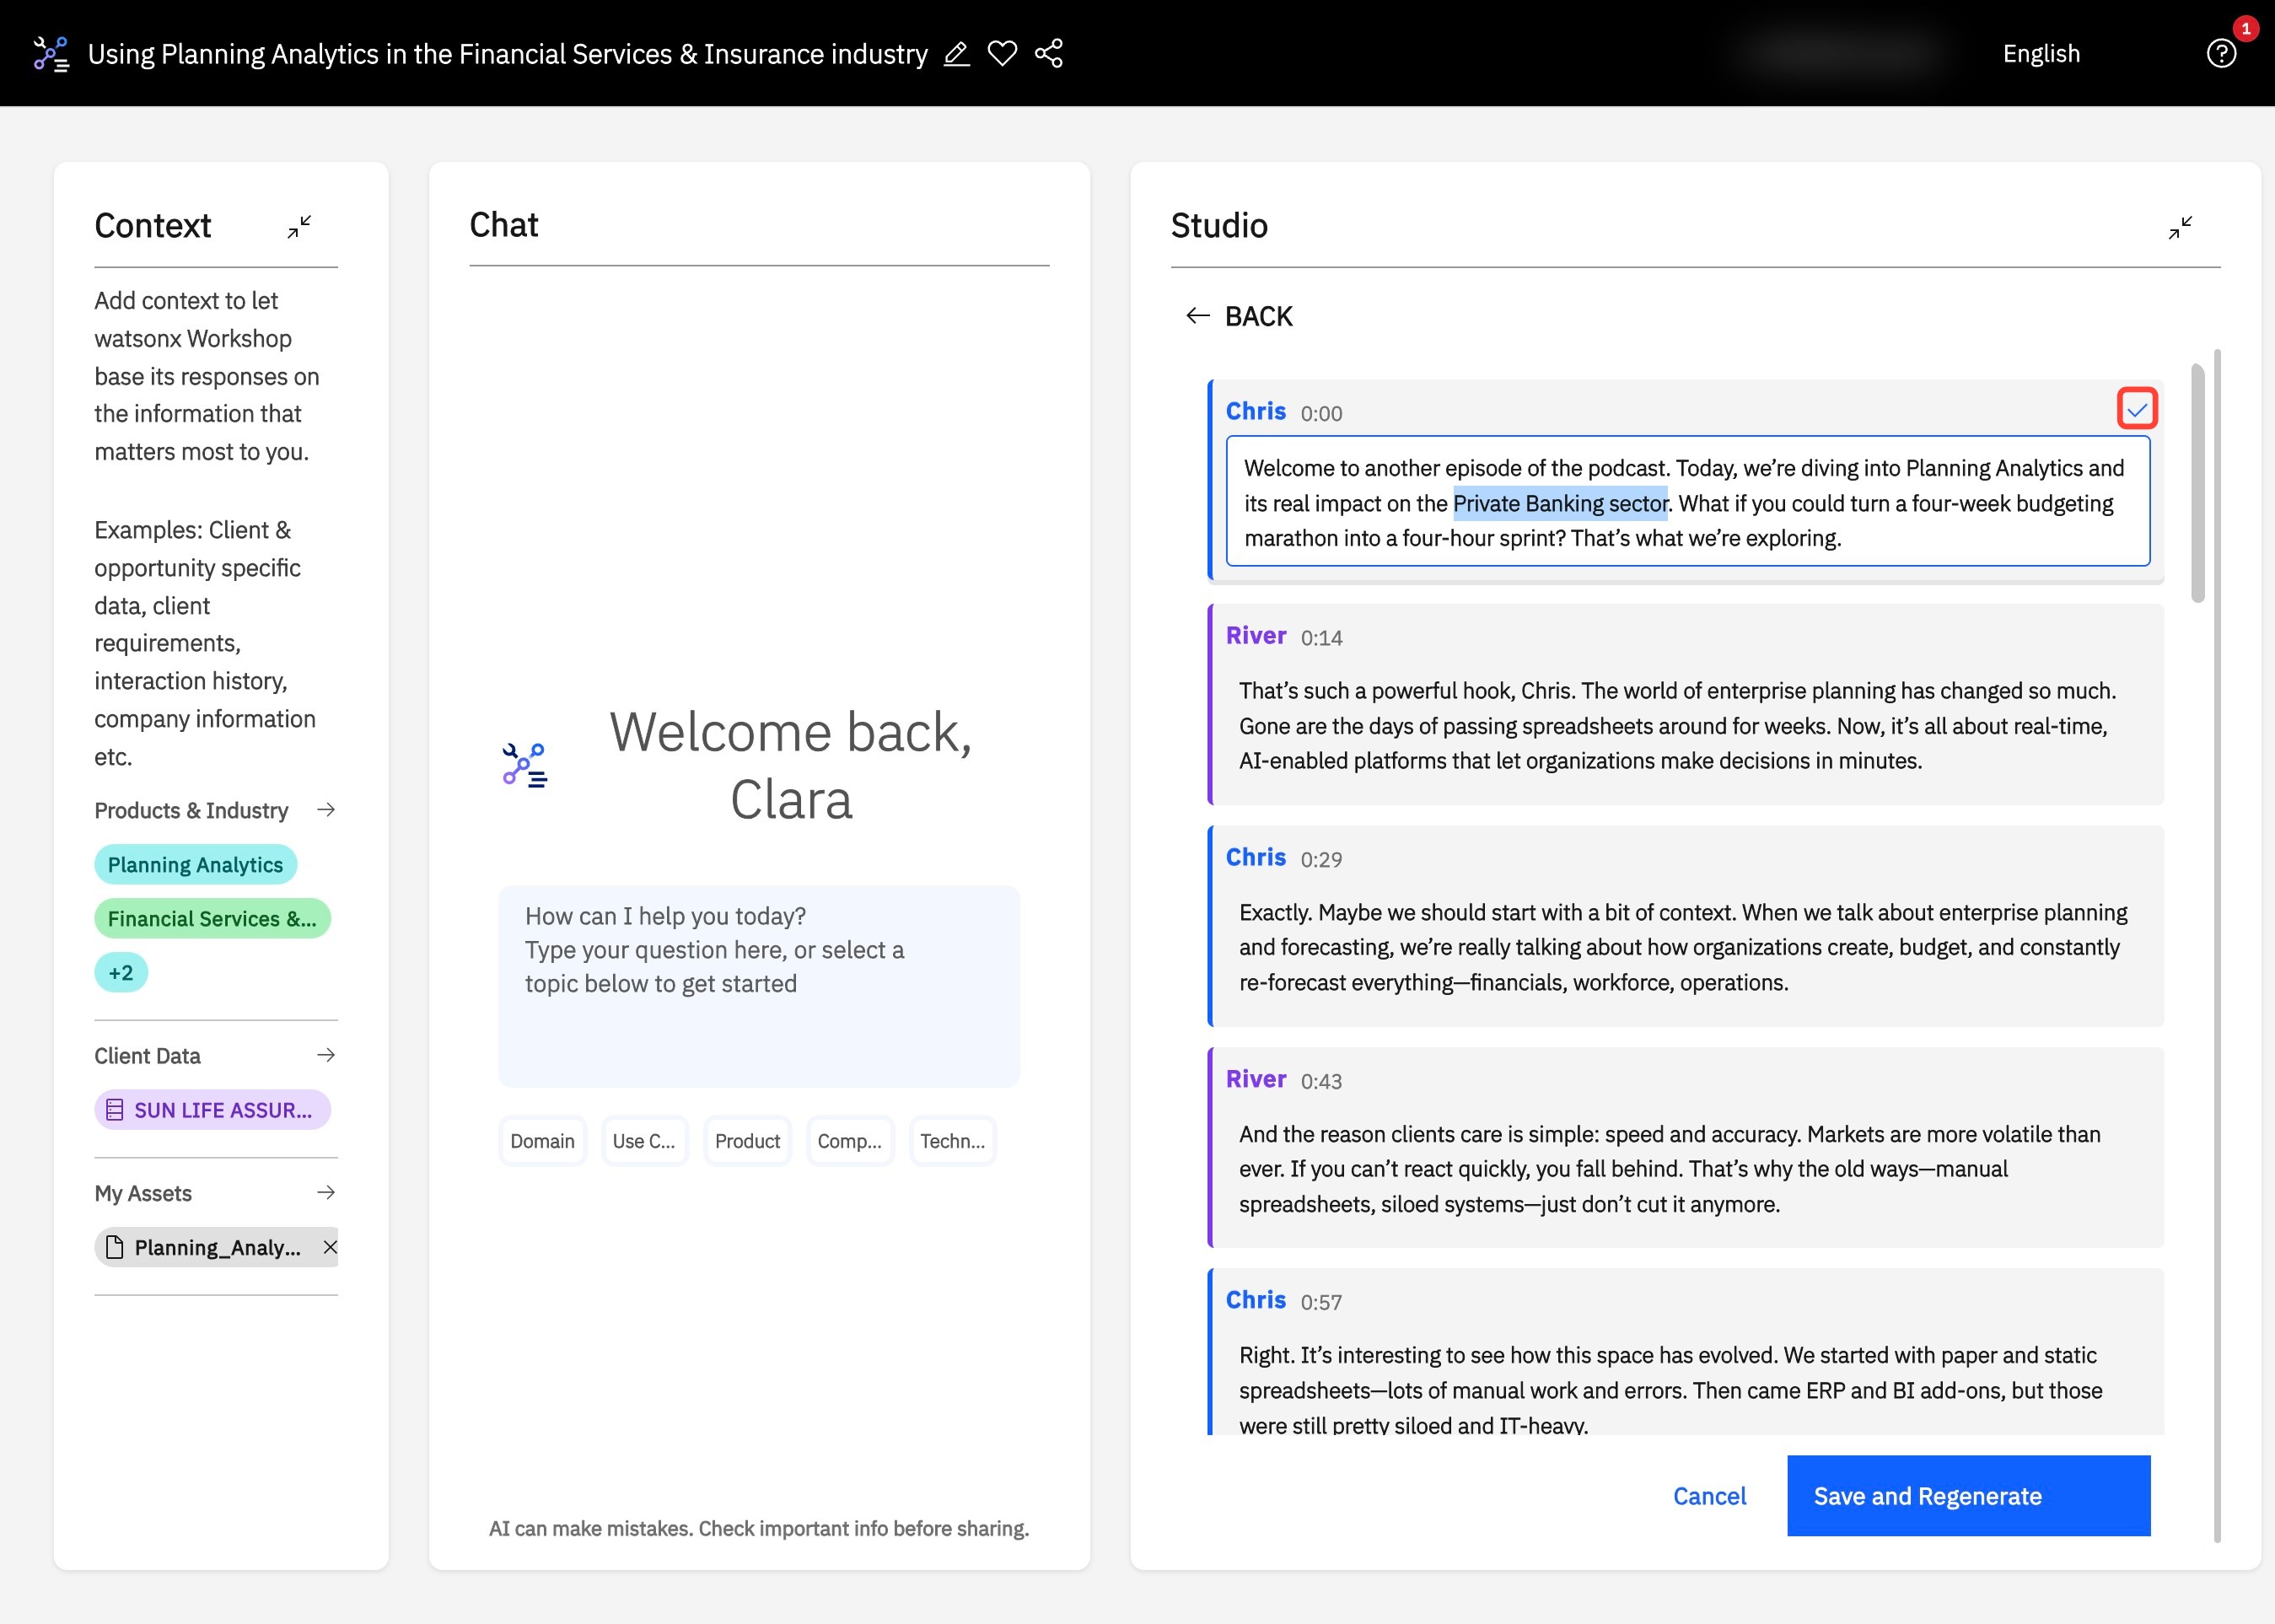
- To edit the transcript, click the pencil icon next to the media controls.
- Click the pencil icon on the line you want to update in the transcript view.
- Edit the transcript text directly within the selected line and click the check mark to apply your changes.
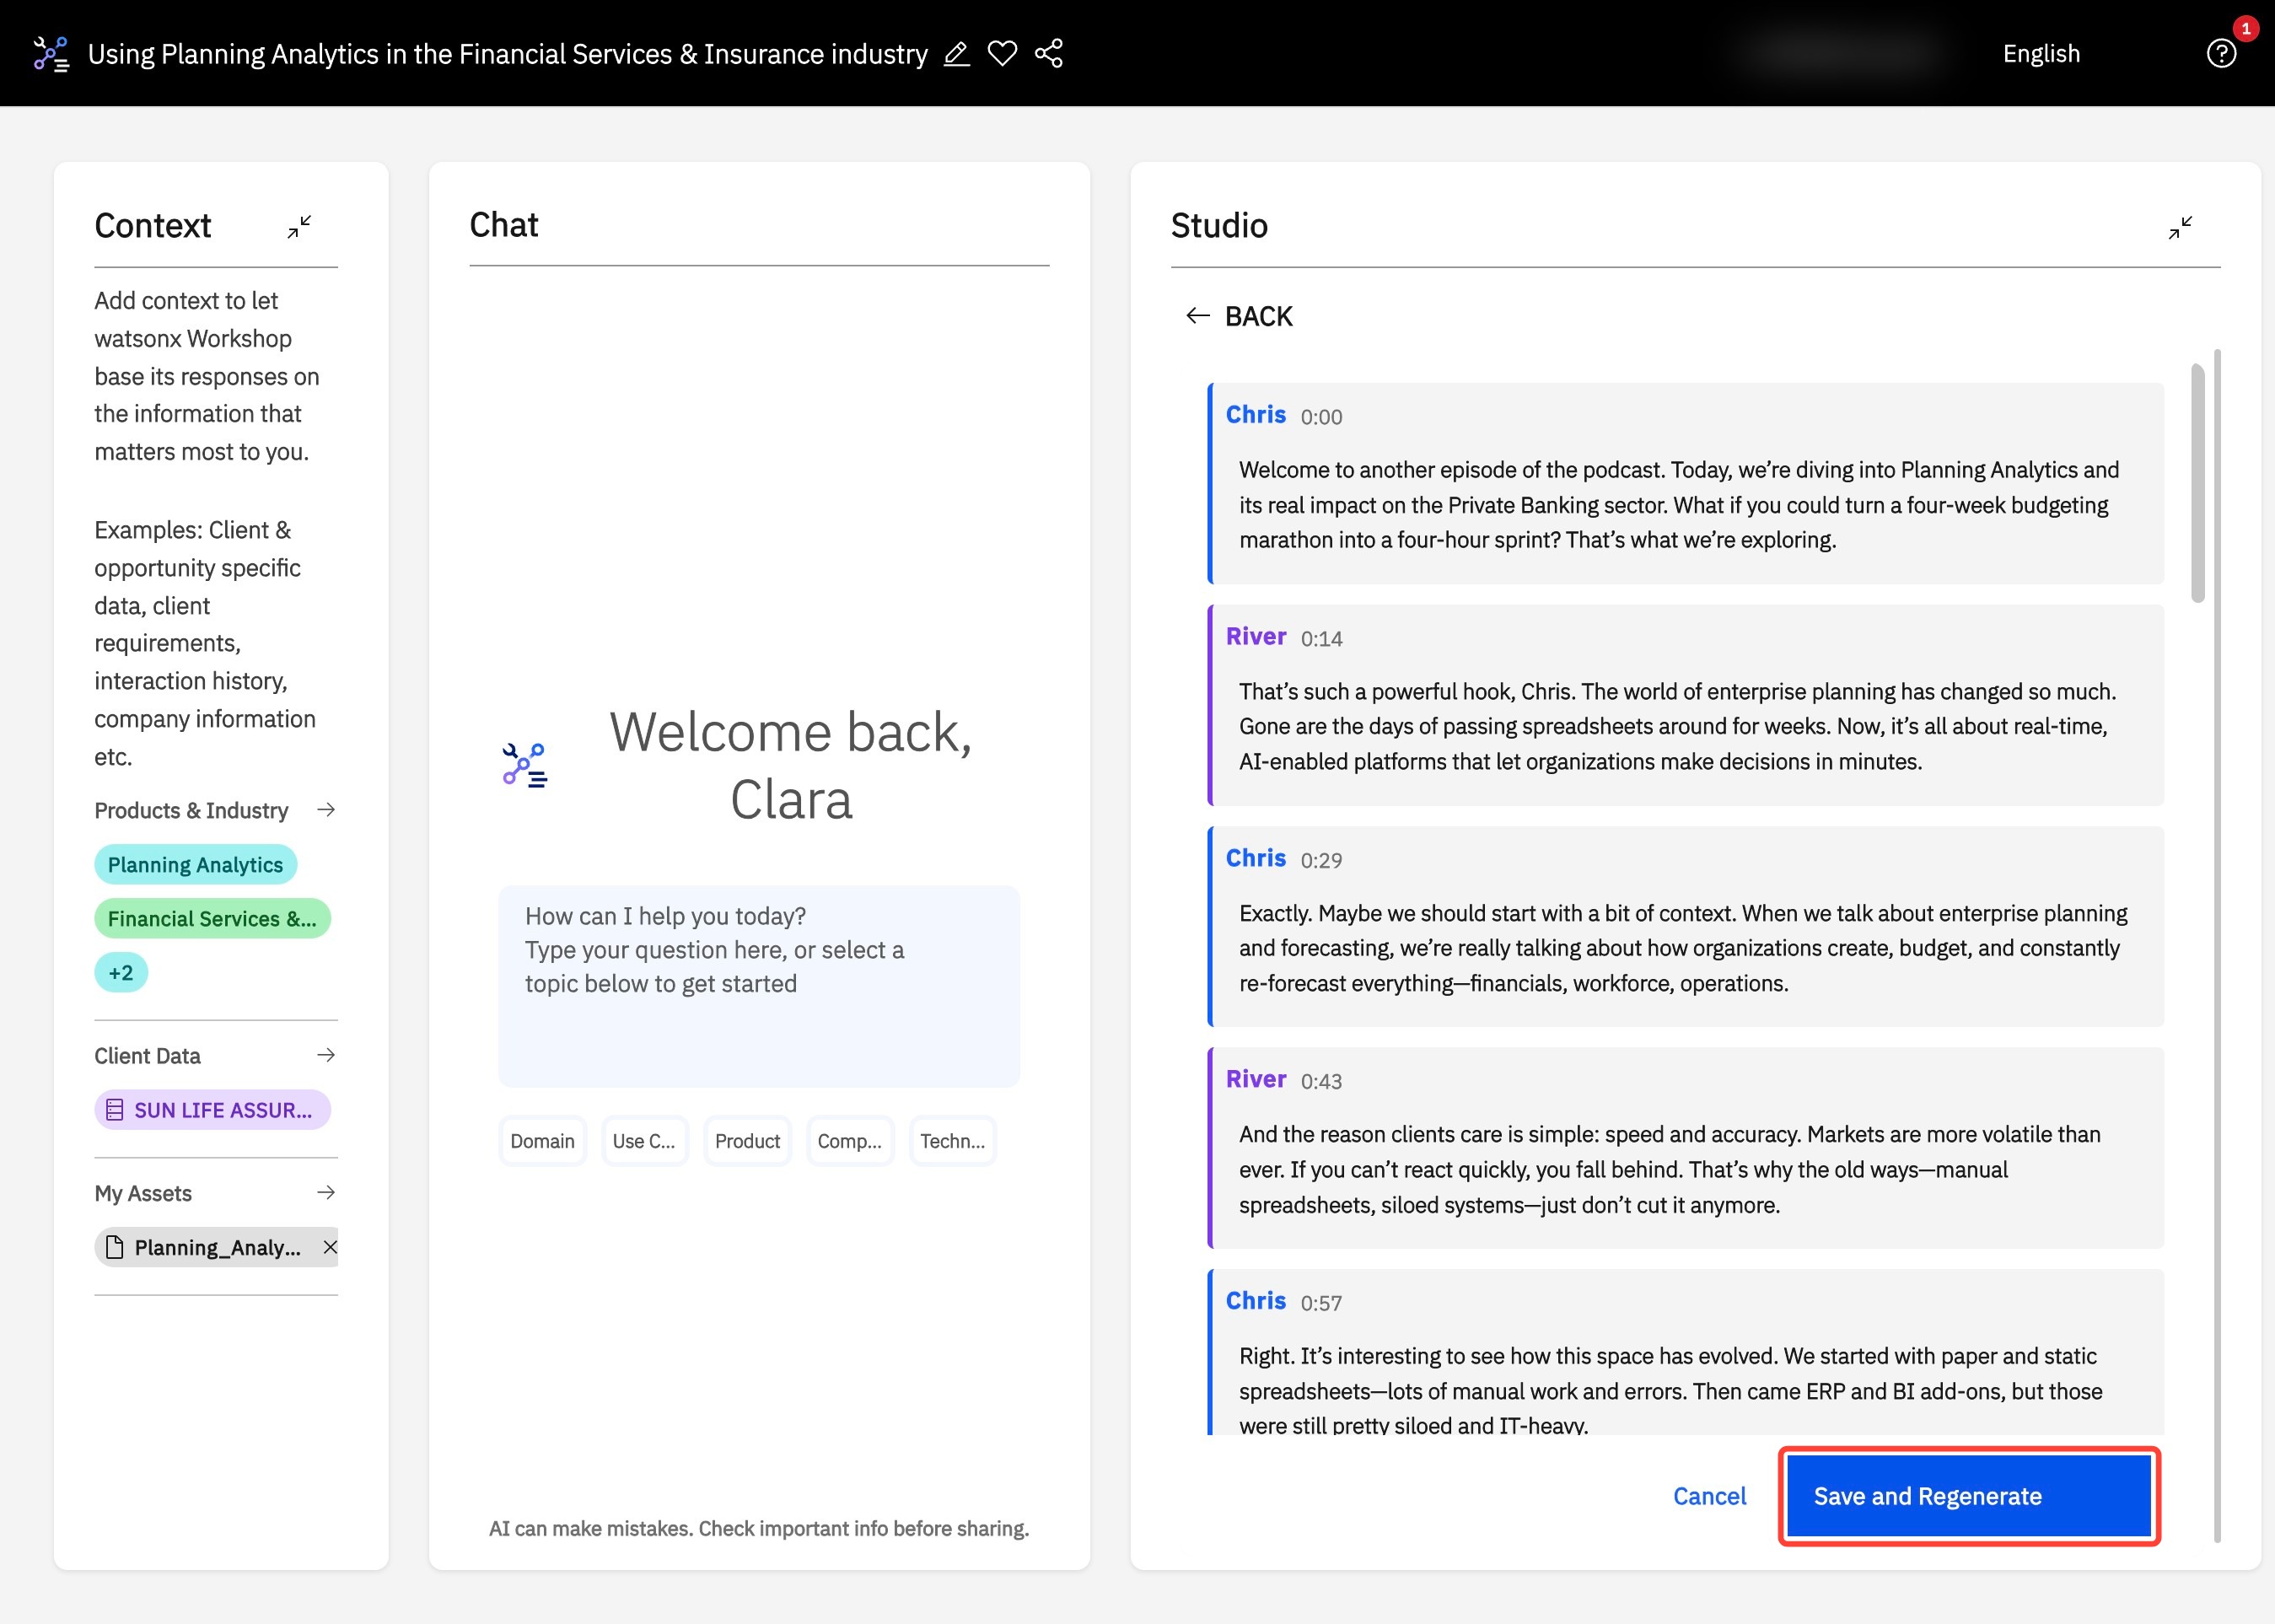
- Once all edits are complete, click Save & Regenerate to update the podcast.
- To listen on-the-go, click the download icon.
- In the popup, click the large download icon to save the podcast directly to your current device.
- Alternatively, the podcast can be sent to your mobile device by entering your phone number, then clicking Send.
Listening to a fully customized, informative podcast is an easy and accessible way to learn about any product, process, or industry. However, the Interactive Podcast goes one step further by allowing you to interact with the podcast in real-time and dig deeper into topics that matter the most to you.
Visual Walkthrough: Getting Started on Interactive Podcast
1. To begin generating your personalized podcast, head over to the Studio, and click Interactive Podcast.
2. Use the slider under Podcast Length to adjust to your desired podcast duration.
3. Add a title for your generated podcast under Podcast Title to keep your session organized.
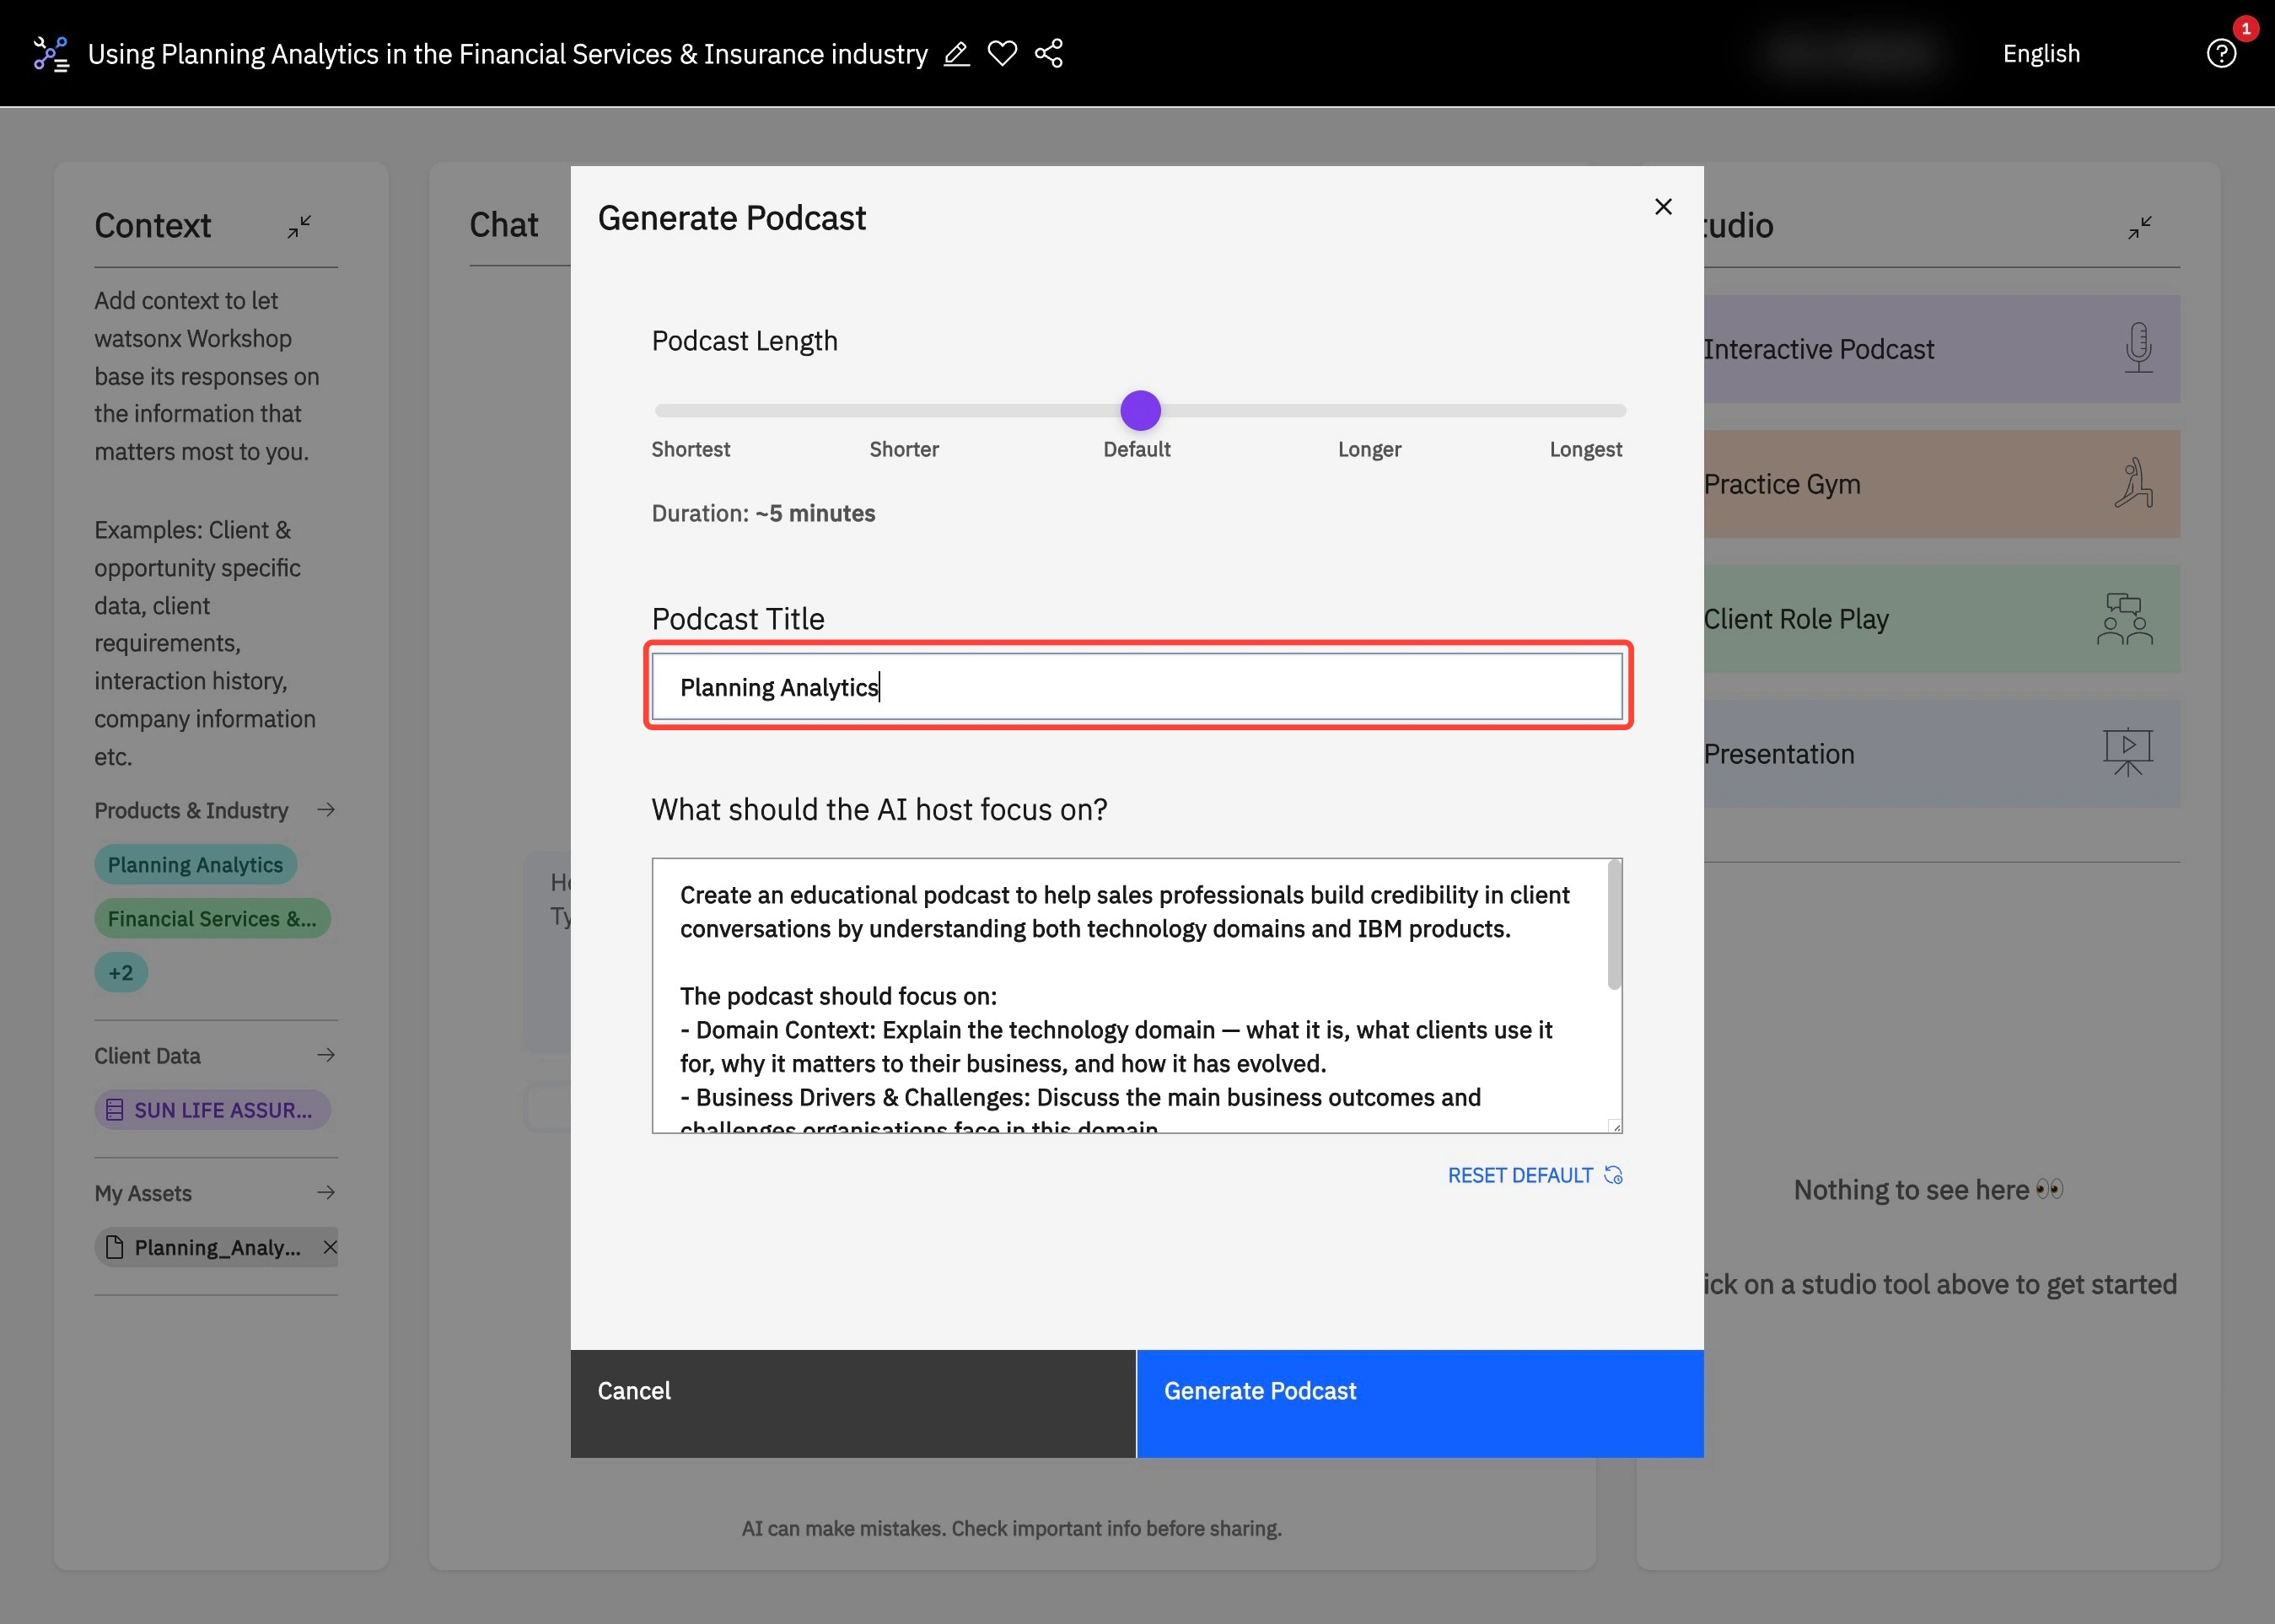
4. To enhance your learning experience, edit the prompt in What should the AI host focus on? (A) to ensure it reflects your desired learning. Then, choose Generate Podcast (B) for a tailored listening experience.
5. In the Studio, find your newly generated podcast.
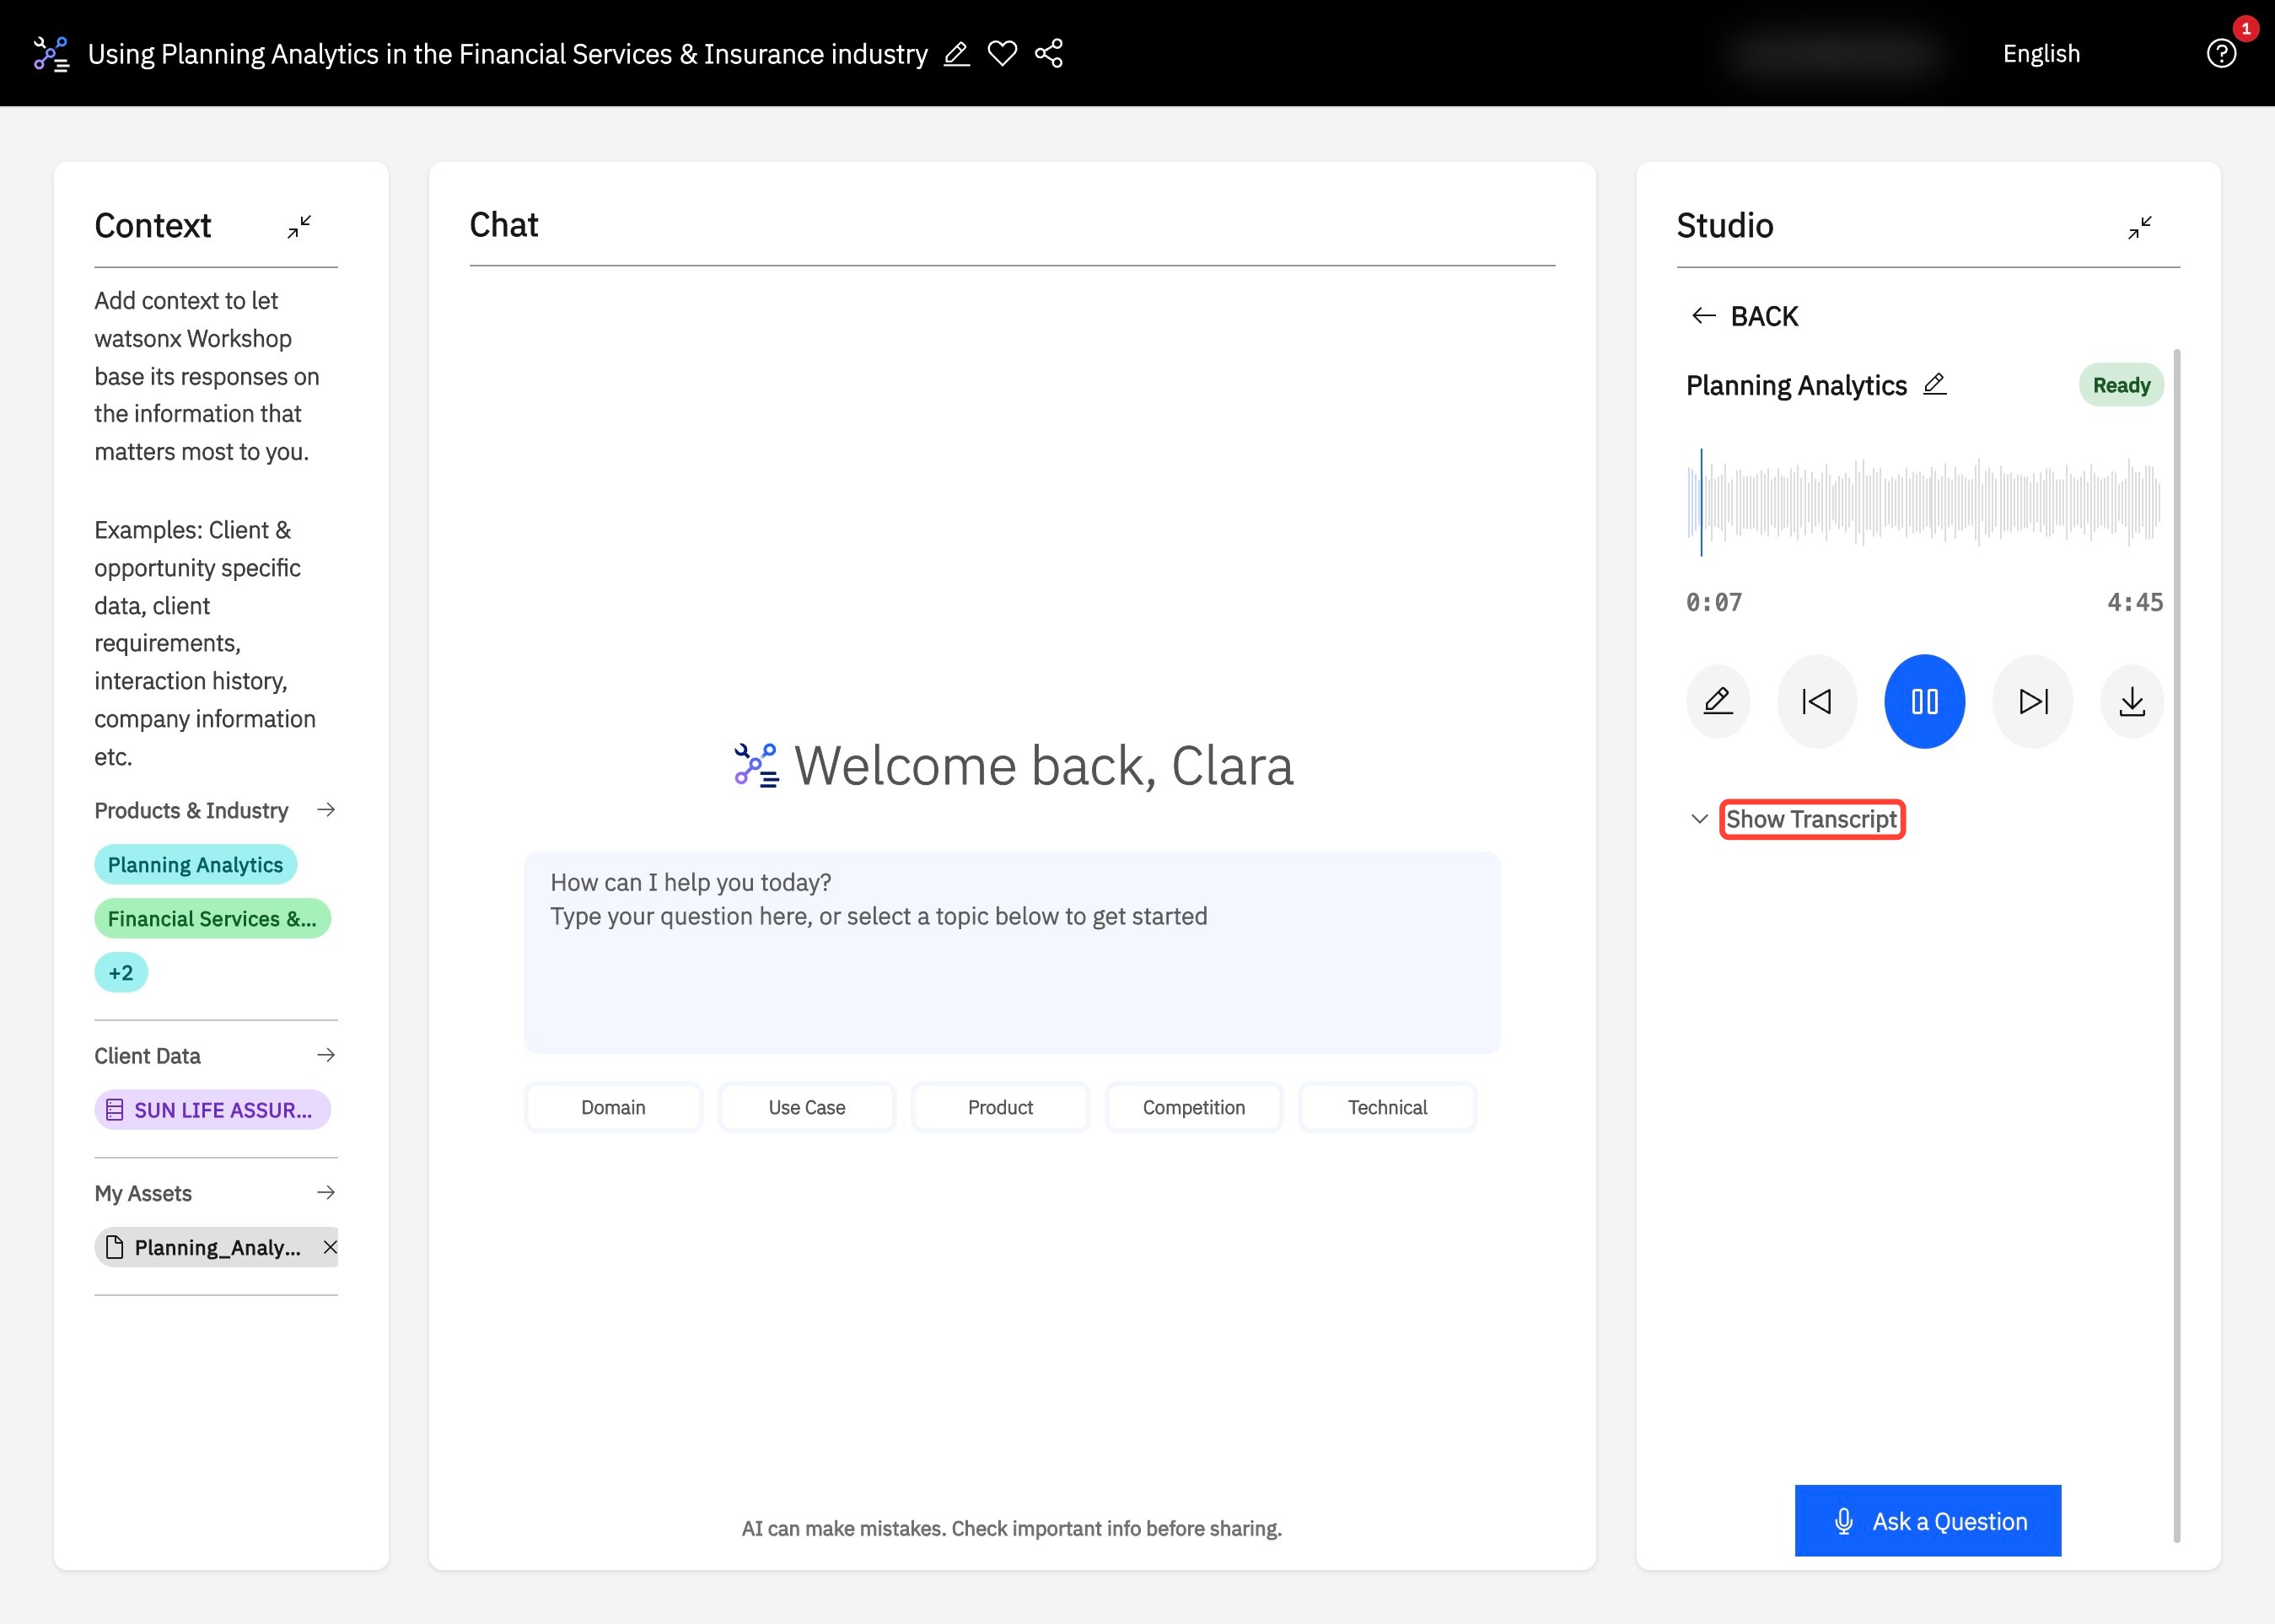
6. Click Play to begin your customized podcast.

7. Click Show Transcript to see the podcast transcript.
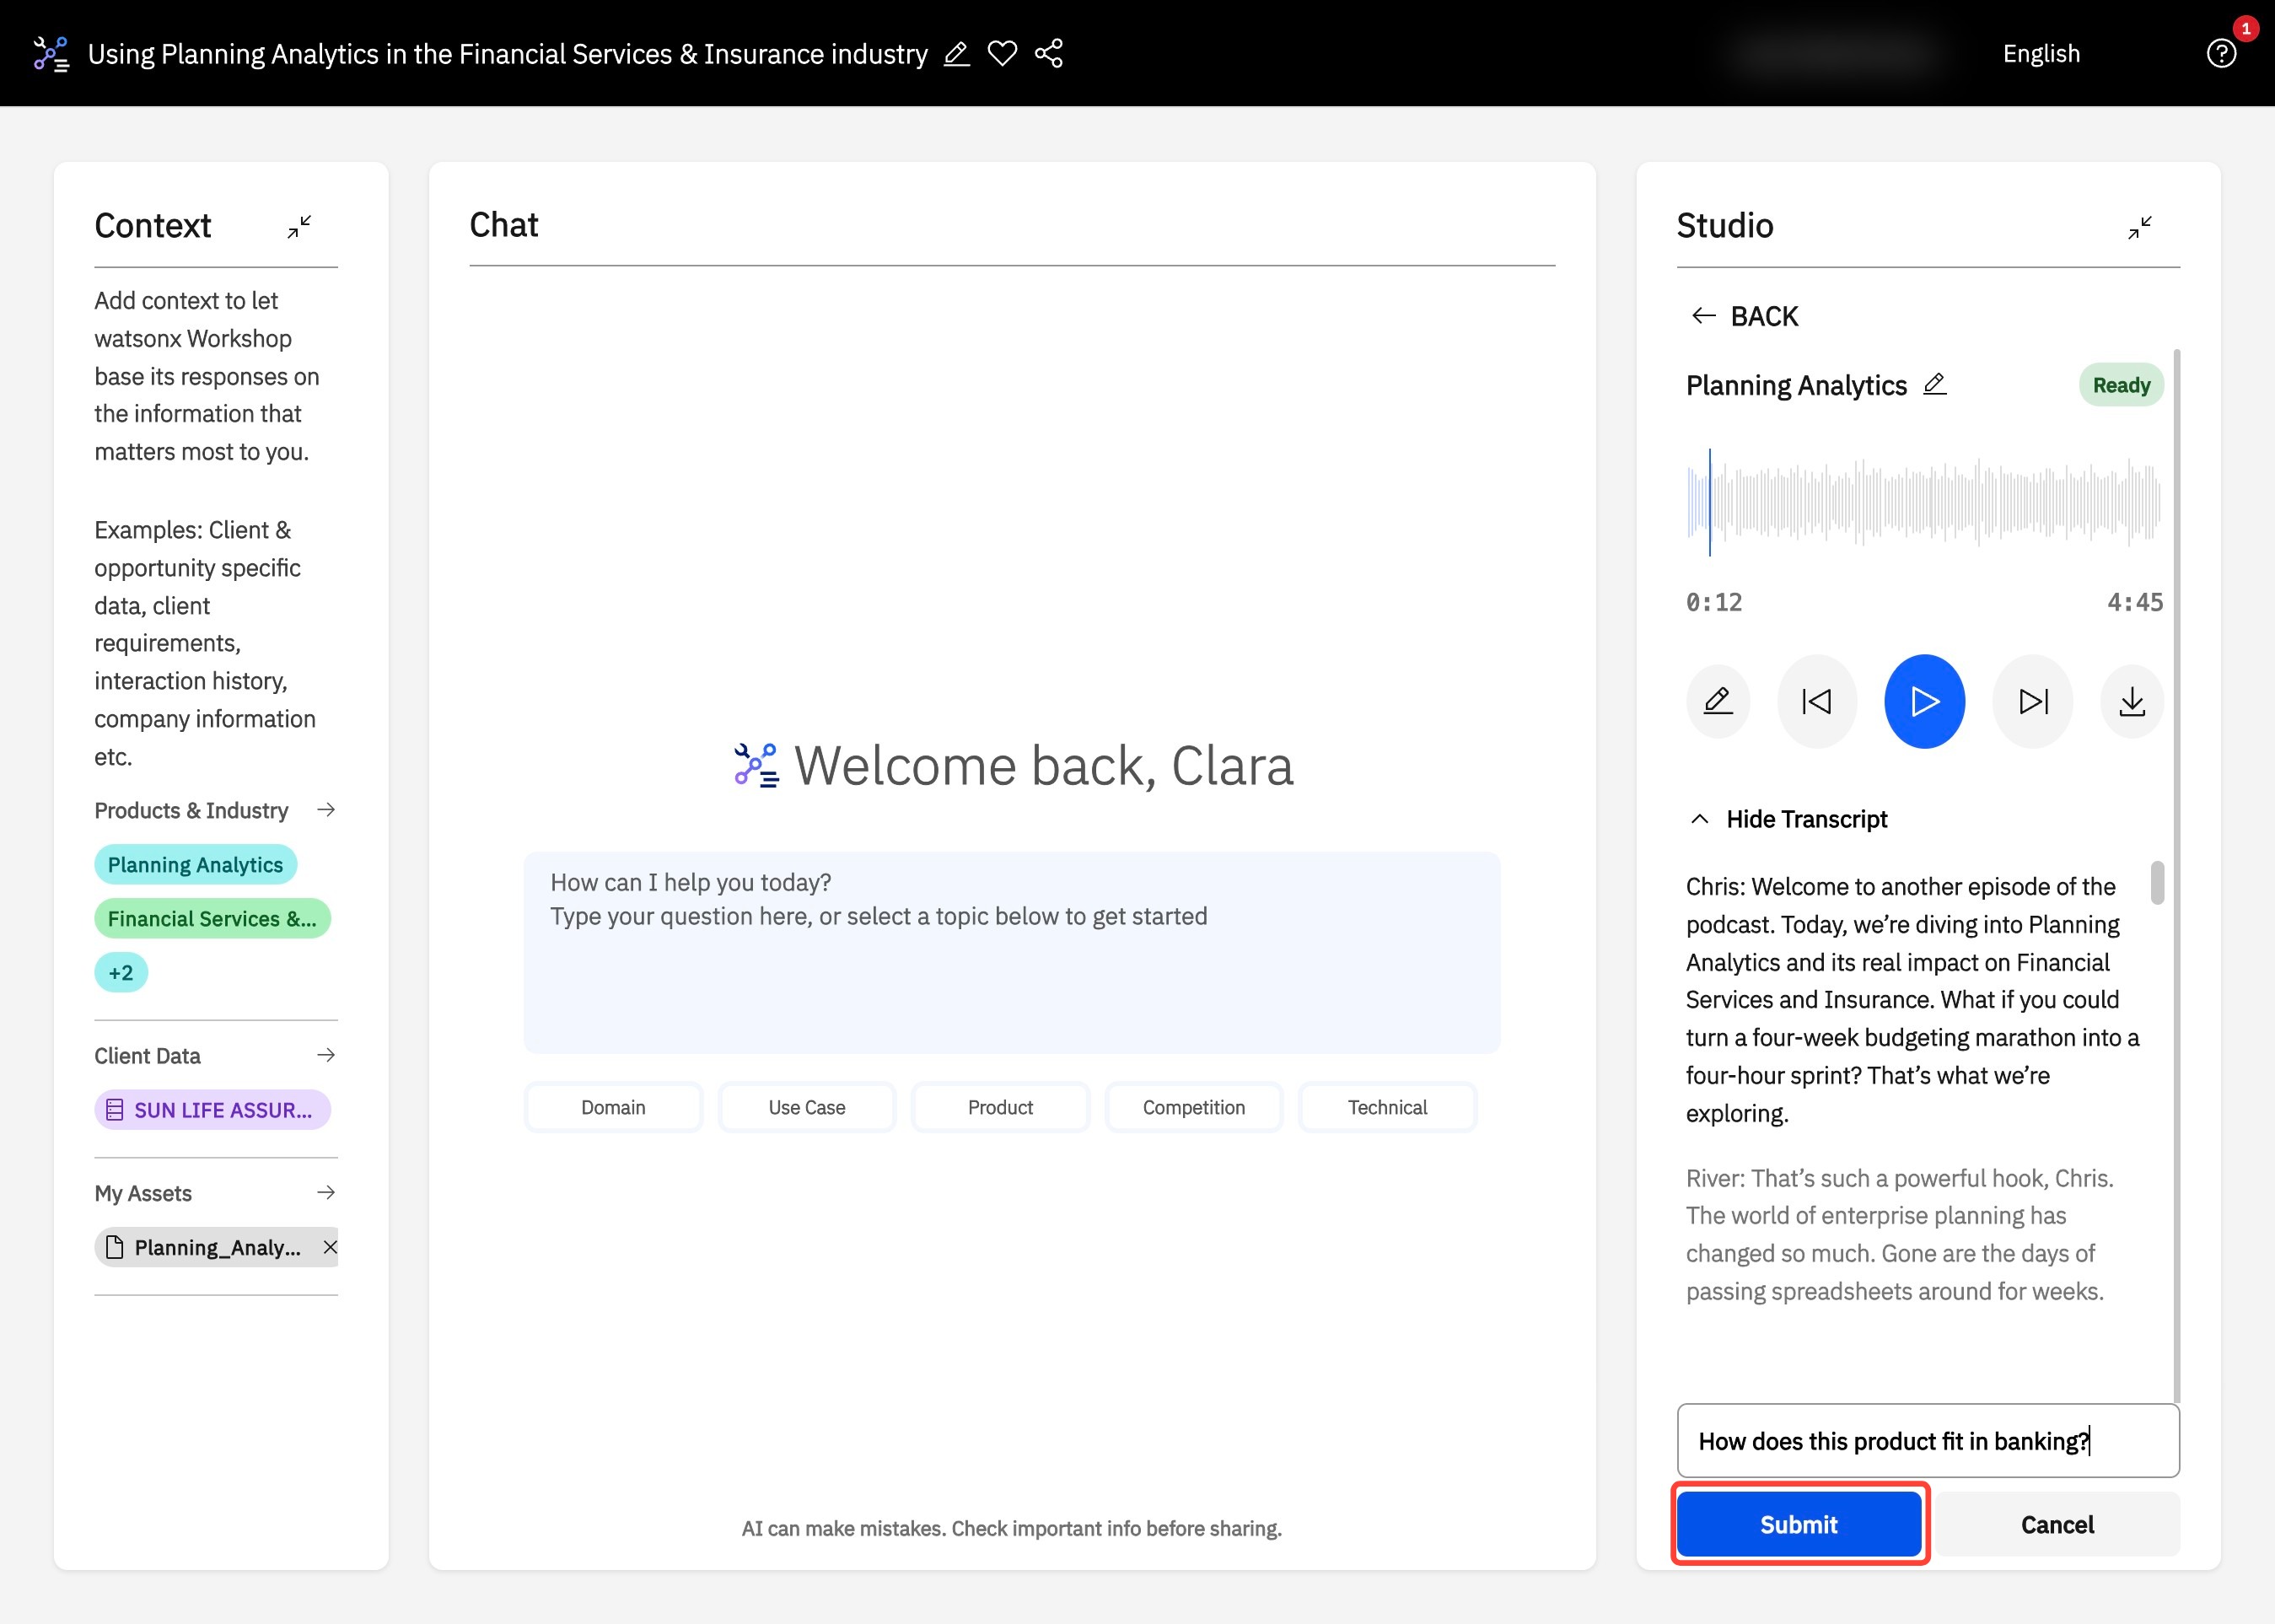
8. Use fast forward or rewind (A) at any time. If you have a question at any point during the podcast session, click on Ask a Question (B).
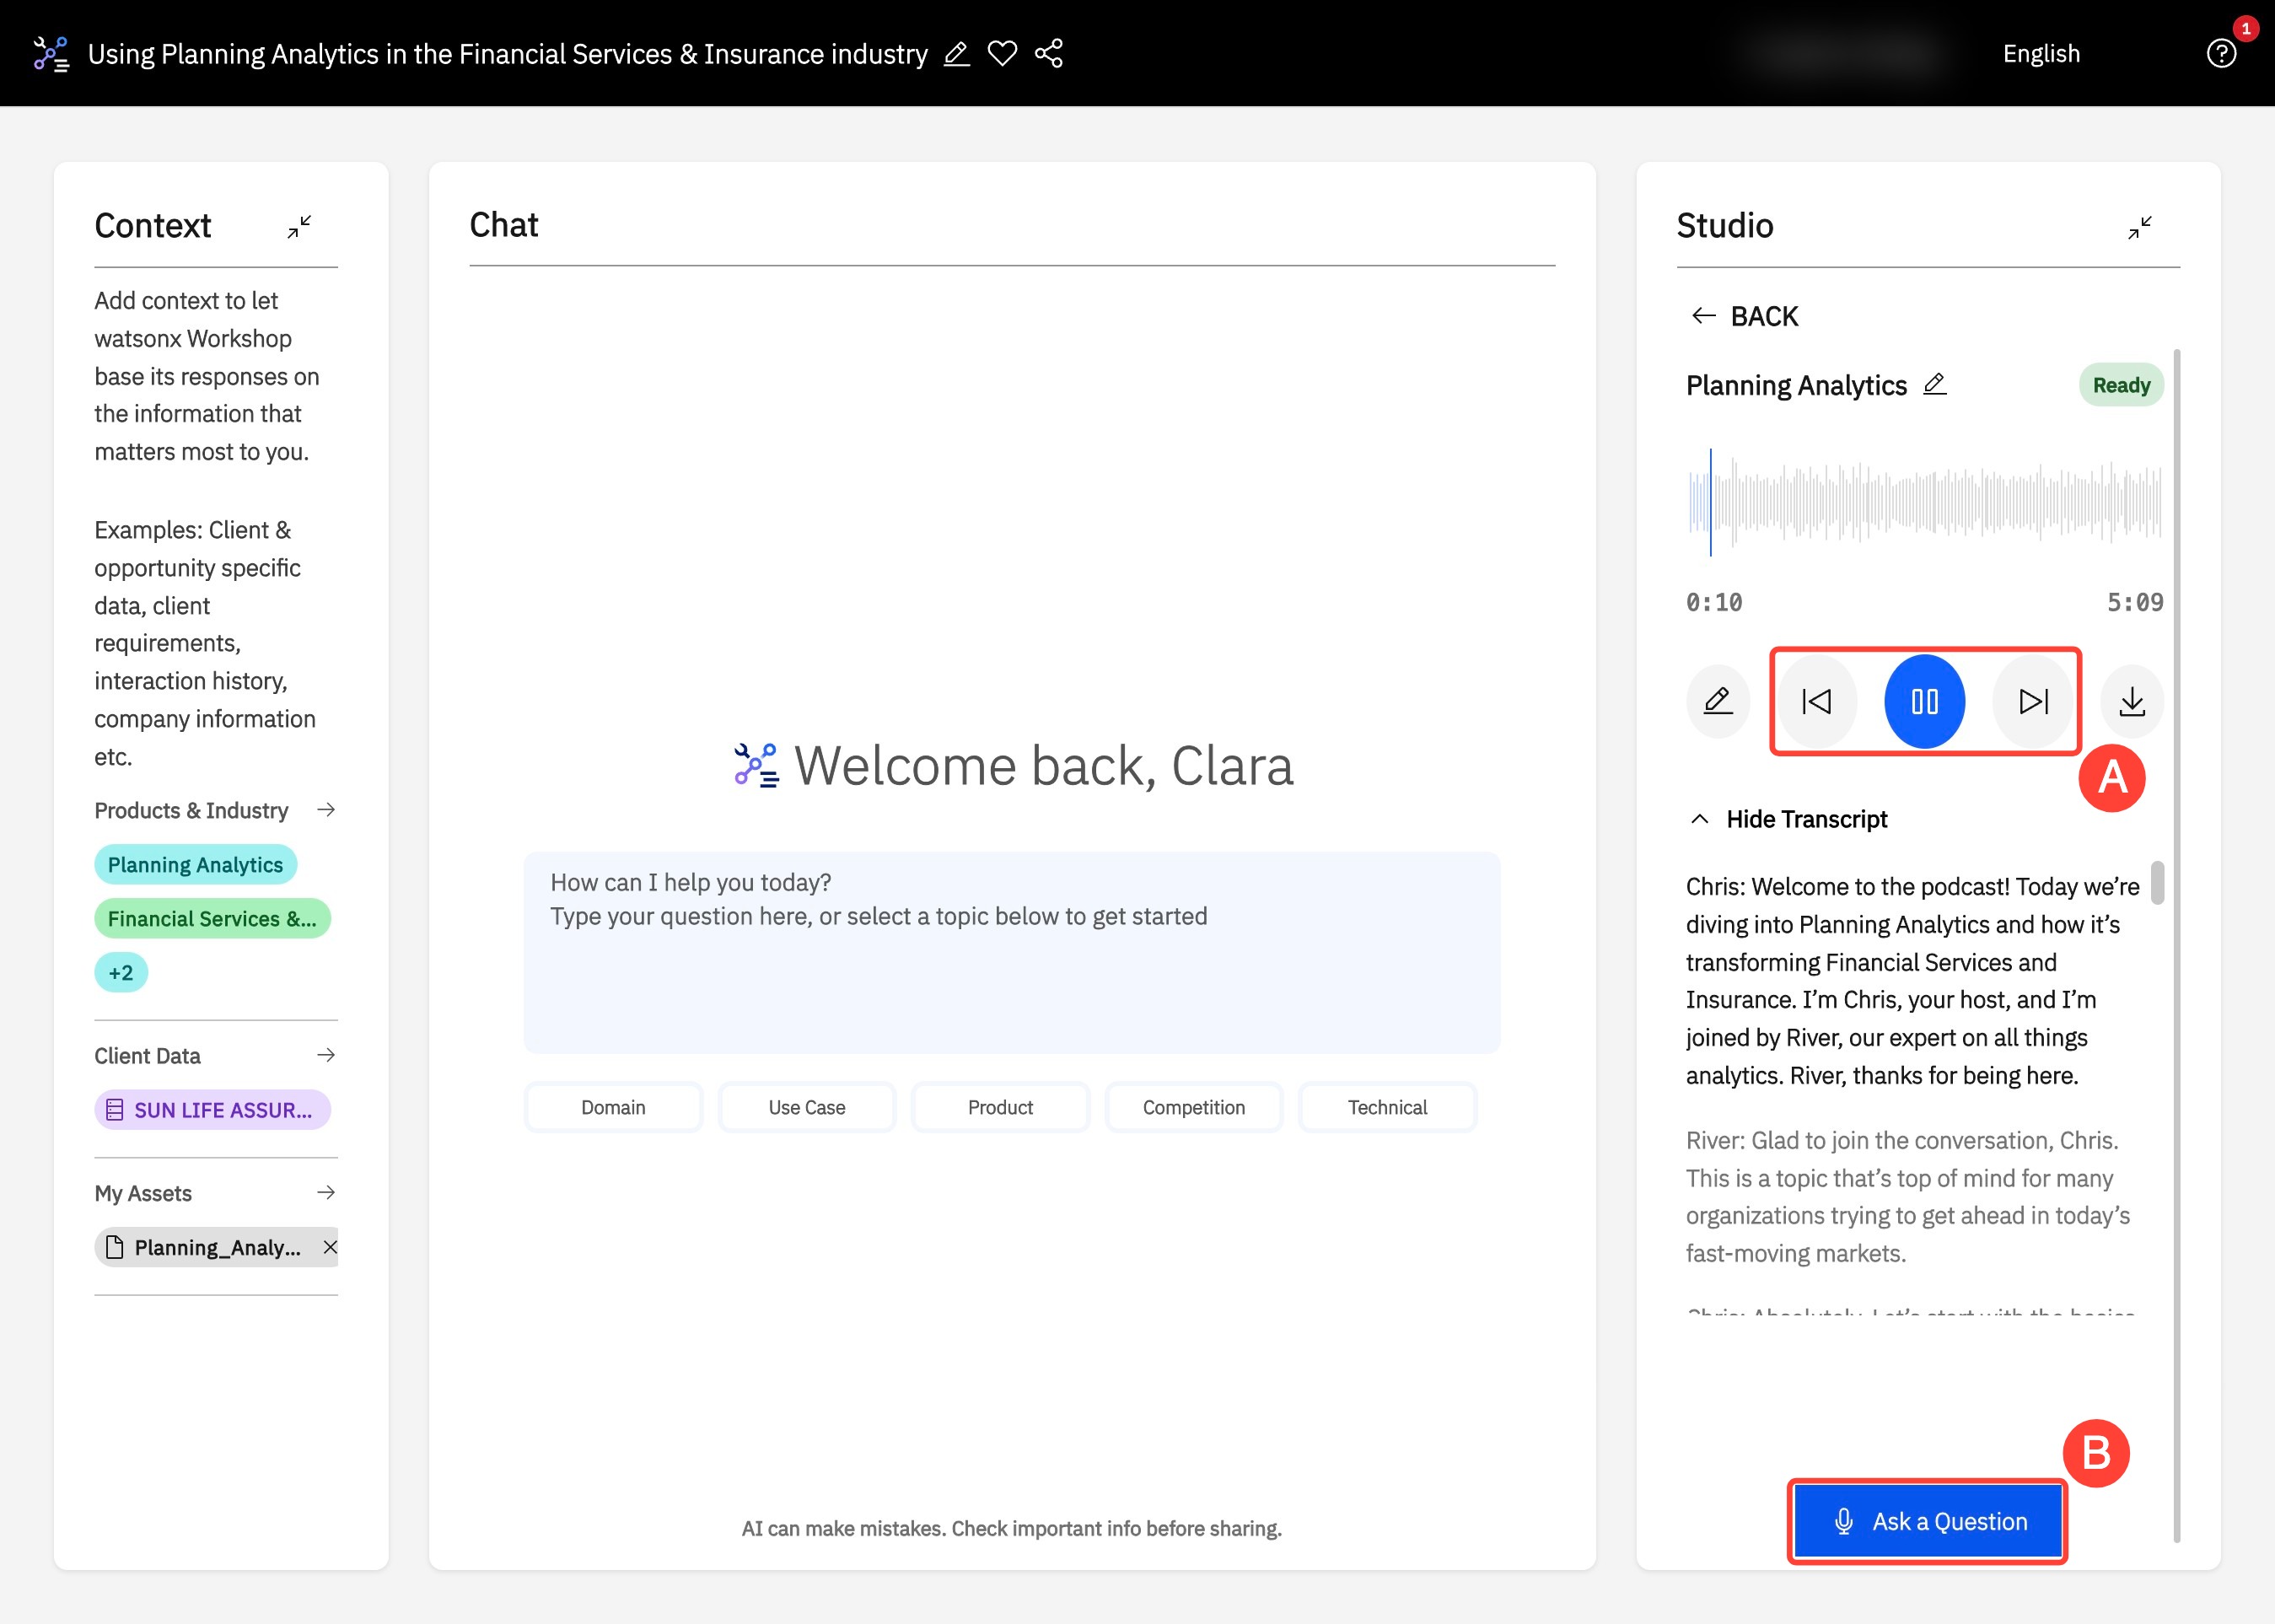
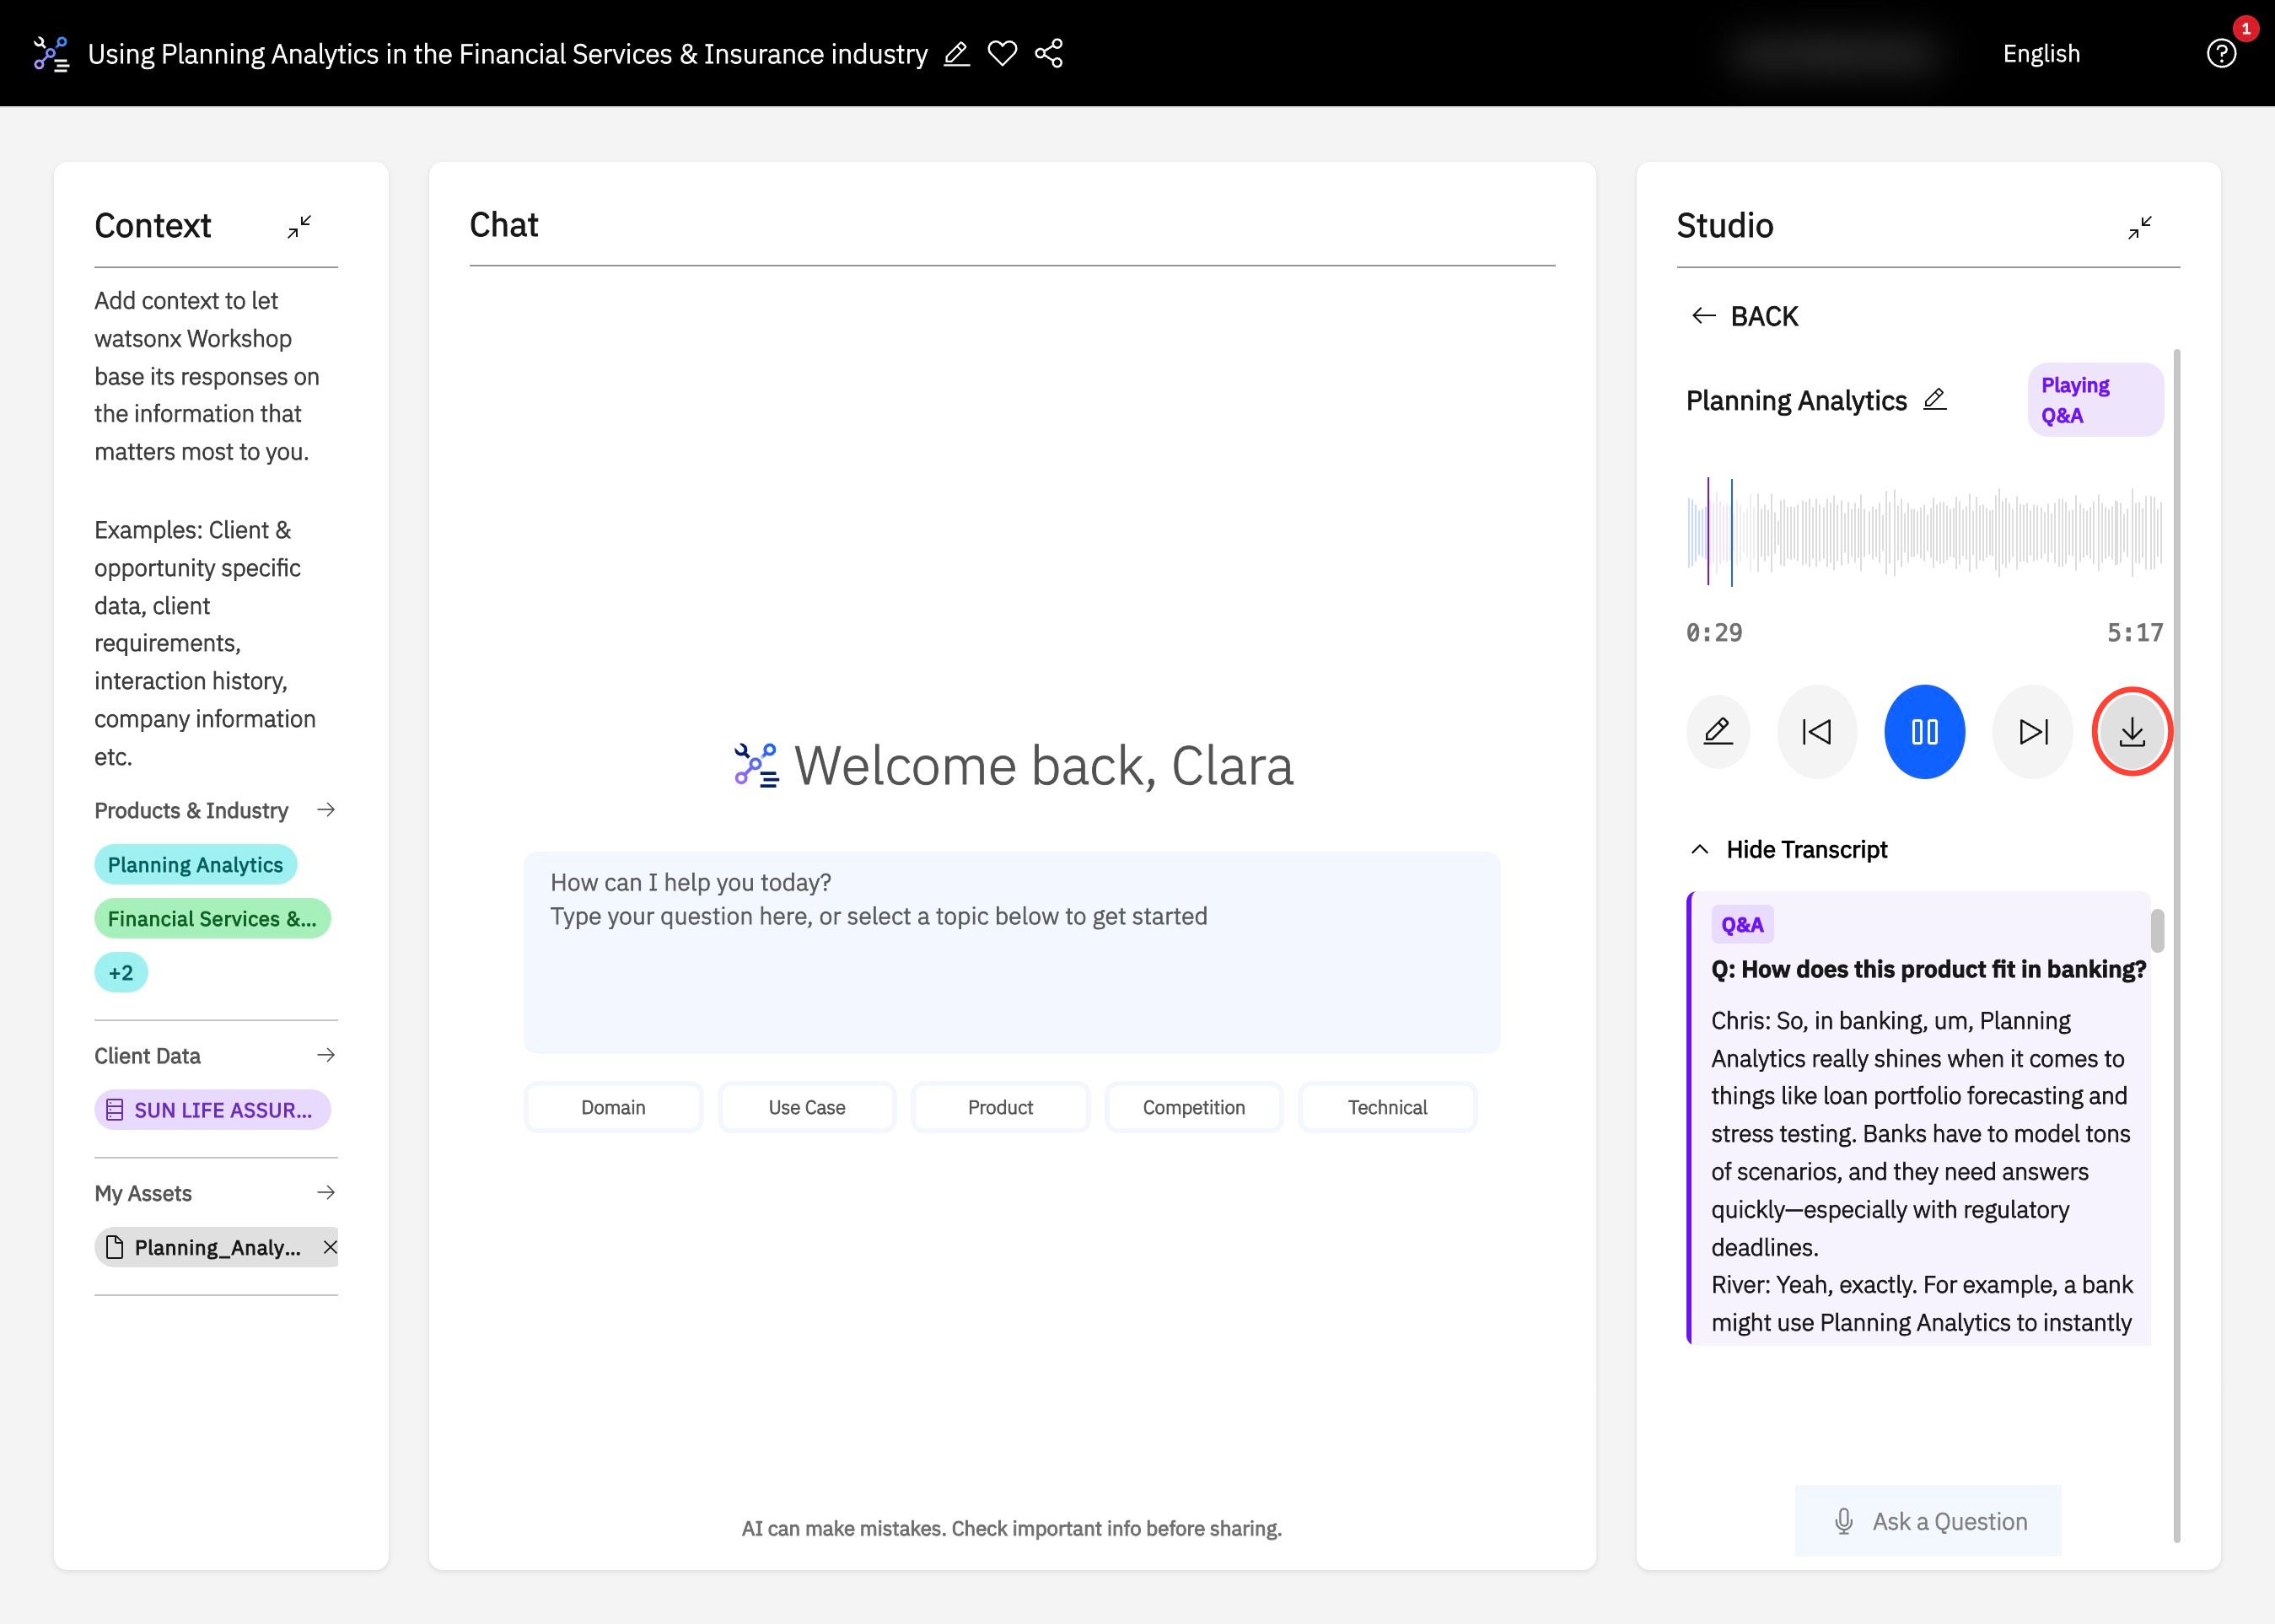
9. Type your question at any time throughout the podcast and click Submit for the AI hosts to answer your question.
10. To download and listen to your generated podcast on the go, click Download.
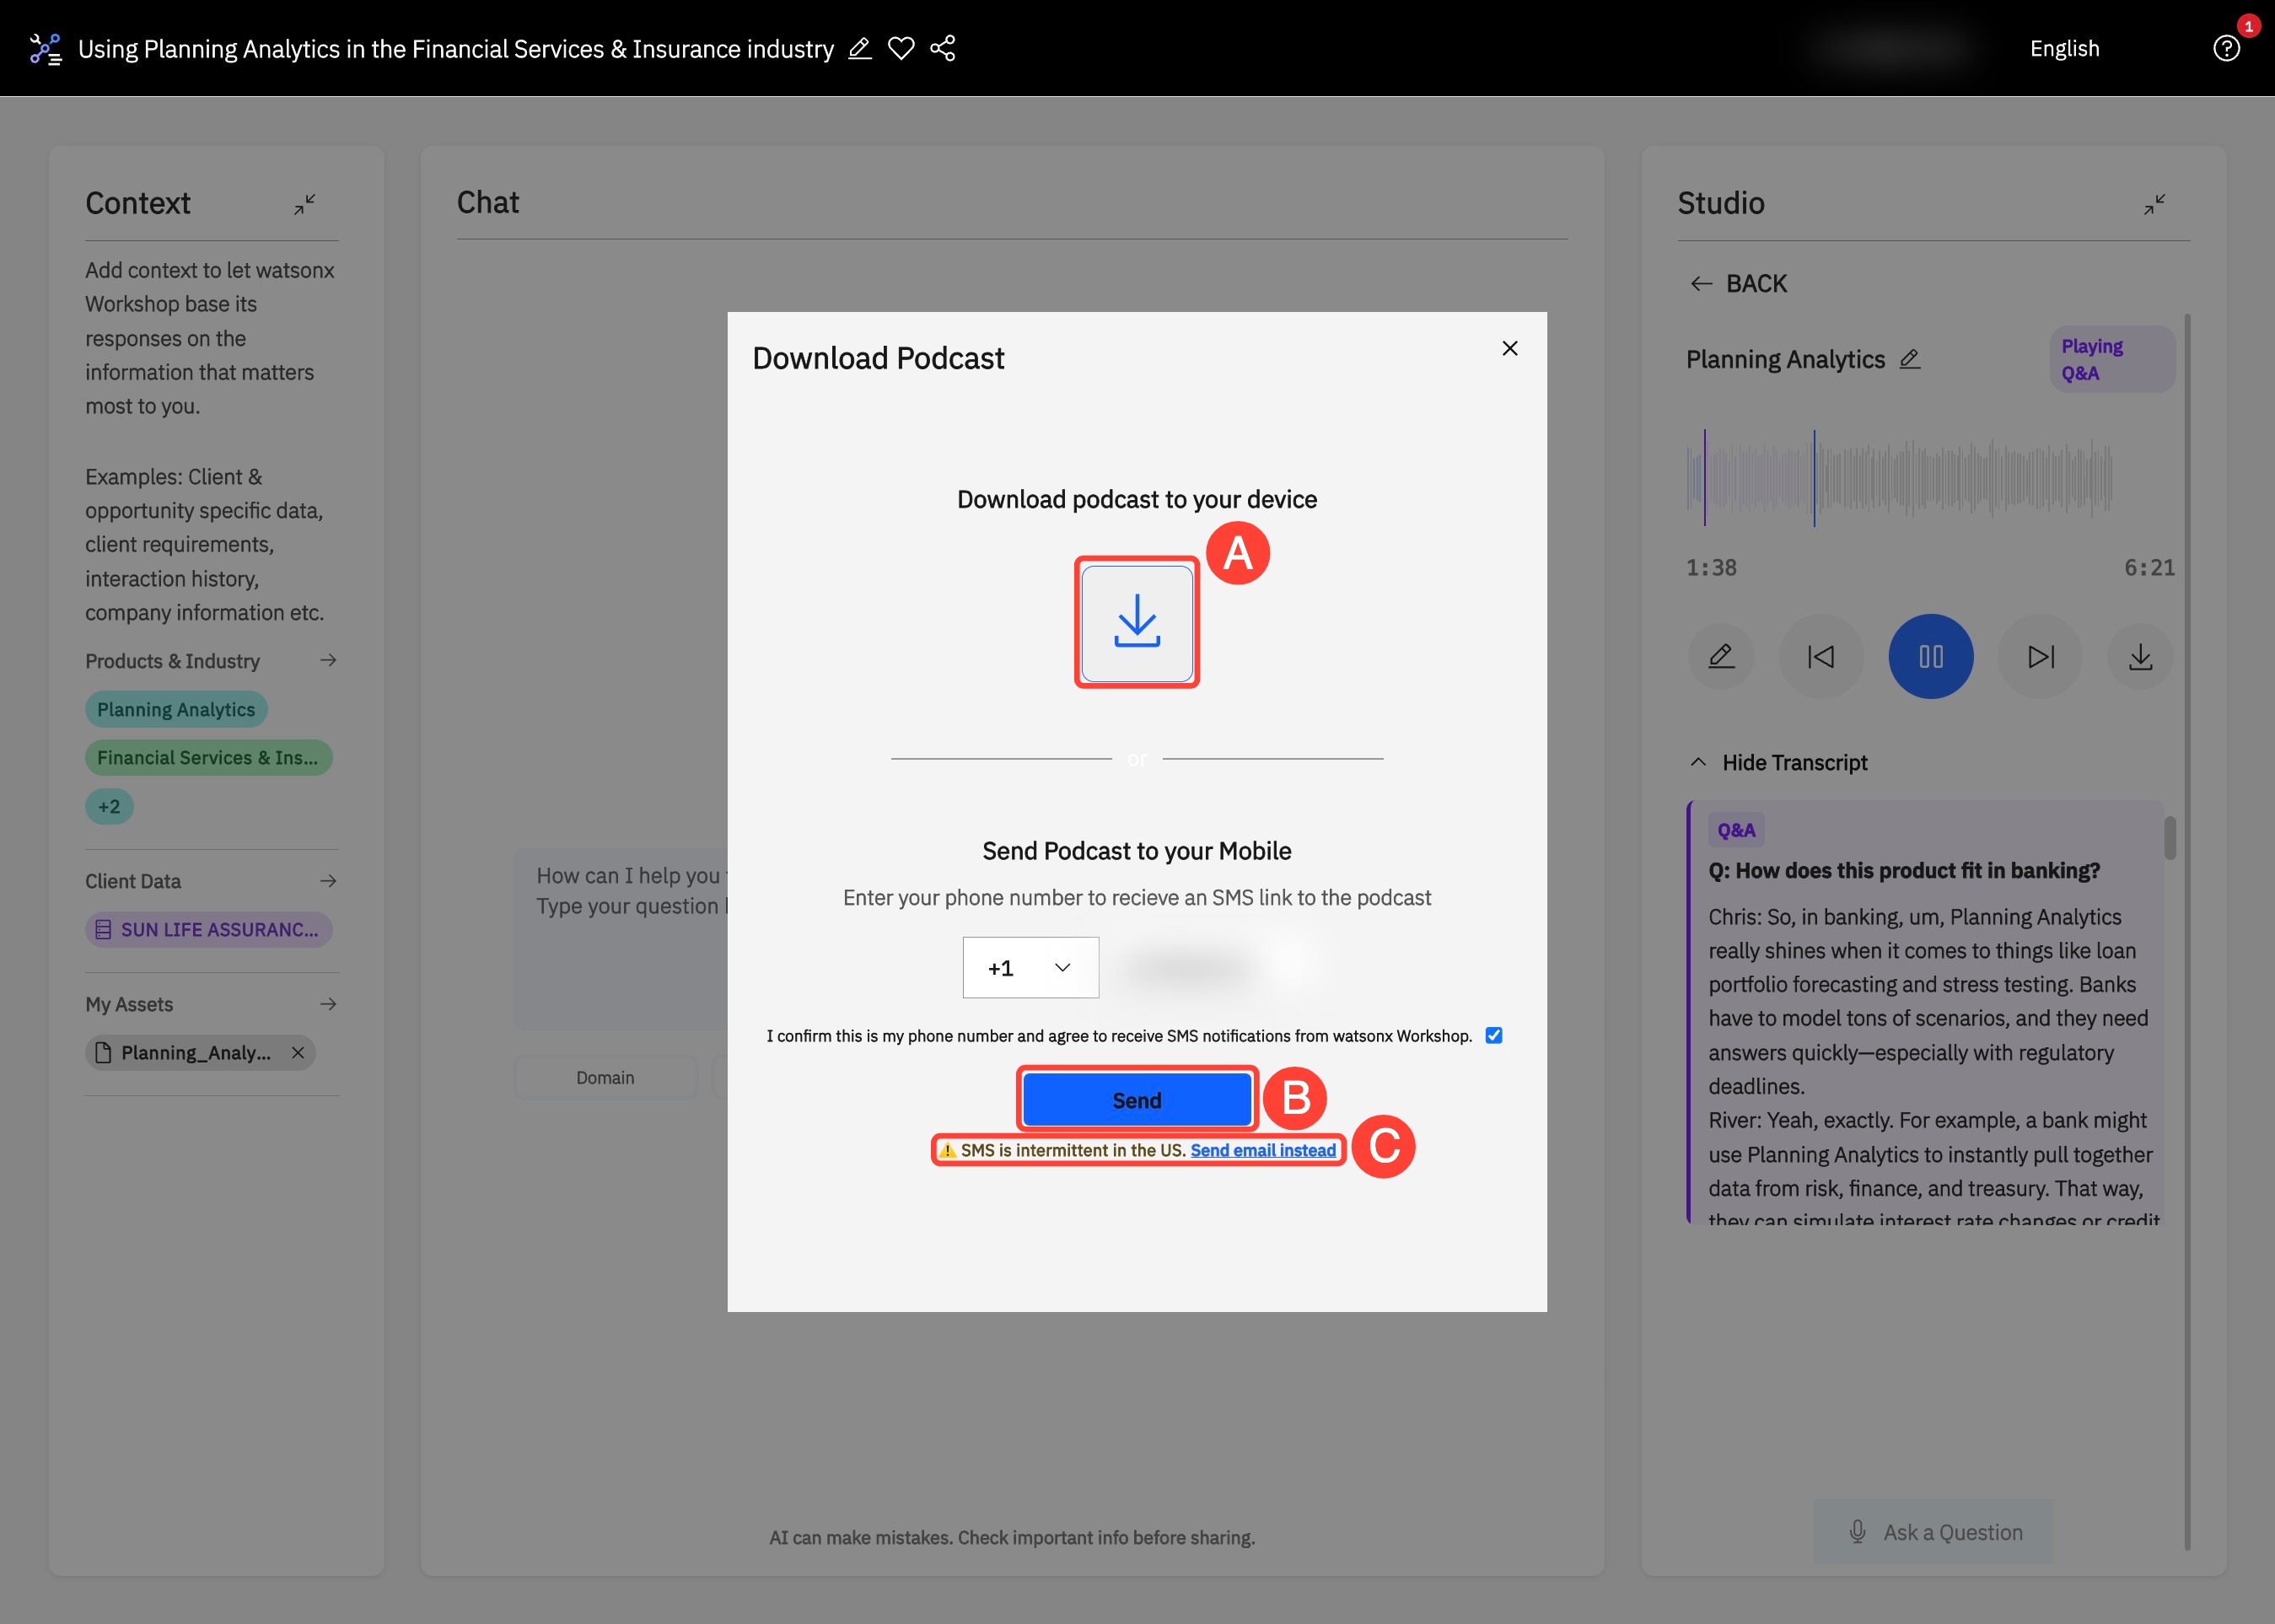
11. You can click Download (A) to download the podcast to your device. Enter your number, select the check box, and press Send (B) to deliver the podcast to your mobile. Alternatively, you can share via email by clicking Send email instead (C).
12. To edit the transcript, click the pencil icon next to the media controls.
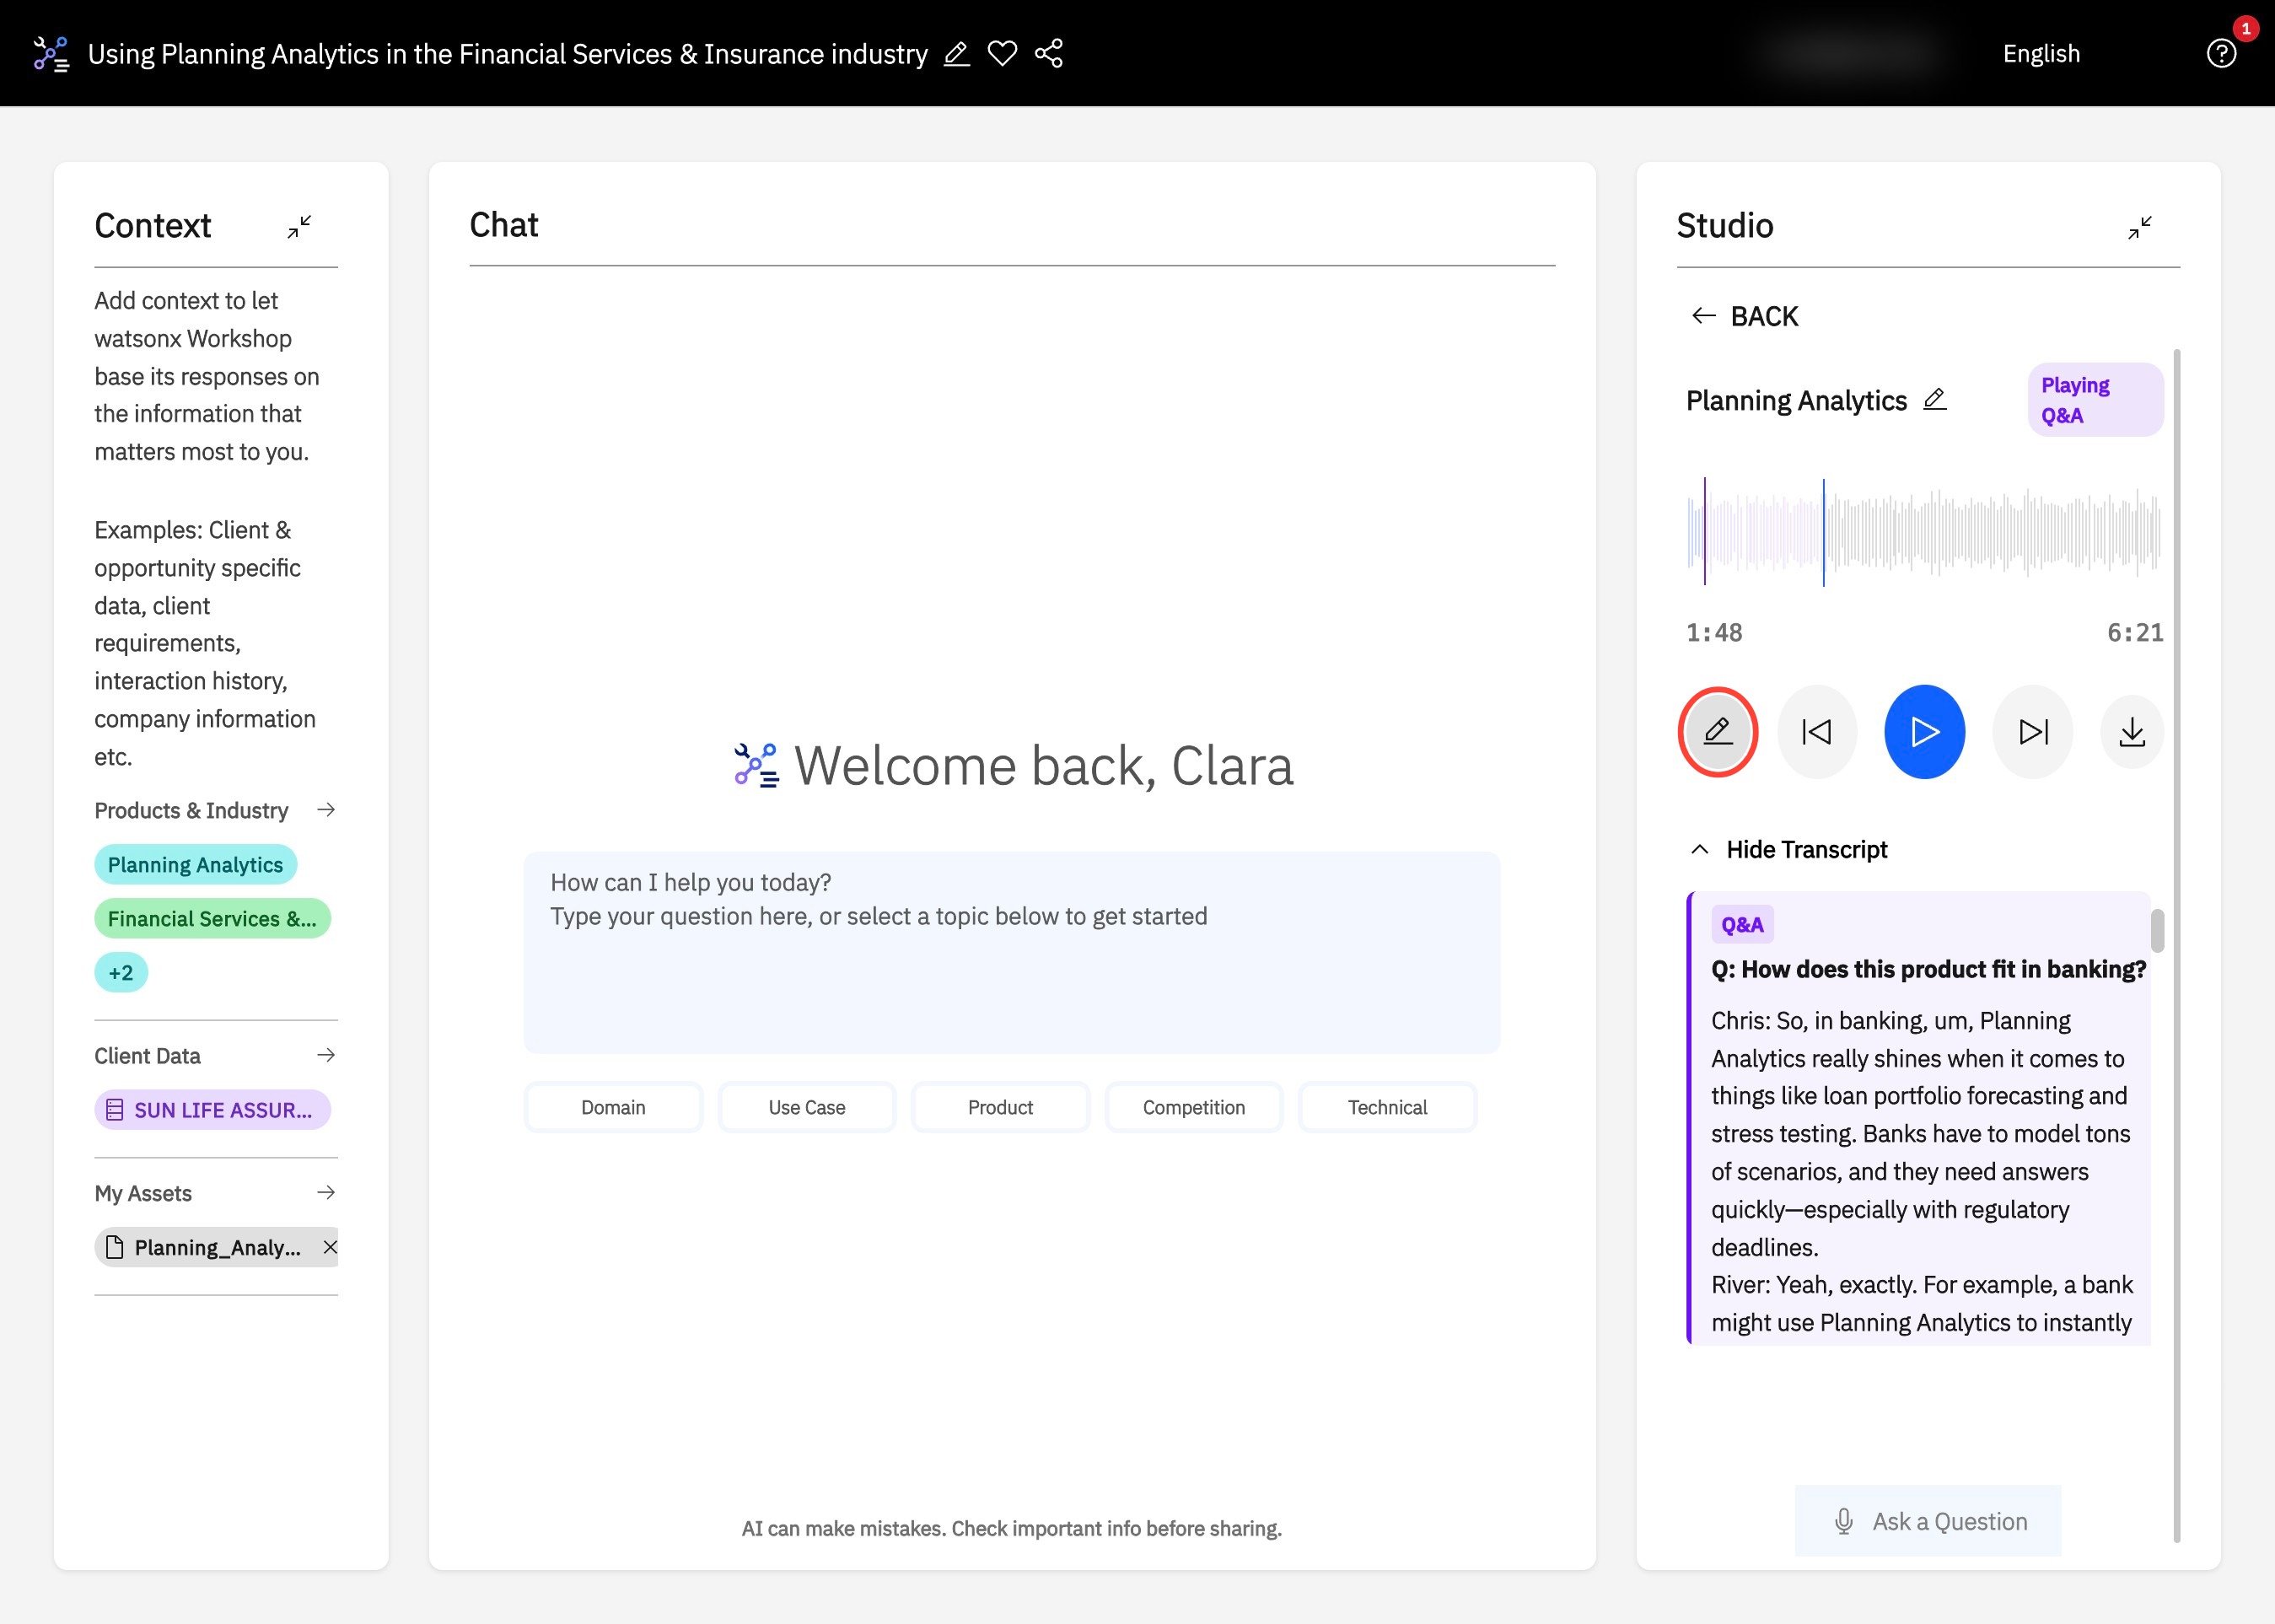
13. Click the pencil icon on the top right of the transcript line you want to edit.

14. Edit the transcript text directly within the selected line and click the check mark to apply the changes.
15. Once all edits are complete, click Save & Regenerate to update the podcast.
Podcast Interaction
- While the podcast plays, click Ask a Question at the bottom-right corner of the screen.
- Type your question in the textbox that appears and click Submit. The podcast will answer your question before continuing.
- An example question you can ask is: “What weaknesses in the current landscape is IBM addressing?”
Example Use Case: Generate a podcast based on an uploaded client document and listen to it hands-free while commuting to a meeting.
Practice Gym
The Practice Gym is an interactive quiz-style tool designed to help you test your product knowledge and readiness. It simulates real-world questions and evaluates your responses, giving you instant feedback and actionable insights.
Key Features
- AI-generated questions tailored to your session context
- Spoken or typed answers with instant feedback
- Integrated learning, with results feeding into the Chat to guide further learning
Getting Started
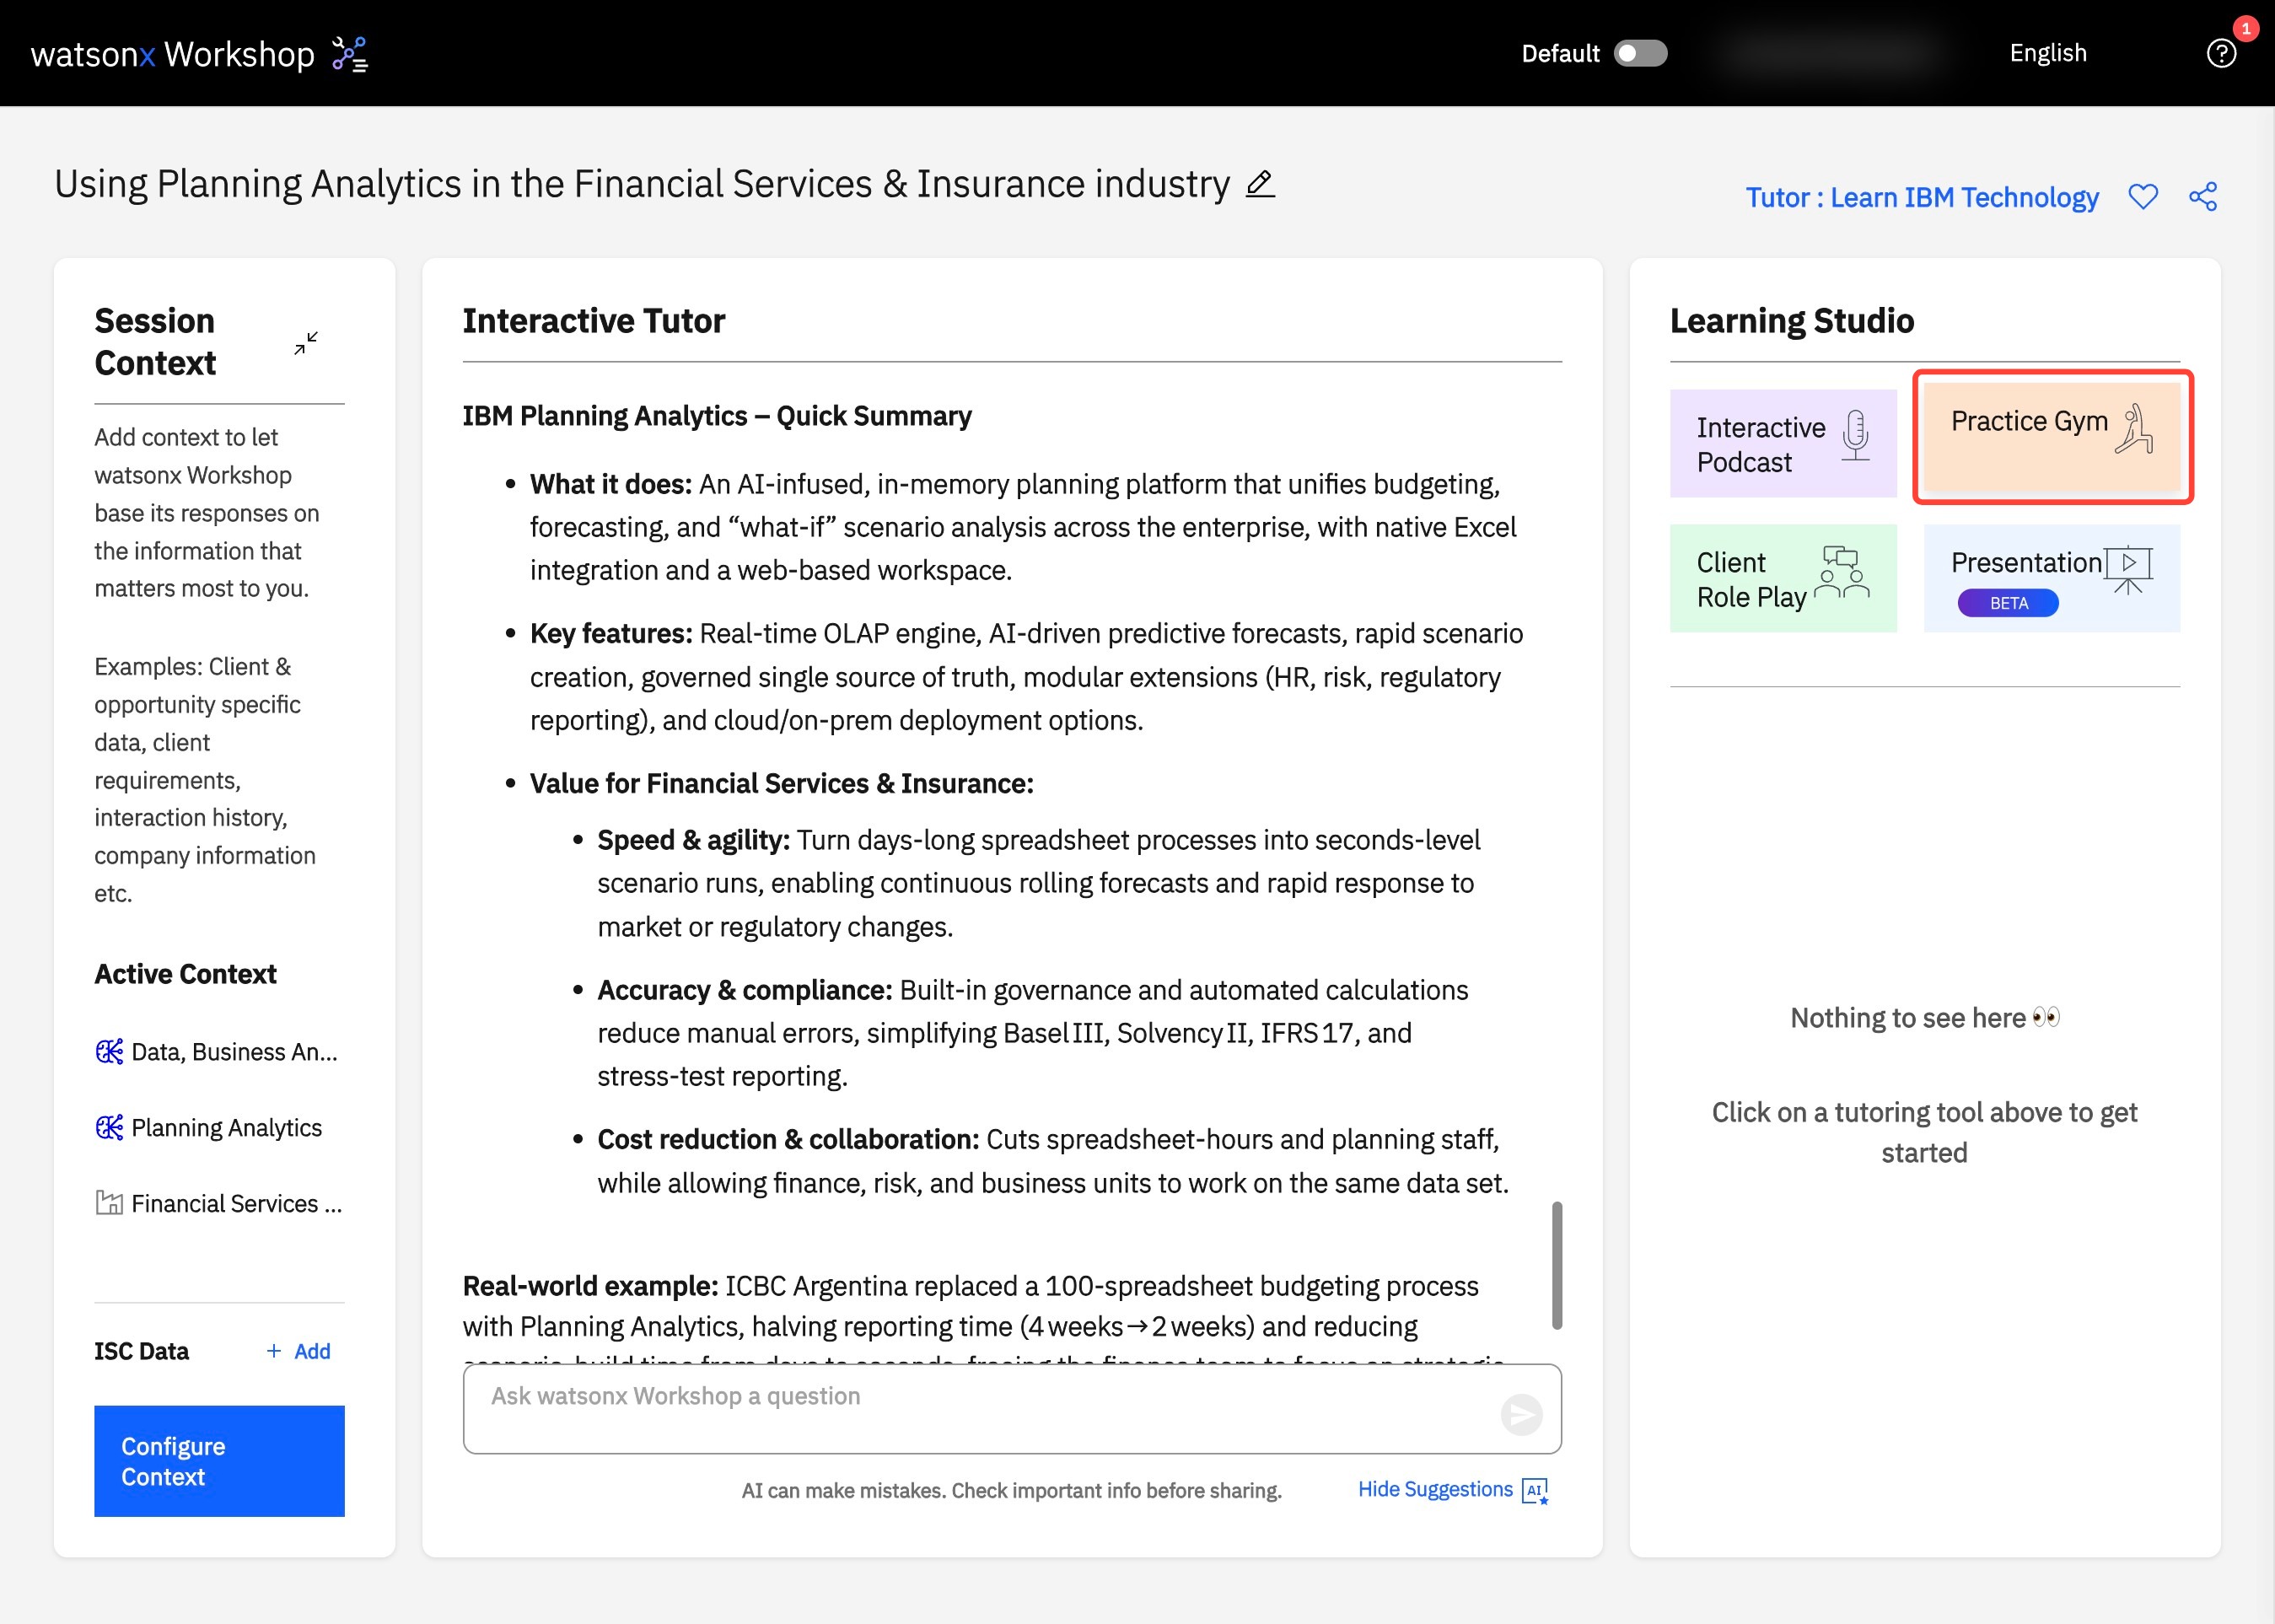
- In your watsonx Workshop session, navigate to the Studio on the right side and click Practice Gym.
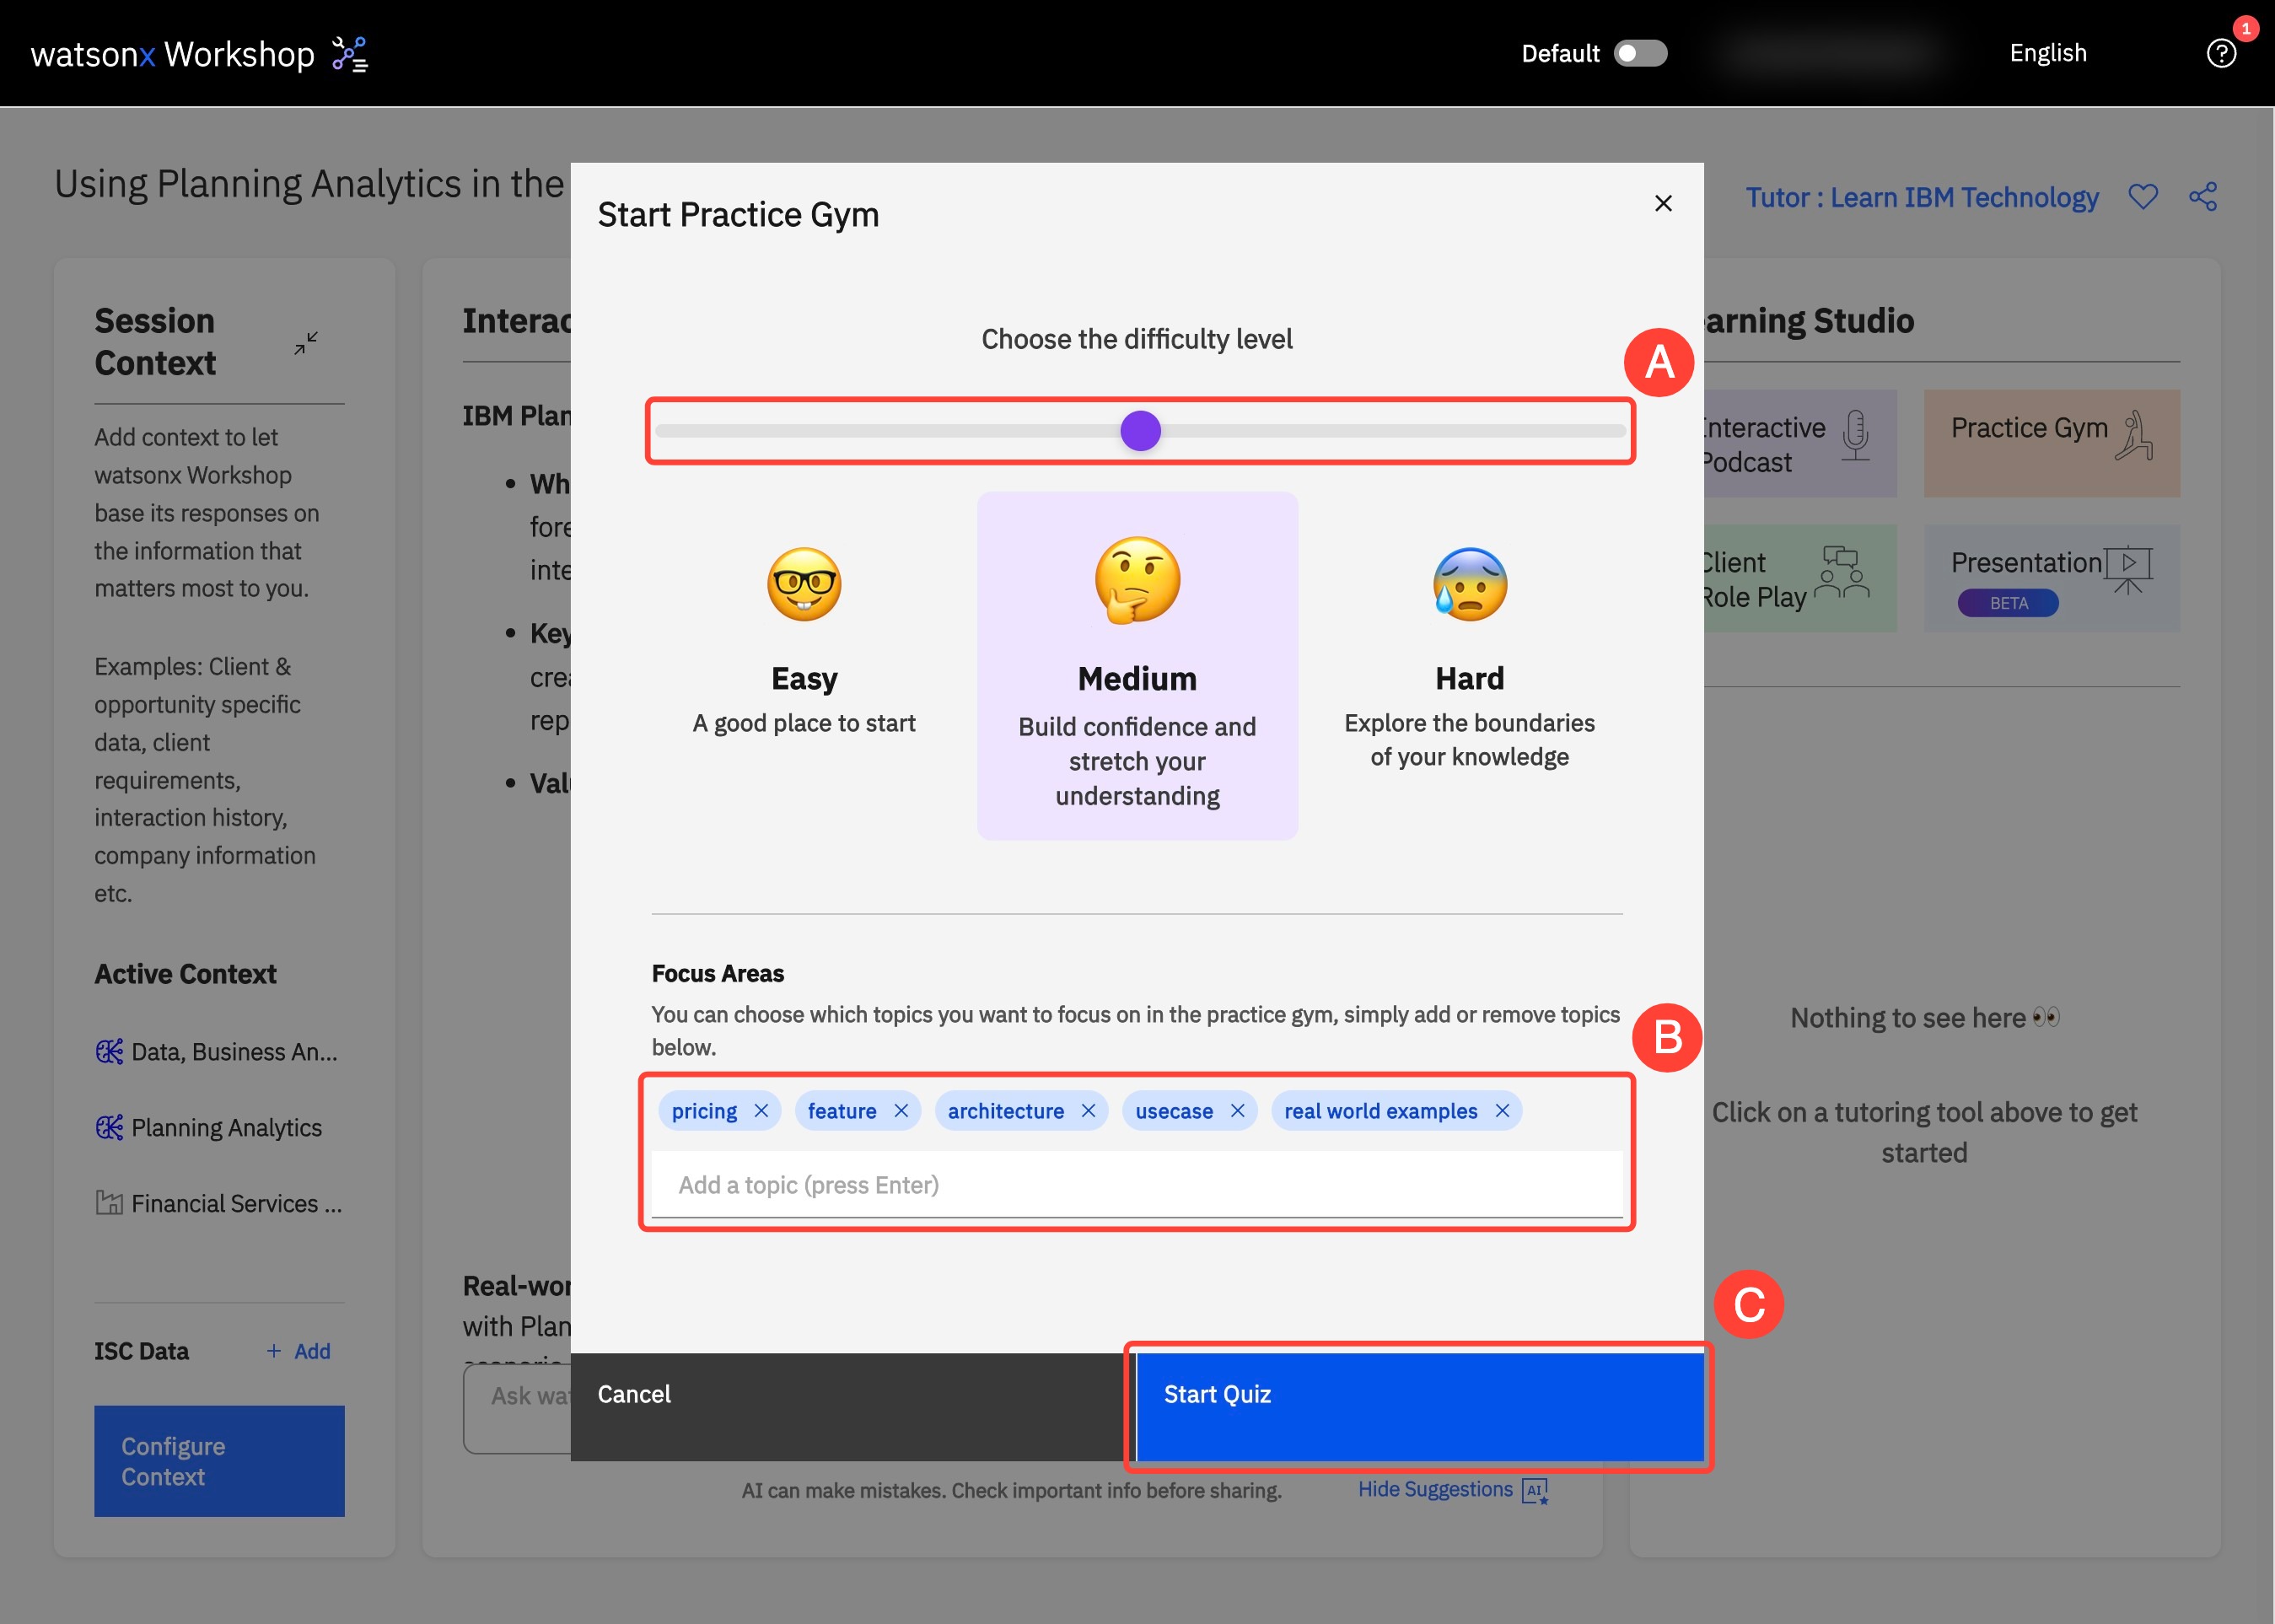
- Select a difficulty level of Easy, Medium, and Hard by adjusting the slider, then click Start Quiz.
- Under Focus Area, add or delete topics to ensure the quiz questions are tailored to your specific learning needs.
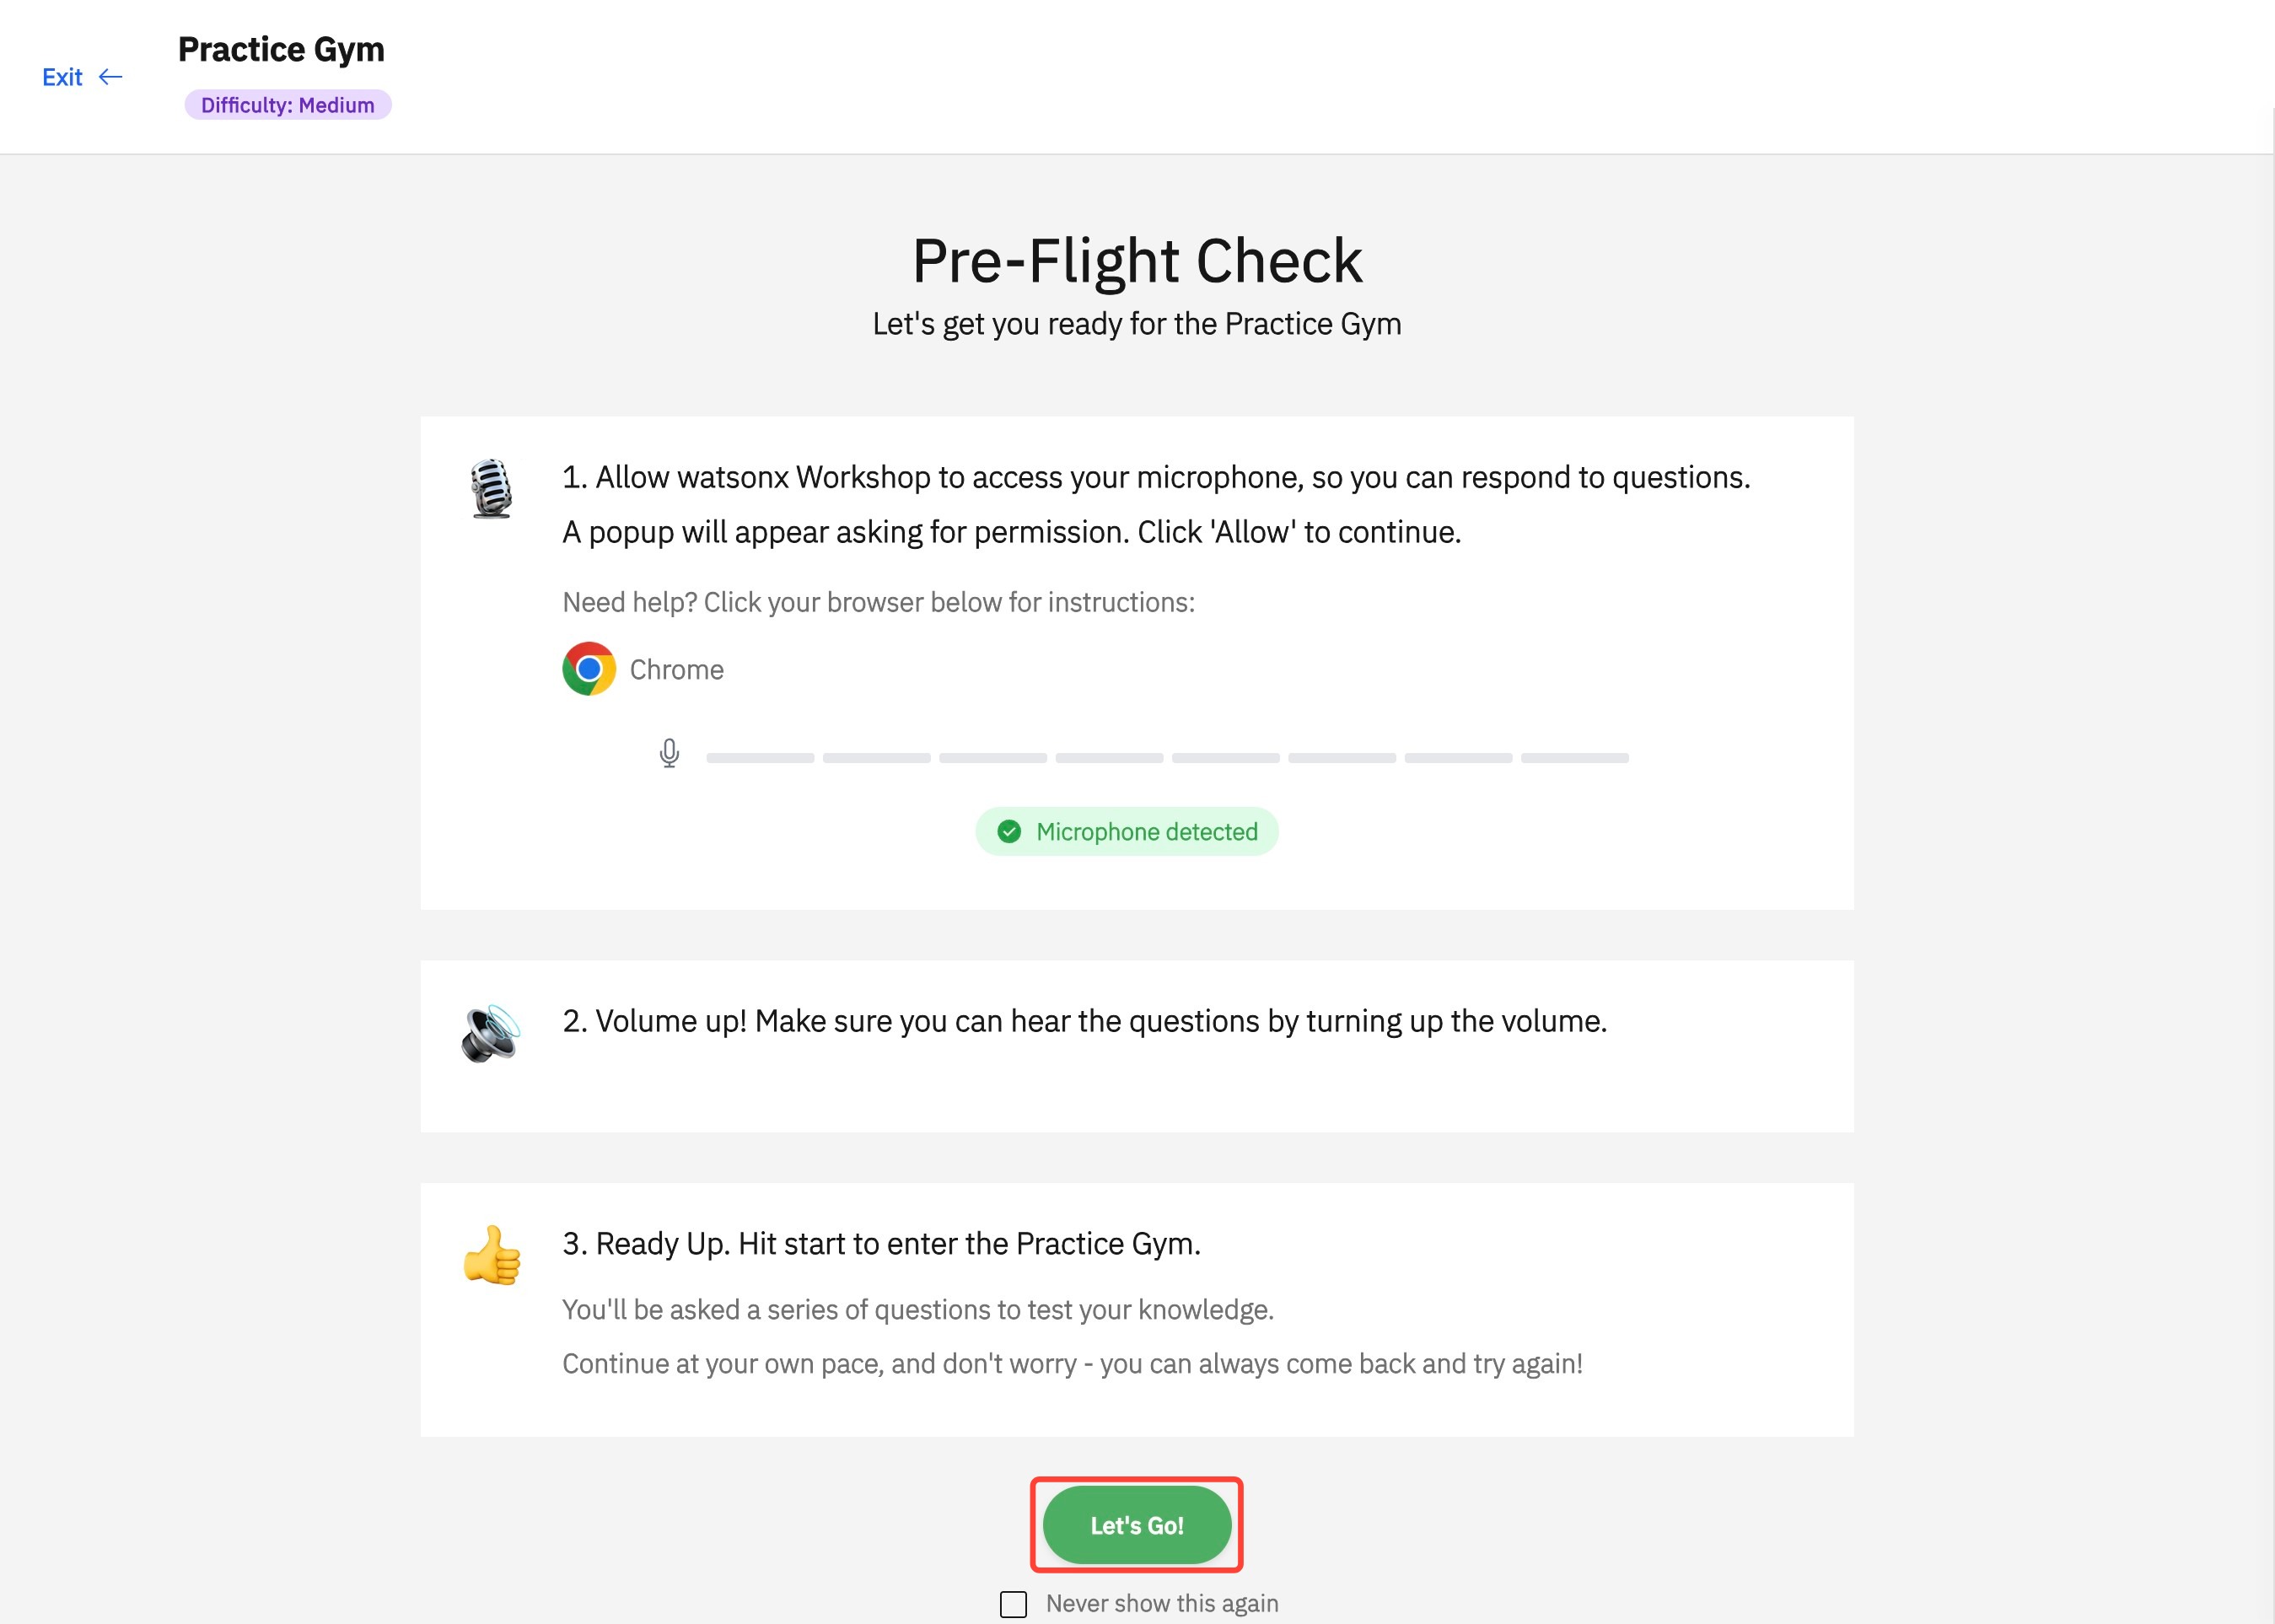
- If prompted, complete the Pre-flight Check for your microphone and camera, then click Let’s Go! to start.
- Questions will appear as text with audio voiceover. Click pause at any time to stop the audio using the button just below the question.
- Answer verbally using the microphone icon below the question. A text version of your answer will appear, and you can modify it if needed.
- Alternatively, textual responses can be given by entering your response directly into the textbox.
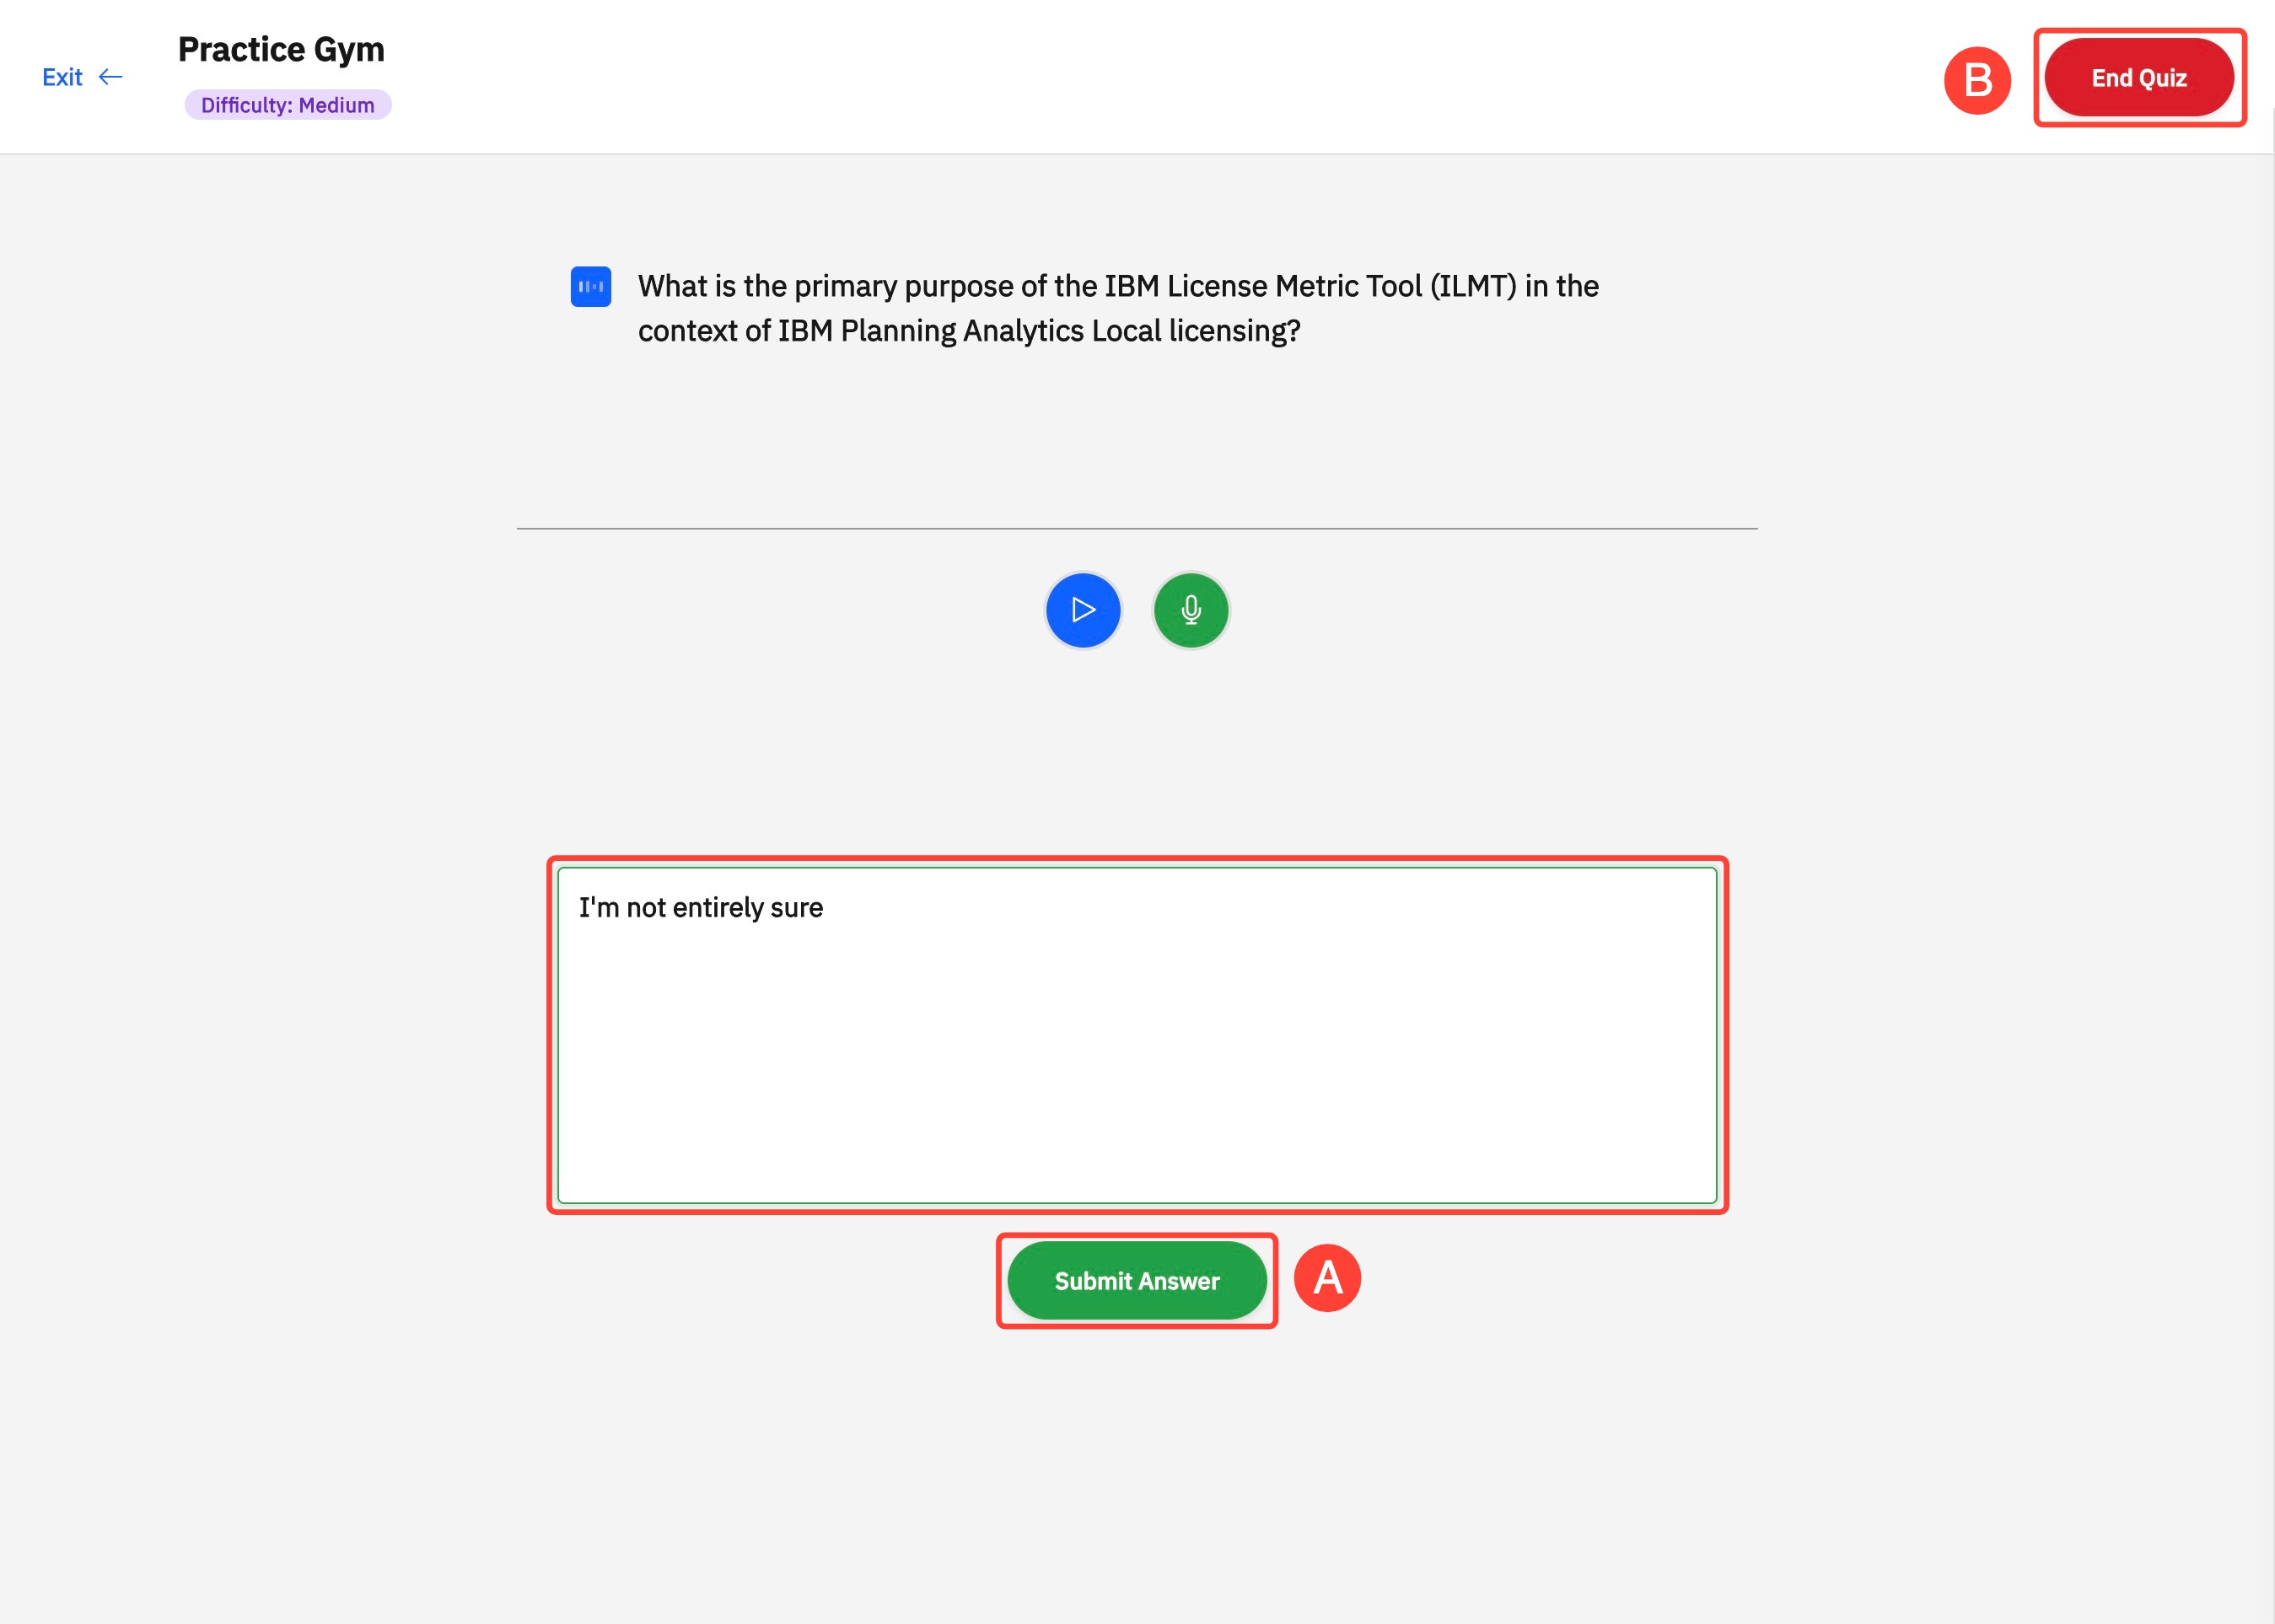
- Once you’re satisfied with your response, click Submit Answer to check it and proceed to the next question.
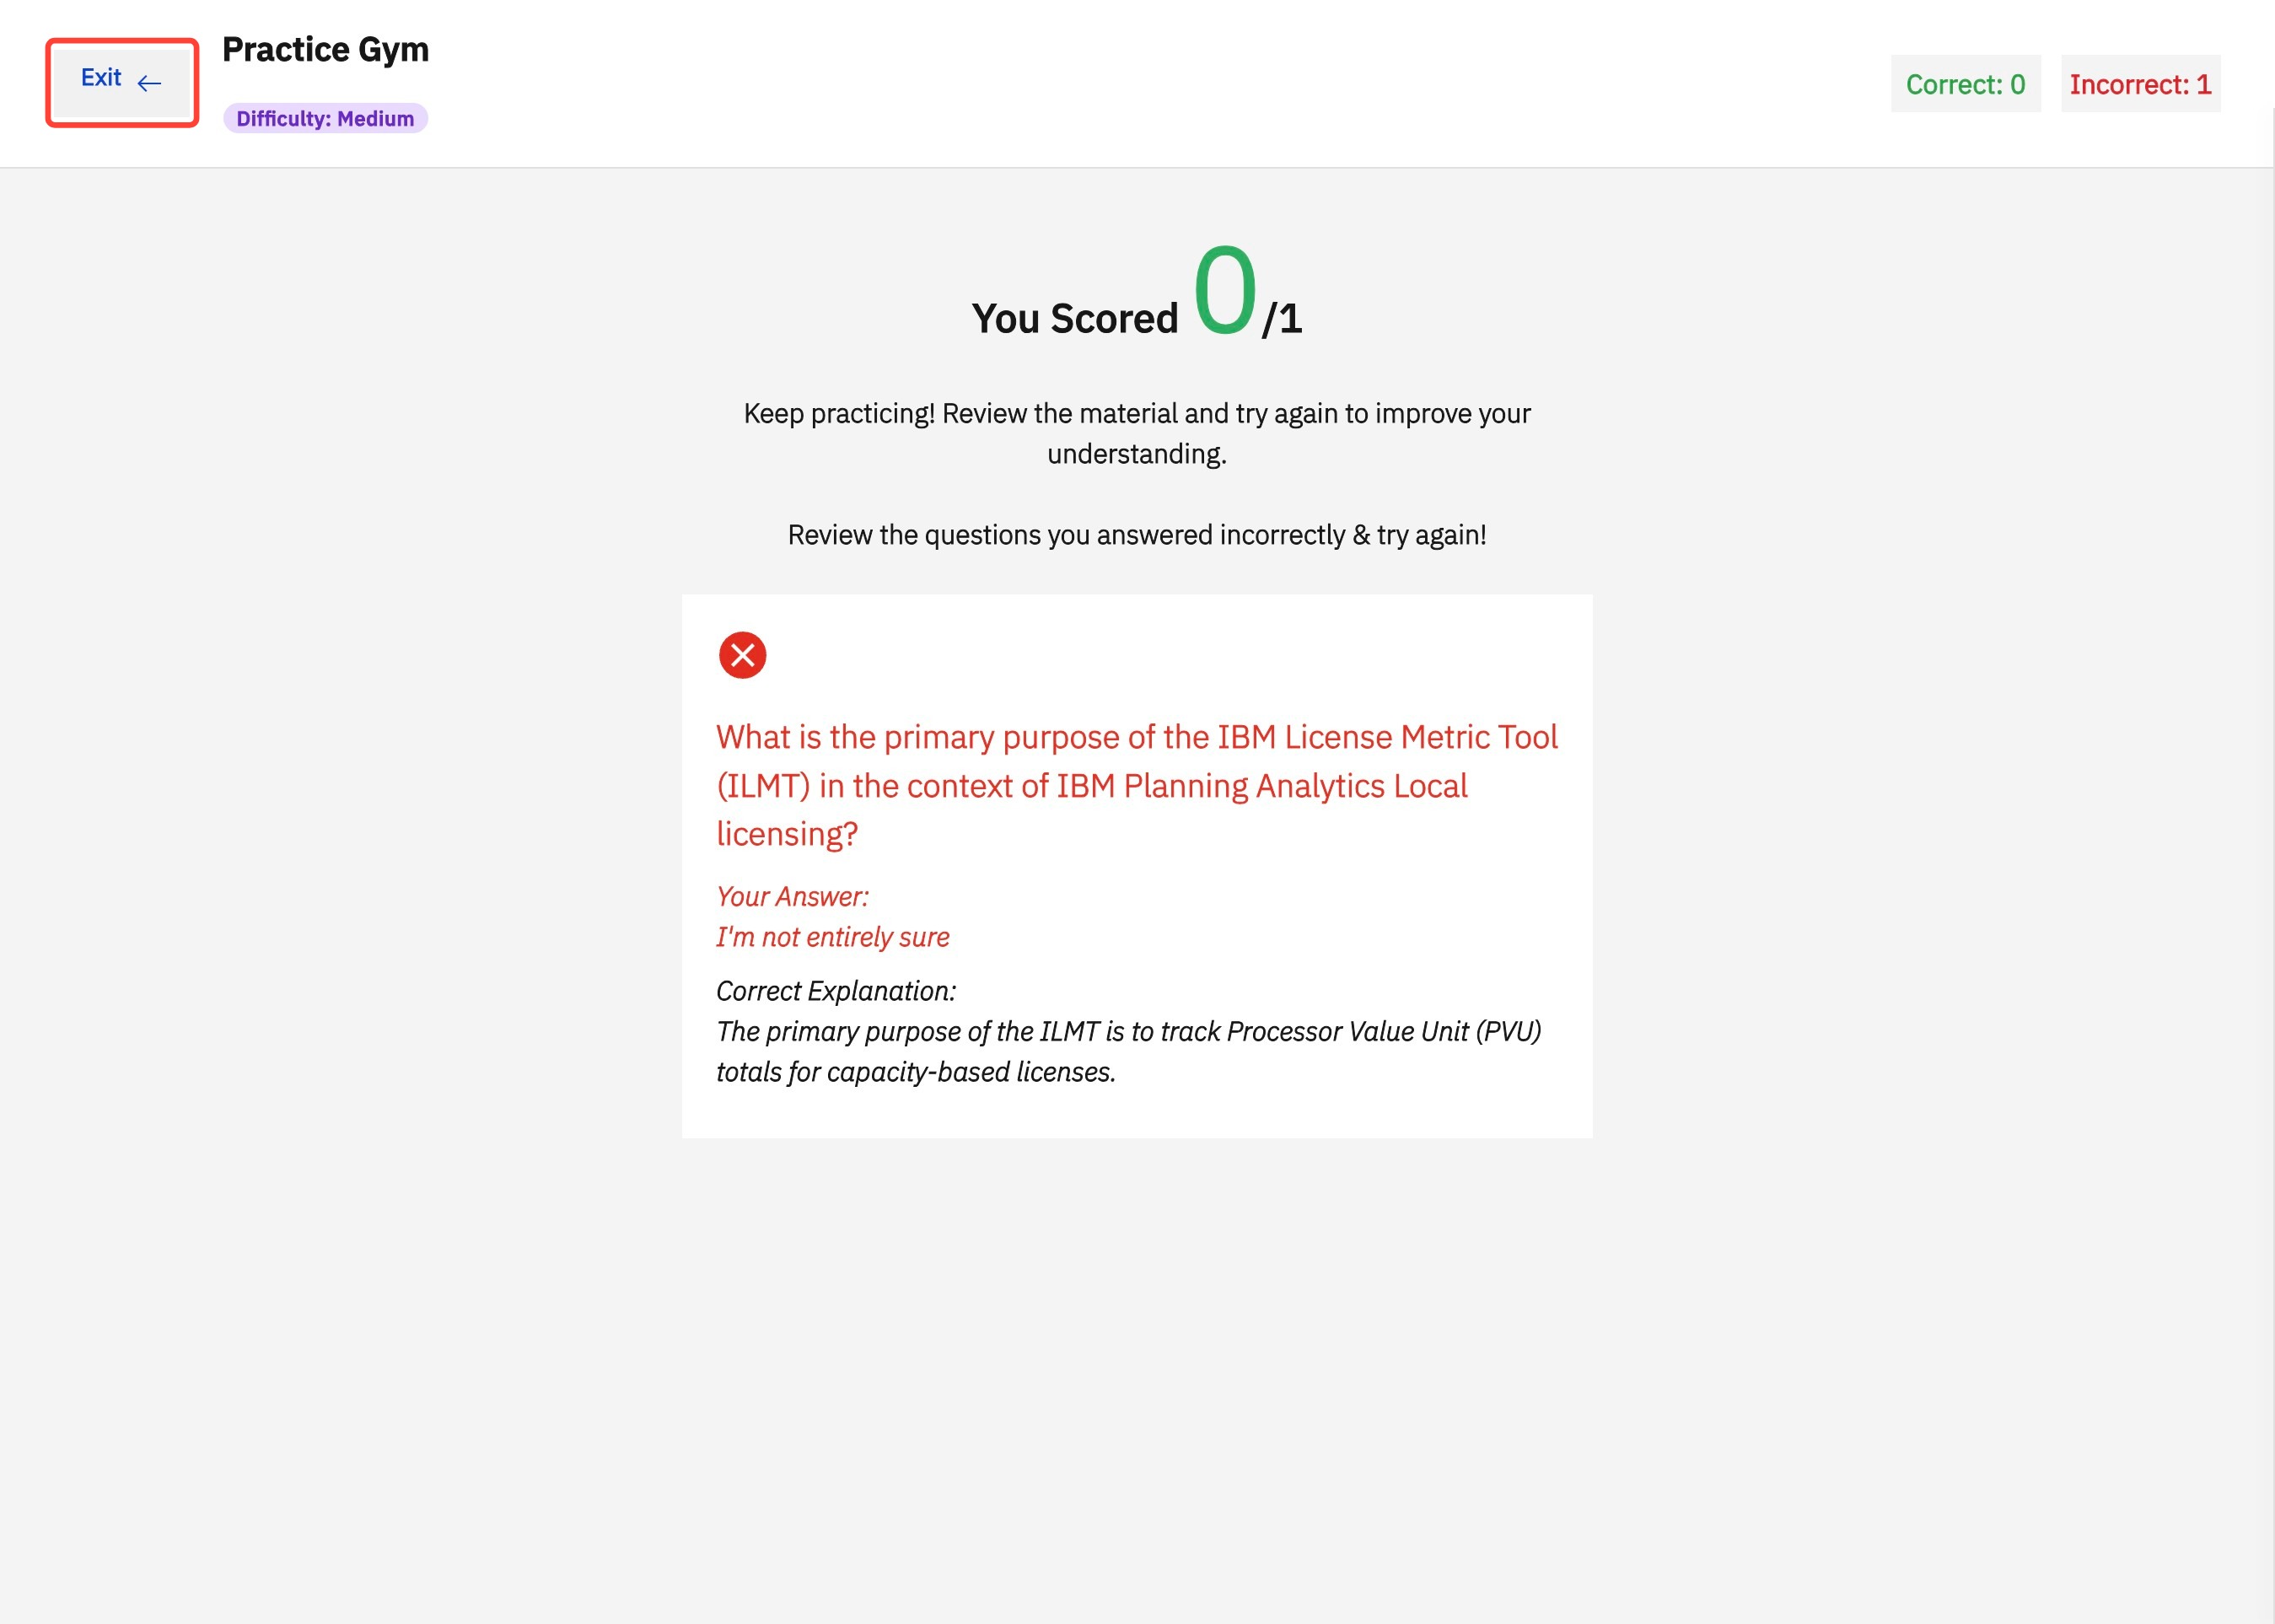
- At the end of your practice session, click End Quiz at the top right corner to view your score, along with detailed comparisons of incorrect answers with correct explanations.
- Click Exit at the top left corner to return to your session.
Visual Walkthrough: Getting Started on Practice Gym
1. In the Learning Studio panel, click Practice Gym.
2. Select your Difficulty level using the slider under Difficulty level (A) to select your difficulty, refine your focus area under Focus Areas (B), and click Start Quiz (C).
3. Complete the Pre-Flight Check to ensure your microphone access is allowed. Then, click Let's Go!
4. Answer the question to the best of your ability and click Submit Answer (A). Once you're done your session, click End Quiz (B).
Pro Tip: If you're in a loud environment where you microphone cannot pick up your words clearly, click Mute and type your response.
5. Review any questions you got wrong along with explanations to ensure you’re ready for your client meeting. Once reviewed, click Exit.
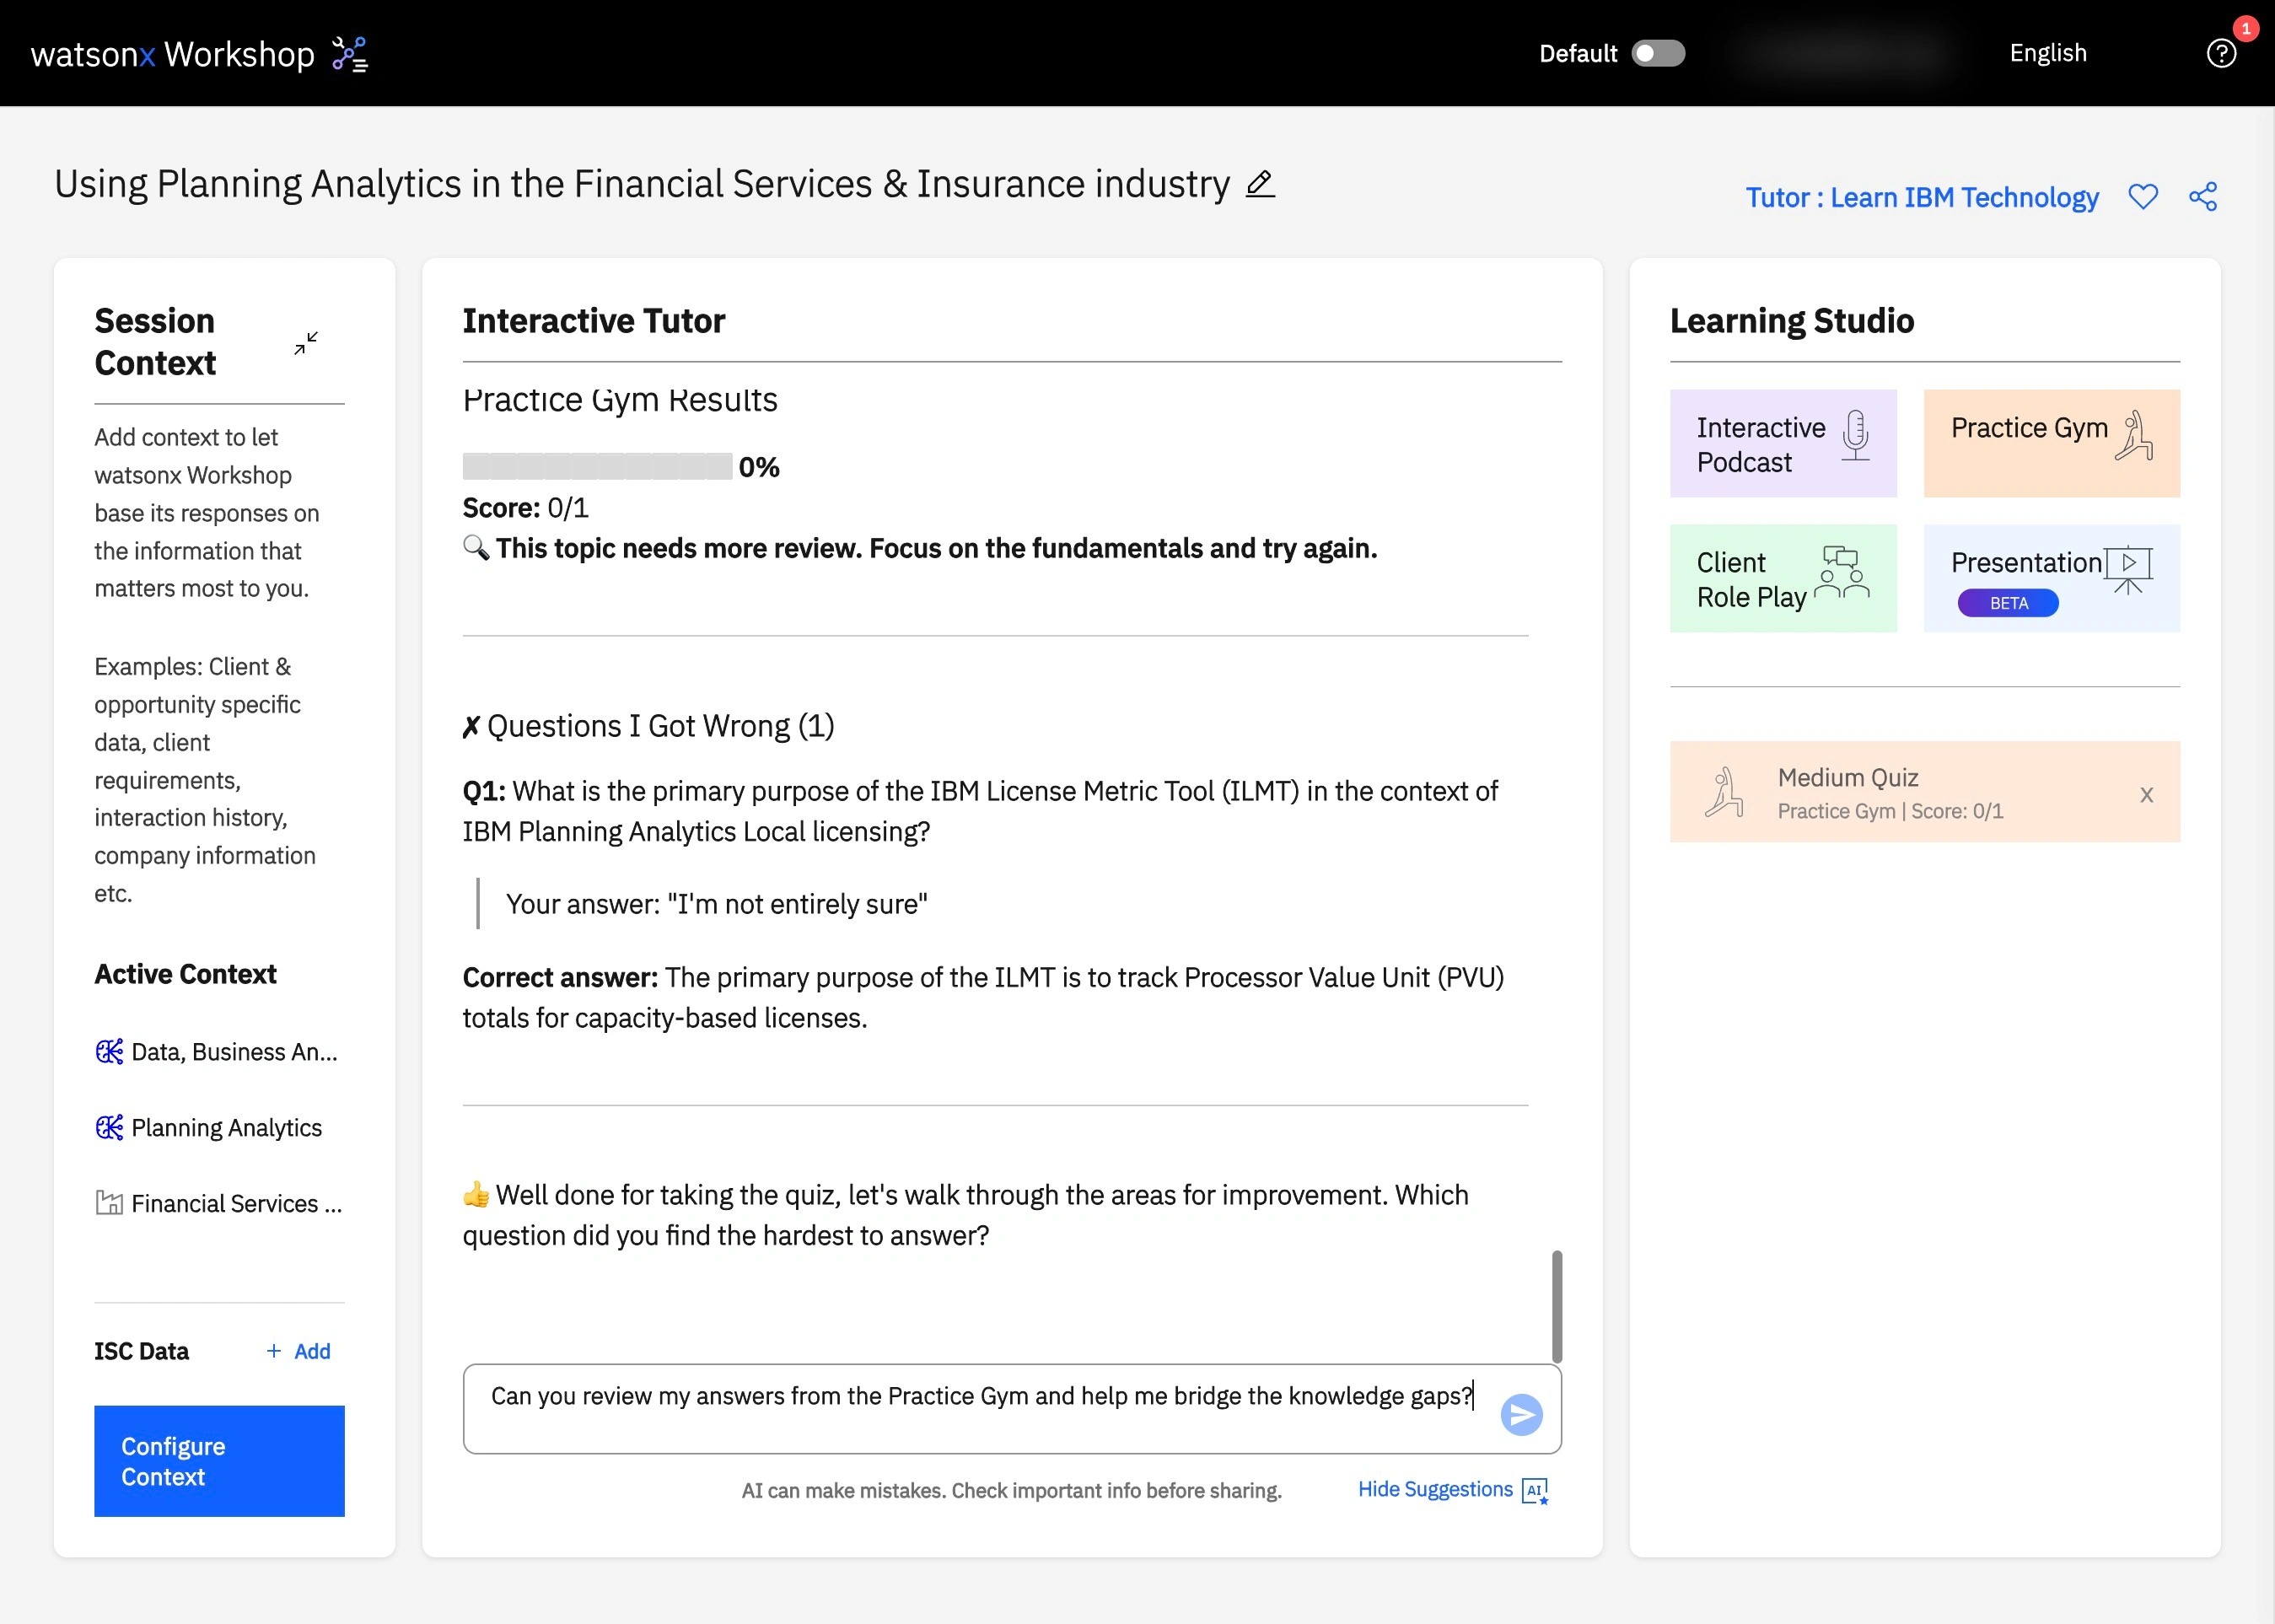
Pro Tip: After your Practice Gym session, get the Interactive Tutor to review incorrect answers and understand where you went wrong.
6. This concludes Getting Started on Practice Gym. You can leverage the Practice Gym ahead of a meeting to practice your product knowledge or demo.
Pro Tip: Mistakes are your best resource for learning. Use the Chat to review incorrect answers and understand where you went wrong. While using the Chat, simply select your practice session to access detailed feedback. Learning from these insights will help you become an expert in no time!
Example Use Case: Prepare for a product demo by practicing technical objection handling before your meeting.
Client Role Play
The Client Role Play tool simulates live conversations with realistic AI personas, helping you rehearse cold calls, discovery sessions, and solution presentations.
Key Features
- Choose from multiple preconfigured personas or a custom client persona
- Pick a ready-made persona by difficulty or adjust personality traits to create a client that feels real
- Receive instant feedback and guidance based on your performance
Getting Started
Client Role Play offers multiple modes to support different practice needs. You can practice pre‑configured scenarios, such as Cold Call and Discovery Call or create your own experience using Custom Scenario. Choose the option that fits your goal and continue with the corresponding steps.
Practice Your Cold Call / Discovery Call
- In the Studio on the right side of your watsonx Workshop session, click Client Role Play.
- Select your preferred mode, then click Create Session at the bottom-right to begin.
- Currently, Cold Call, Discovery Call, and Custom Scenario are offered. More options are coming soon, so stay tuned for updates!
- You will be presented with several options to customize your Client Role Play: either choose a pre-made personality you’ll practice engaging in All Personas or create your own in My Personas.
- To design a custom personality to practice with, navigate to My Personas, and click Create on the top right.
- Complete the following fields: Name, Title, Company, Company Size, Description, and Voice Gender.
- Navigate to Personality Traits to customize the personality. Either choose a preset personalities (Friendly, Skeptical, or Frustrated) or design the personality.
- To design the personality, adjust the corresponding circle icon towards the center or away in the interactive radar chart for each of the traits: Openness, Receptiveness, Risk Tolerance, Personability, Tech Savvy, Price Flexibility, Trust Building, and Patience. Moving the icon toward the center decreases the trait, while dragging it outward increases it.
- Once satisfied with the client personality, click Save Persona in the bottom right corner.
- Click Next in the bottom-right corner and review the Scoring System. Click the pencil icon if you want to make changes to the criterions.
- Click Start Practice to start the Client Role Play.
- If prompted, complete the Pre-flight Check for your microphone and camera, then click Let’s Go! to start.
- To prepare for the Client Role Play, review the Scenario details. These include the scenario description, company overview, key insights, and more. Once ready, click Next: Review Objectives at the bottom right of the screen to continue.
- The Objectives outline the key goals to focus on during the Client Role Play. Once you’re ready to begin, click Start Call Session.
- Questions will appear as text along with audio voiceover, which you can pause at any time using the pause button above the question.
- You can respond in two ways:
- Manual Mode (Default): Speak your answer into your microphone and edit the transcription in the textbox if needed. Alternatively, you can type your response directly. Click Submit to confirm your answer and move to the next question.
- Auto-Sense Mode: Click Auto-sense at the bottom of the screen. Speak your response into your microphone after a question has been given. The system will detect when you have answered and automatically proceed.
- To finish your roleplay, click End Call below the video feed to receive feedback on strengths and areas for improvement.
- After reviewing, click Return to Session to exit.
Pro tip: Not sure how to apply your feedback? Try asking the Chat! Discuss this feedback with the Chat to explore strategies for improvement.
For a visual step-by-step tutorial, check out this guide.
Build Your Custom Scenario
- In the Studio on the right side of your watsonx Workshop session, click Client Role Play.
- Select Custom Scenario, then click Conversation.
- Currently, Cold Call, Discovery Call, and Custom Scenario are offered. More options are coming soon, so stay tuned for updates!
- In the Describe your practice scenario box, provide a description of the call scenario you want to prepare for. These descriptions can be broad and general or include specific details about the type of client you’ll be speaking with.
- Examples of possible custom scenario descriptions for IBM Power Virtual Server calls:
- Focus on discussing a client’s current on‑prem IBM Power environment and evaluating whether IBM Power Virtual Server would meet their performance and reliability needs.
- The call should center on migrating a client’s AIX-based SAP workload to IBM Power Virtual Server in the Dallas region, covering required sizing, storage performance targets, network connectivity, compliance constraints, and a projected cutover timeline.
- Examples of possible custom scenario descriptions for IBM Power Virtual Server calls:
- Click Next at the bottom right corner to generate your custom scenario.
- Then Review Your Practice Scenario where detailed Scenario, Success Criteria, and Grading Criteria is provided. You can edit any of them as follows:
- Click Edit all fields at the top right corner.
- Modify the scenario or criteria directly in the textboxes.
- Delete unwanted criteria using the trash icon beside each item.
- Add new criteria by scrolling to the bottom of the section, clicking Add Success Criteria/Add Grading Criteria, and entering your text.
- When finished, click Done Editing at the top right corner.
- Click Continue at the bottom right corner to begin the Client Role Play.
- The Custom Scenario will proceed just like the Client Role Play, with feedback at the end of the session.
For a visual step-by-step tutorial, check out this guide.

Example Use Case: Practice a cold call with a simulated CIO to refine your opening pitch and objection handling.
Presentation
The Presentation transforms your session into a comprehensive PowerPoint or video tailored to meet your exact needs.
Key Features
- Customize length and focus
- Choose your delivery format
- Modify the presentation file name
- Downloadable and shareable internally
Getting Started
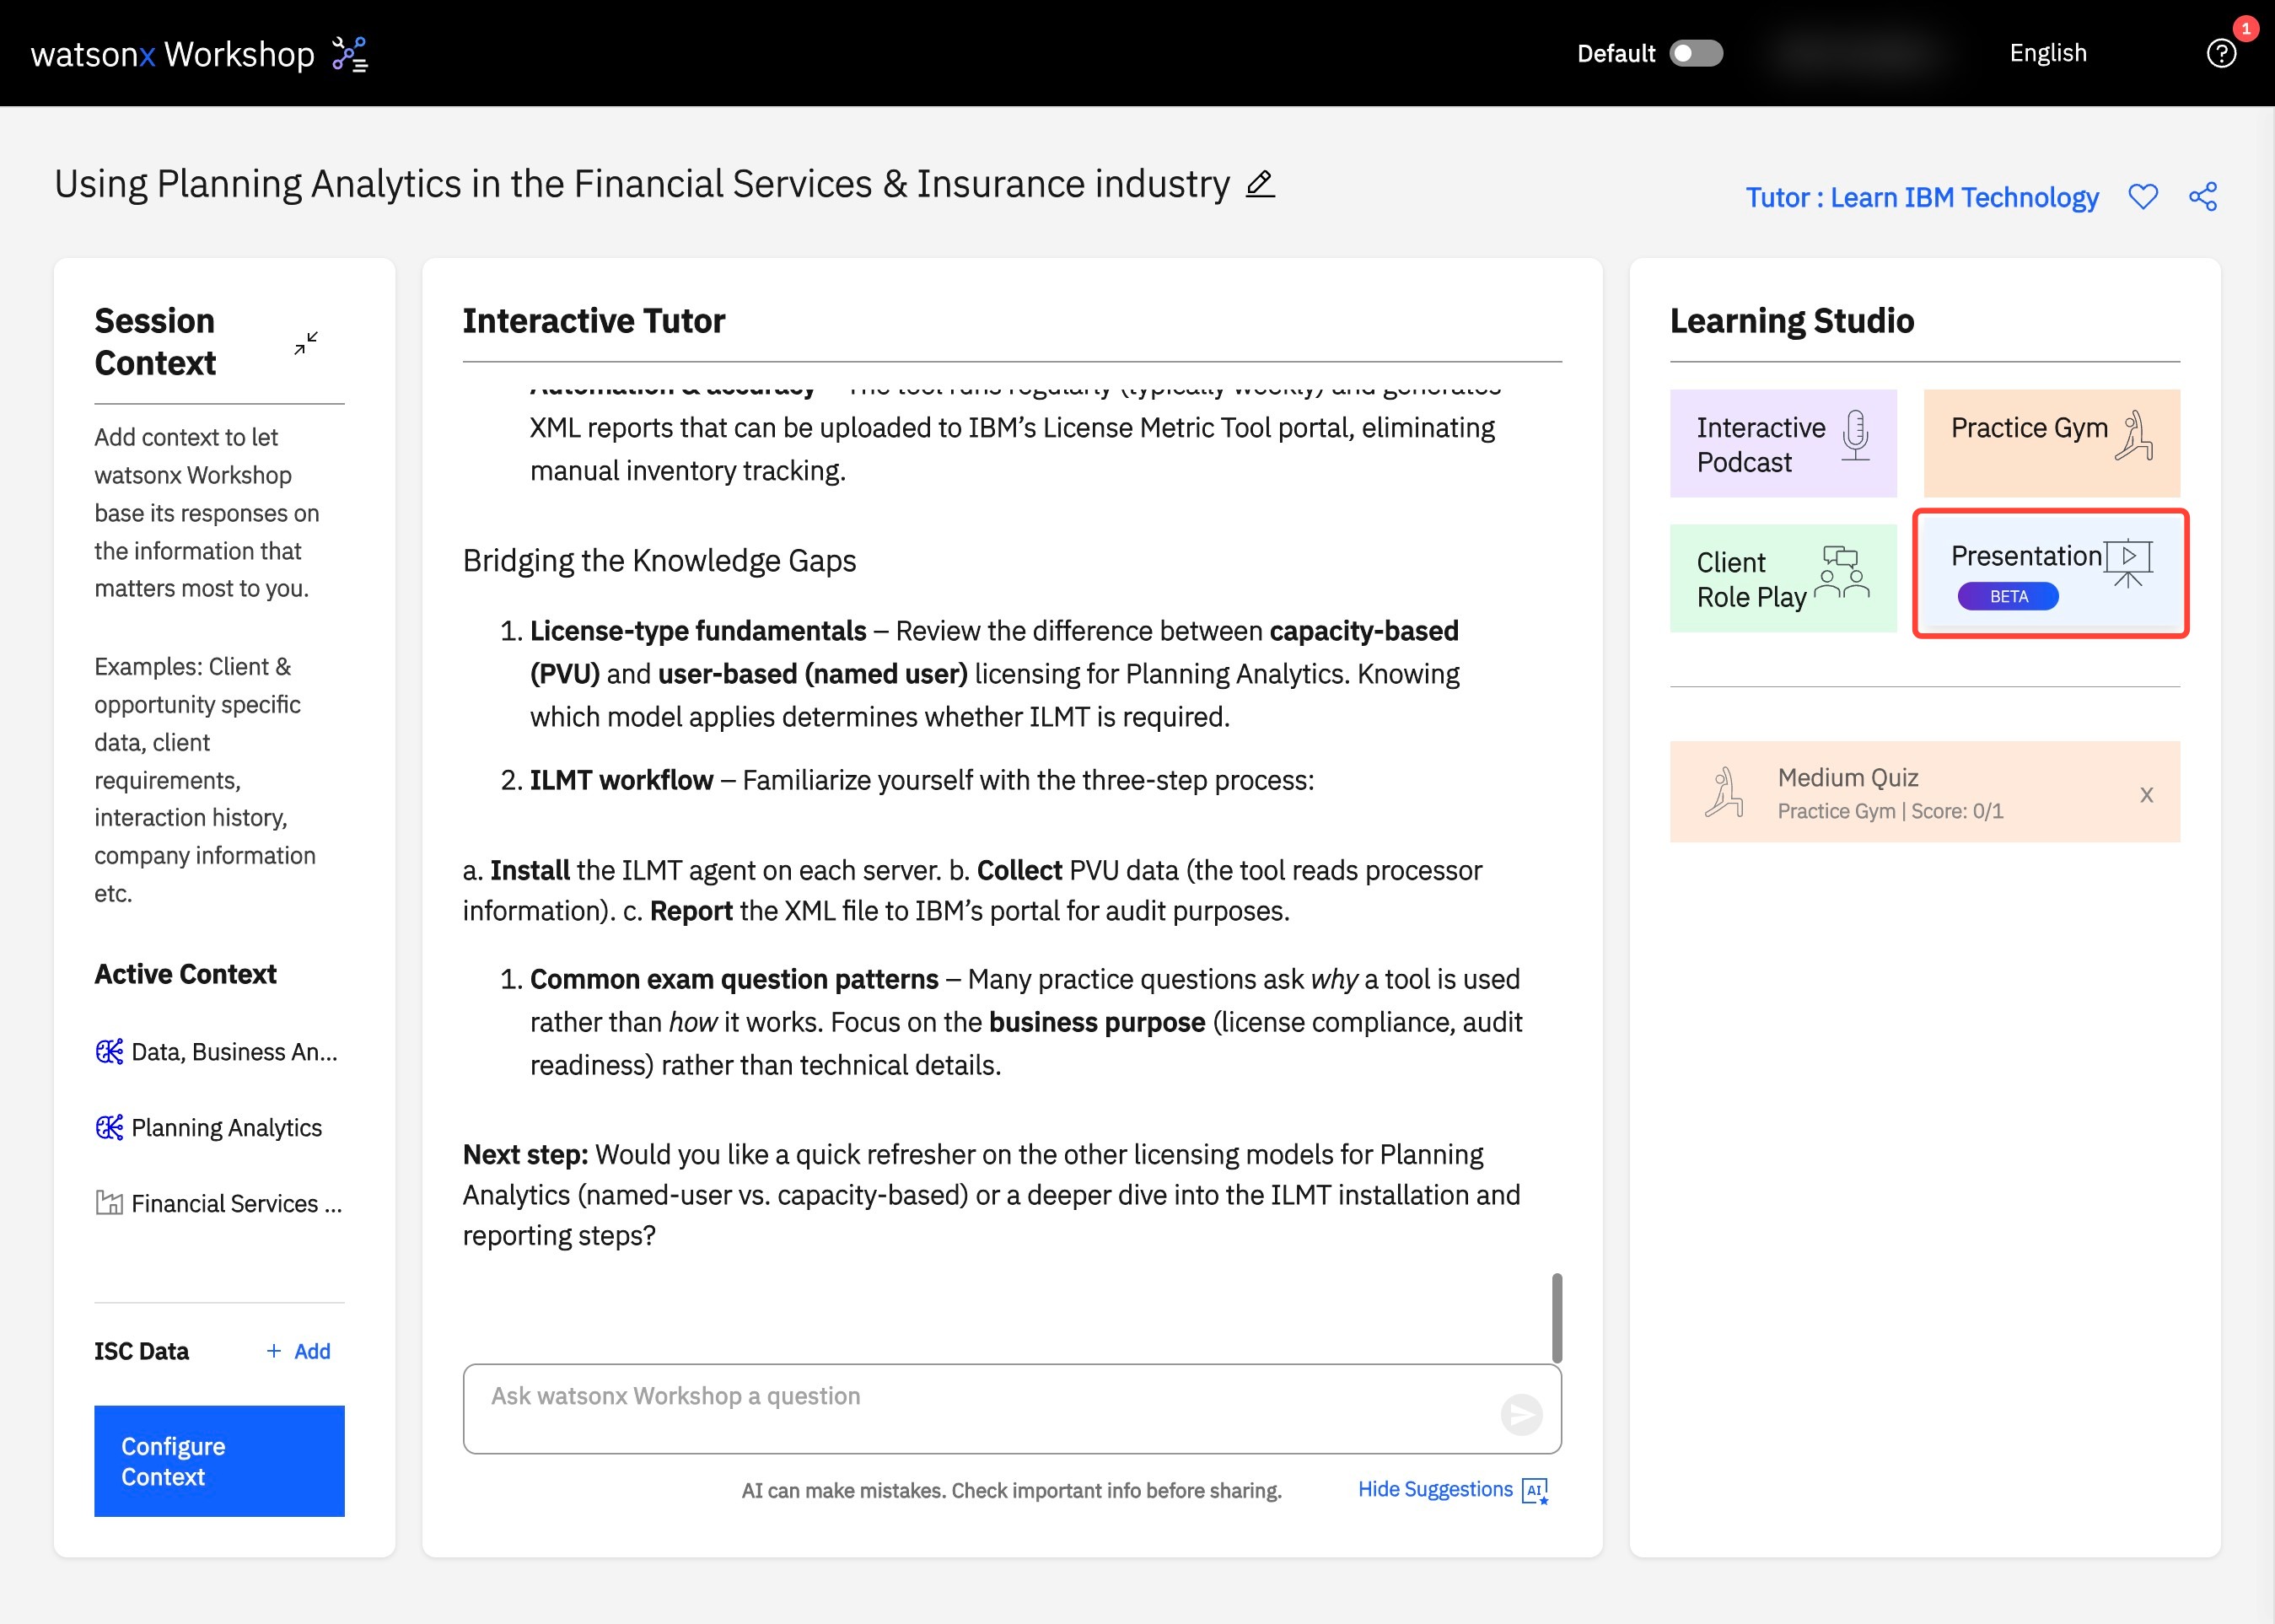
- During any watsonx Workshop session, in the right panel, under Studio, click on Presentation to open the Generate Presentation menu.
- Select between Short Explainer and Full Presentation which adjusts the length of the video. Short Explainer videos will focus on a couple key topics in great detail. While Full Presentation videos follow a storyline perfect for client meetings.
- You can choose to create between Slides or Video. The Slides option delivers a fully tailored PowerPoint aligned to your needs, while the Video option transforms the generated slides into a narrated walkthrough. If you start with Slides, you can generate a video at any time.
- Rename your presentation under Presentation Title to keep your .pptx files organized.
- Under the What should the presentation focus on, configure tailor key topics—such as business values, use cases, industry focus, and more—to suit your needs.
- Click Generate Presentation. In just a few minutes, your presentation will be ready. You will have the option to download either your presentation or video.
Example Use Case: Generate a presentation from your configuration to use as an outline for client slide decks and watch the video on the go to practice for your client meeting.
Visual Walkthrough: Getting Started on Presentation
1. In your session, navigate to Learning Studio and click Presentation to generate downloadable slides or videos.
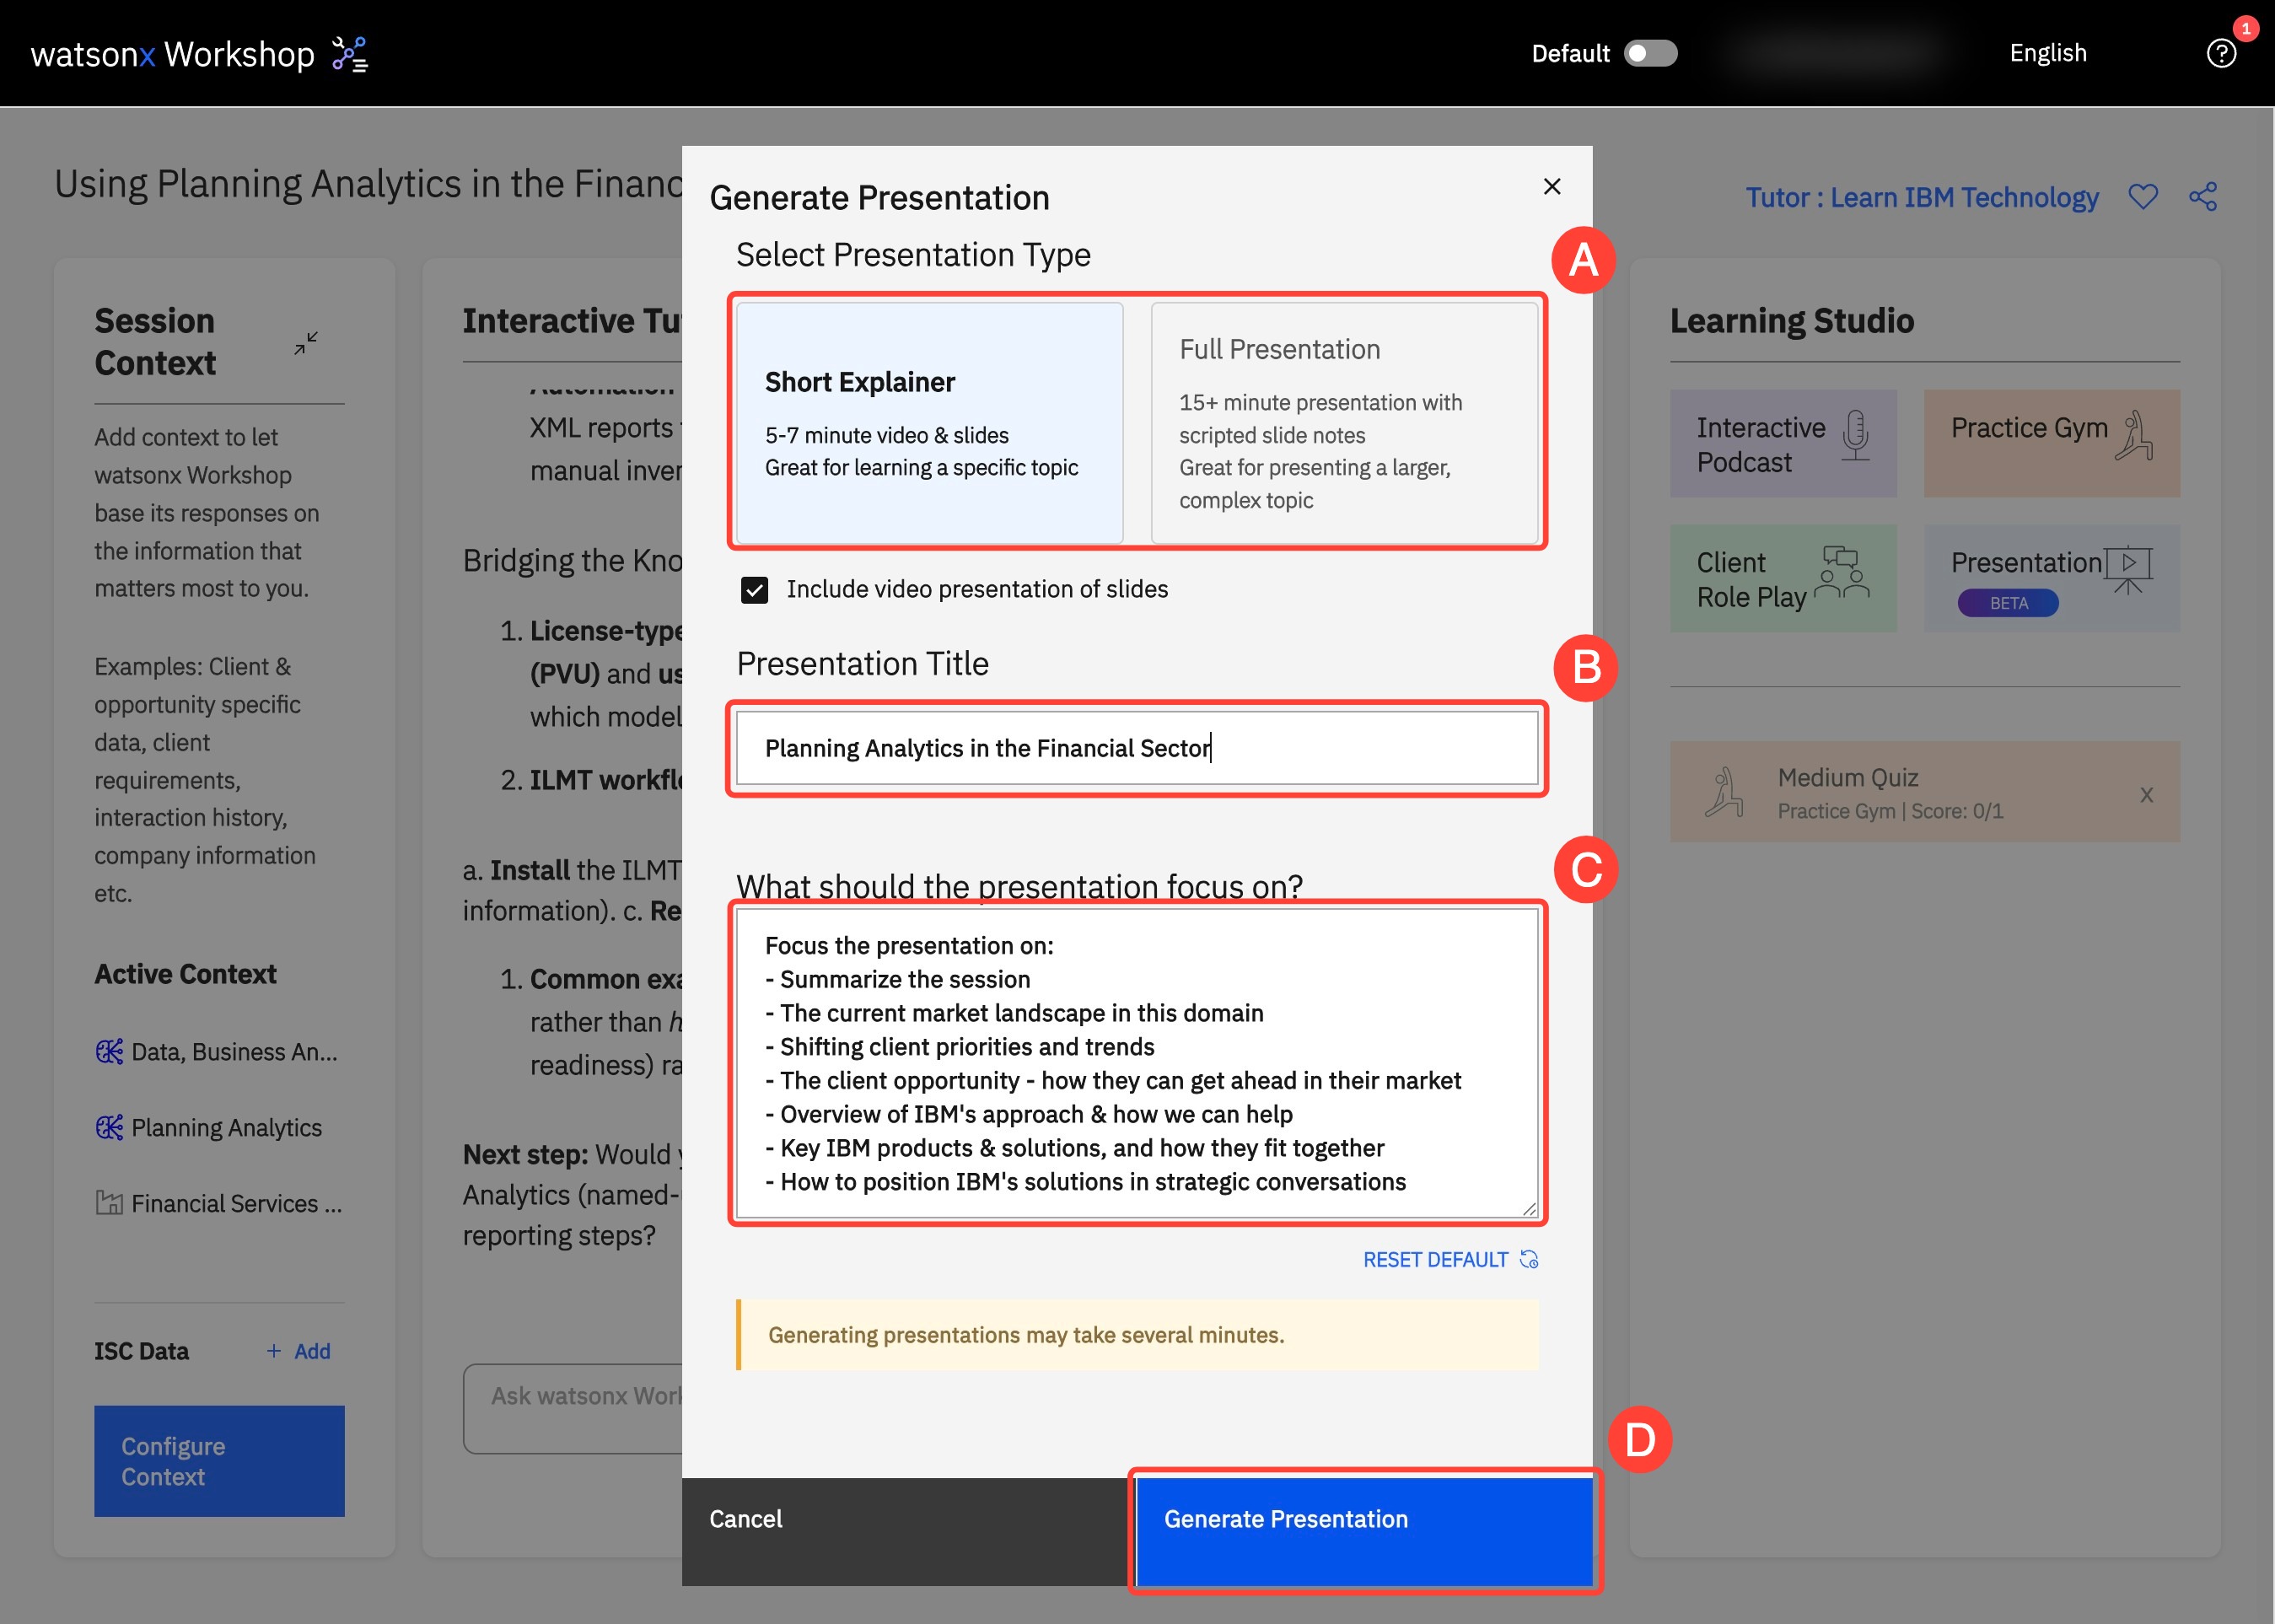
2. You can alter the length under Select Presentation Type (A). To keep your session organized, navigate to Presentation Title (B) and add a title. Refine your generated presentation by changing the prompt under What should the presentation focus on? (C). For example prompts, view Play #4 in the Playbook. Once completed, click Generate Presentation (D).
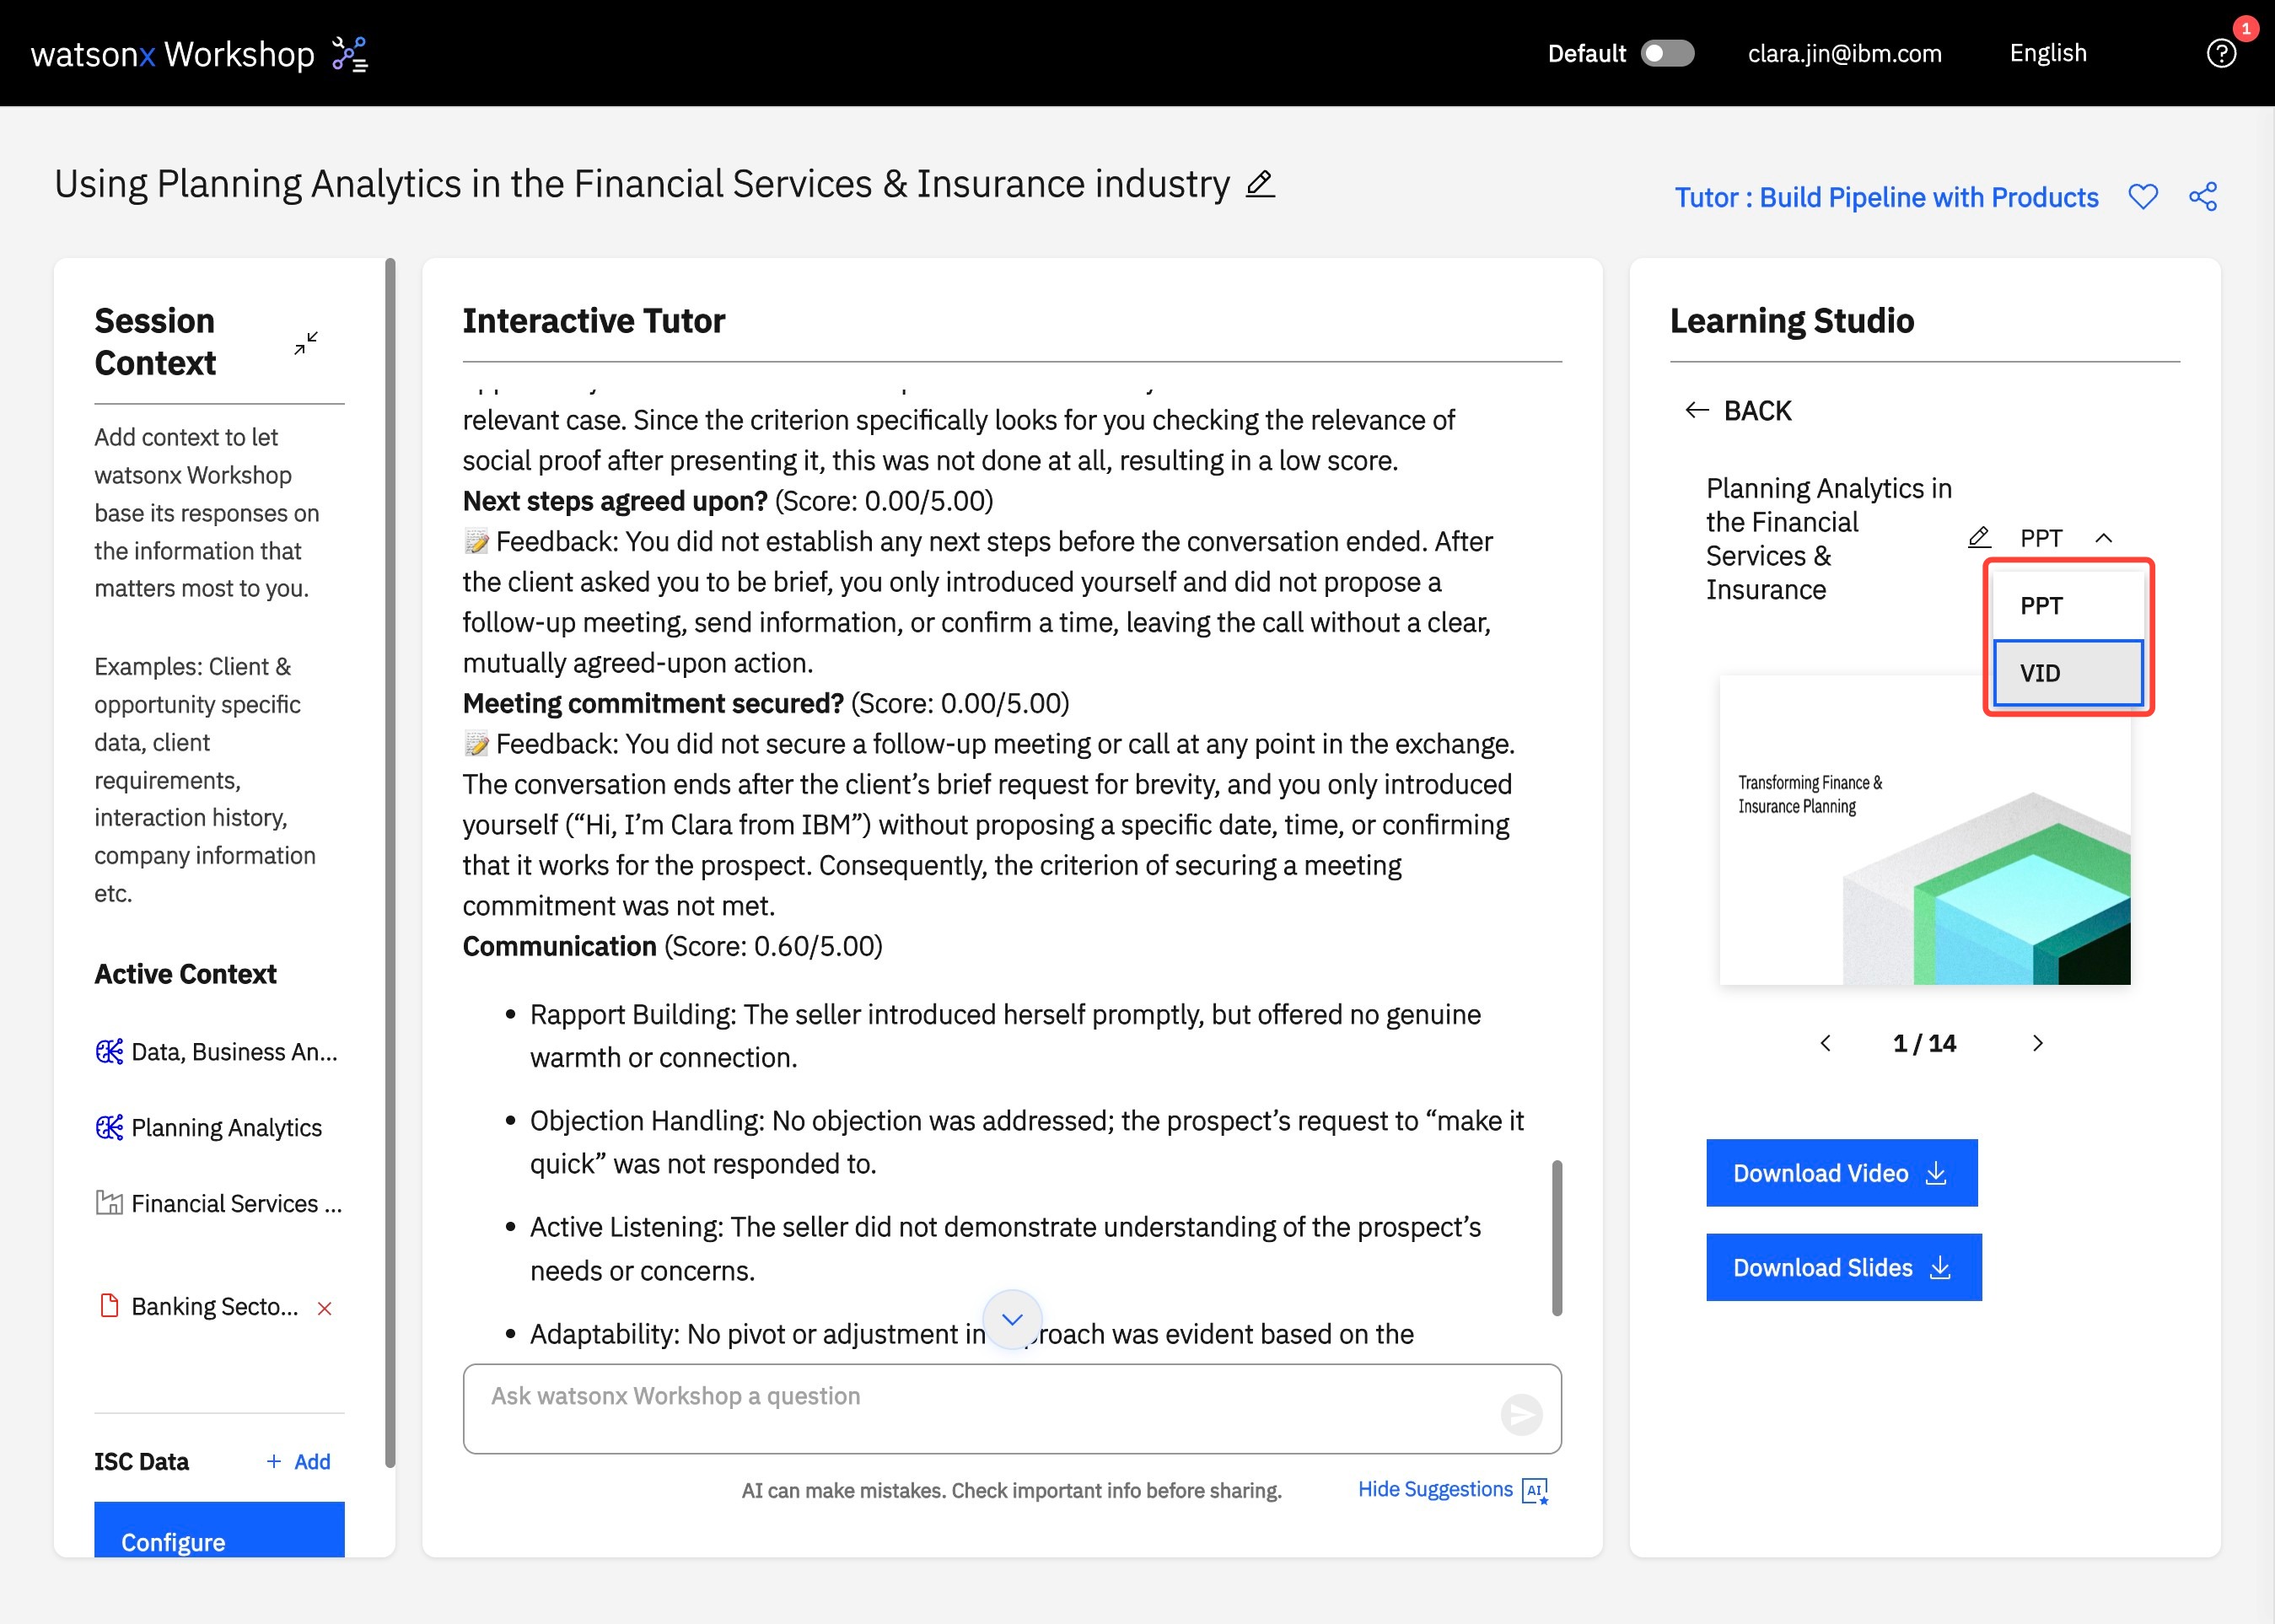
3. Under Learning Studio, find your newly generated presentation.

4. Click on the dropdown next to the Presentation title to preview the powerpoint or video.
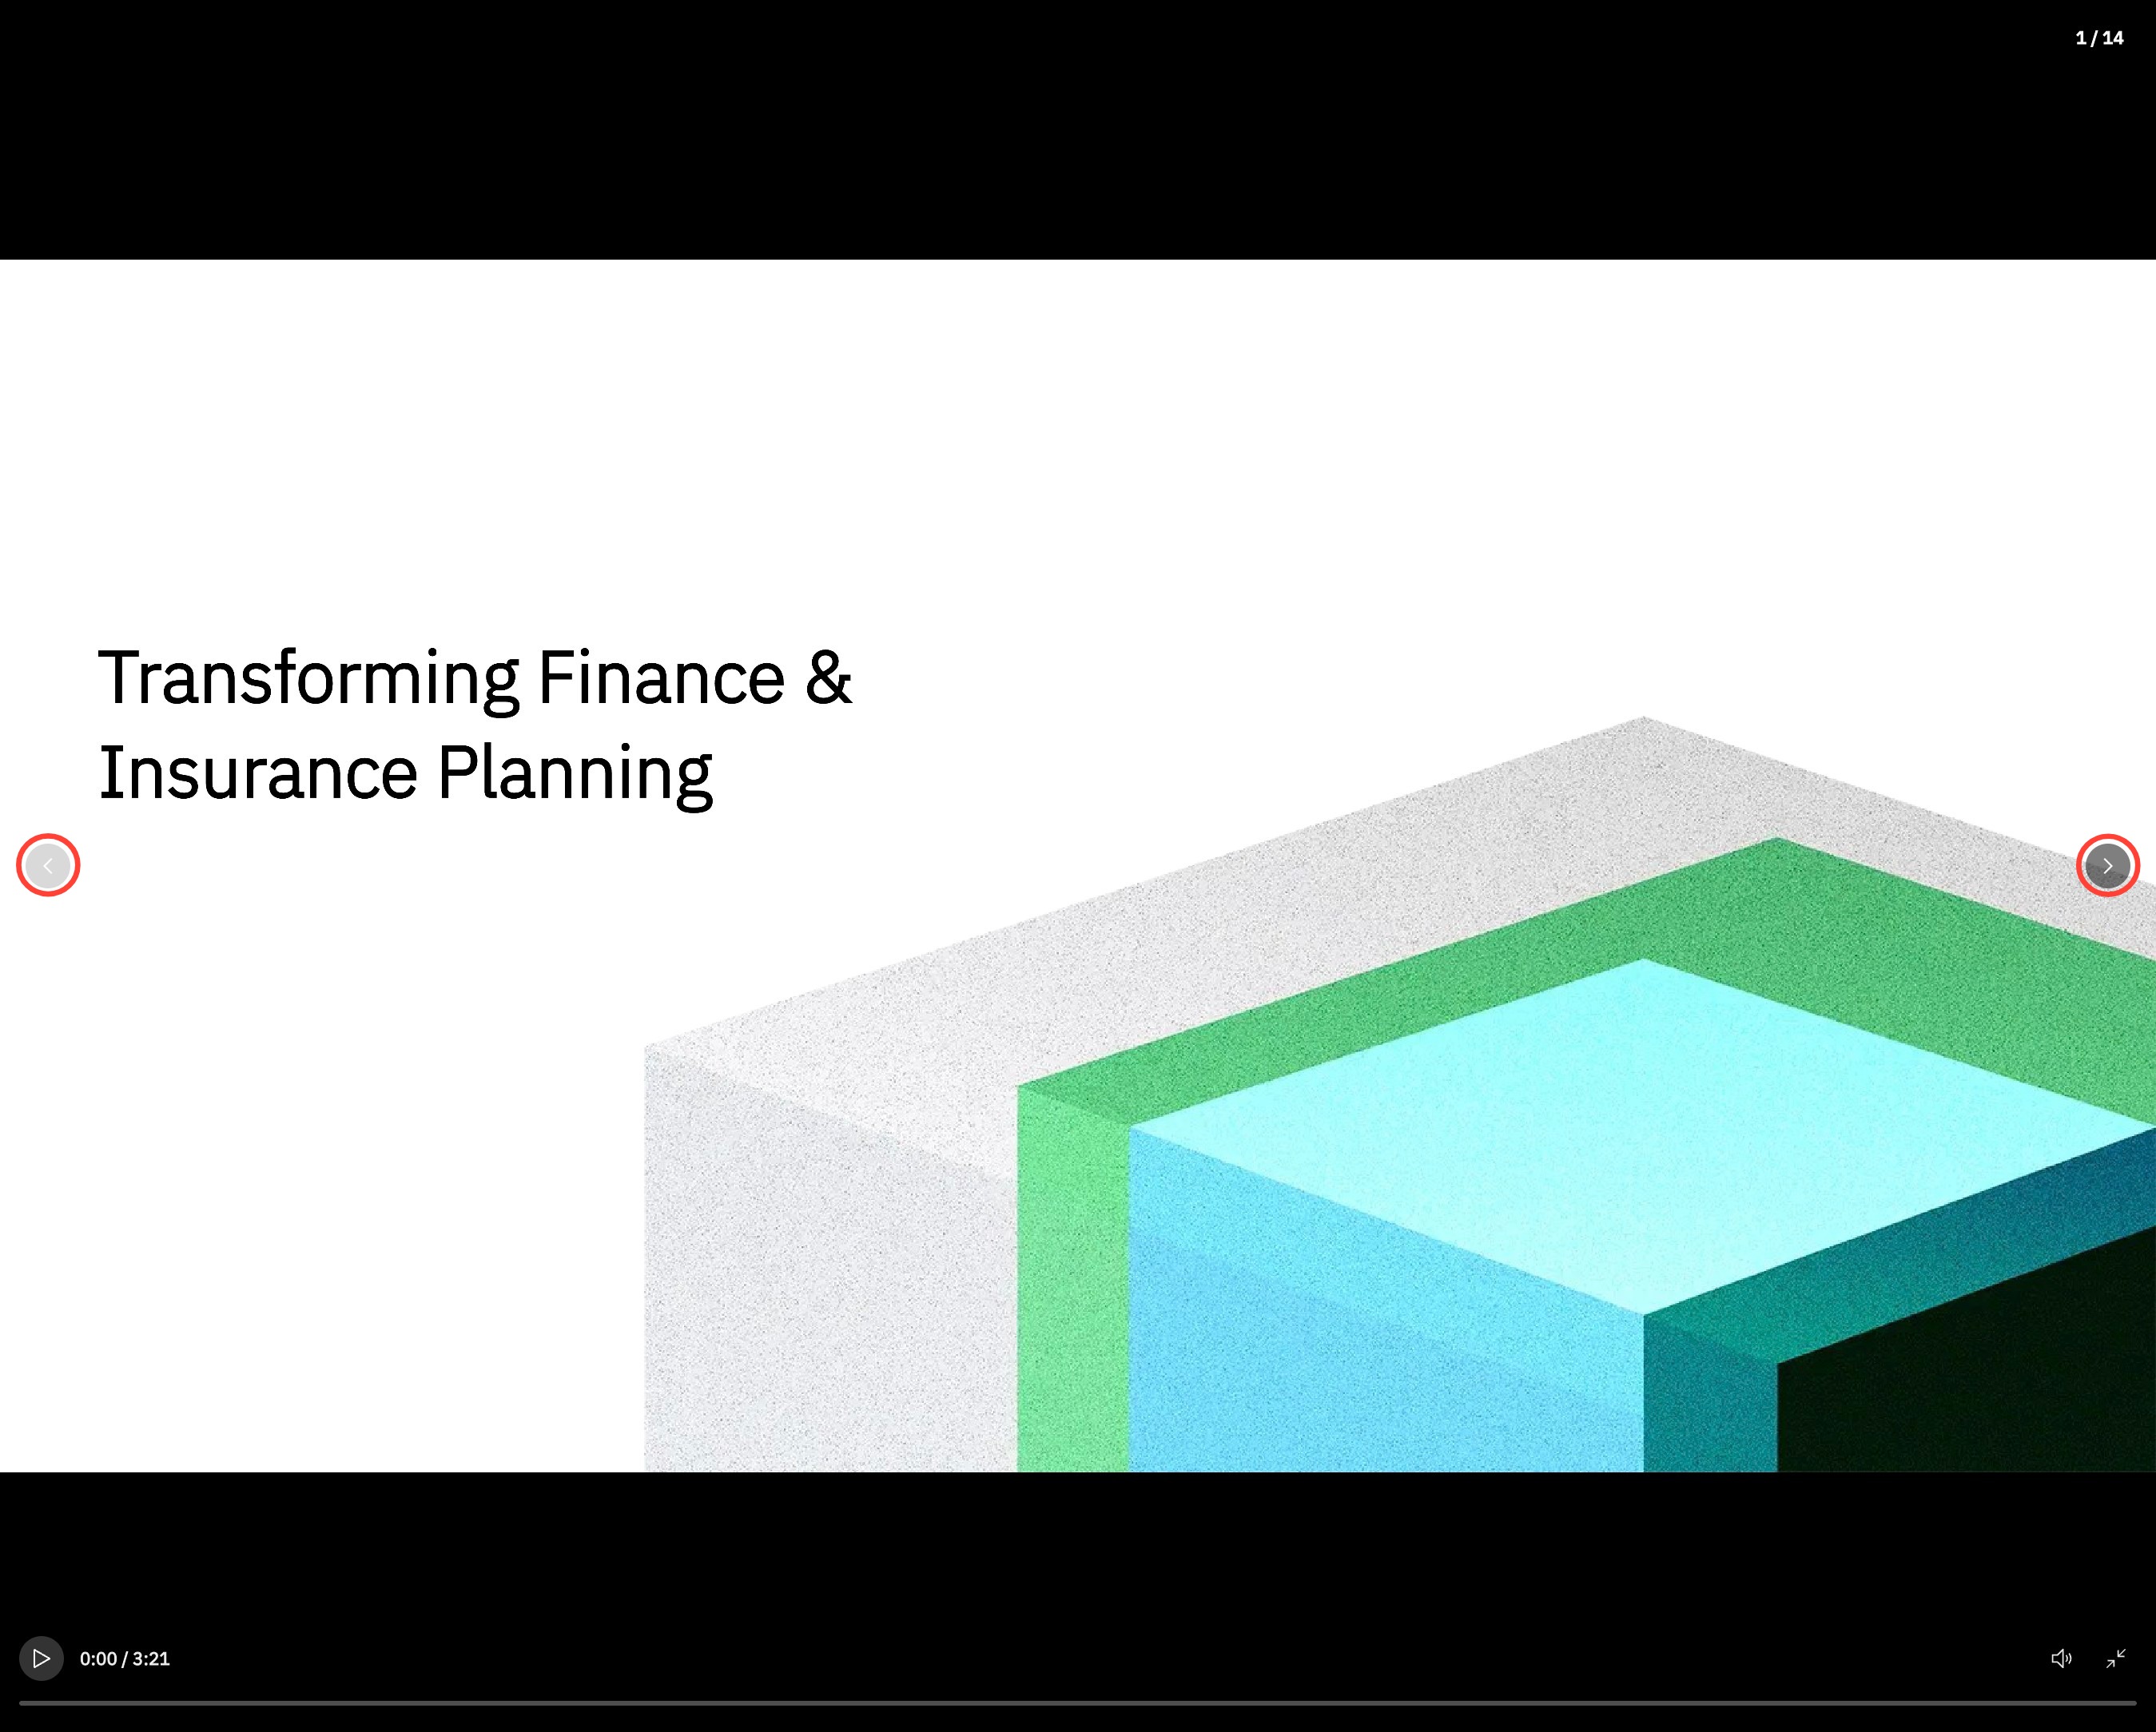
5. In the video option, to preview your video better, click on the Maximize button.
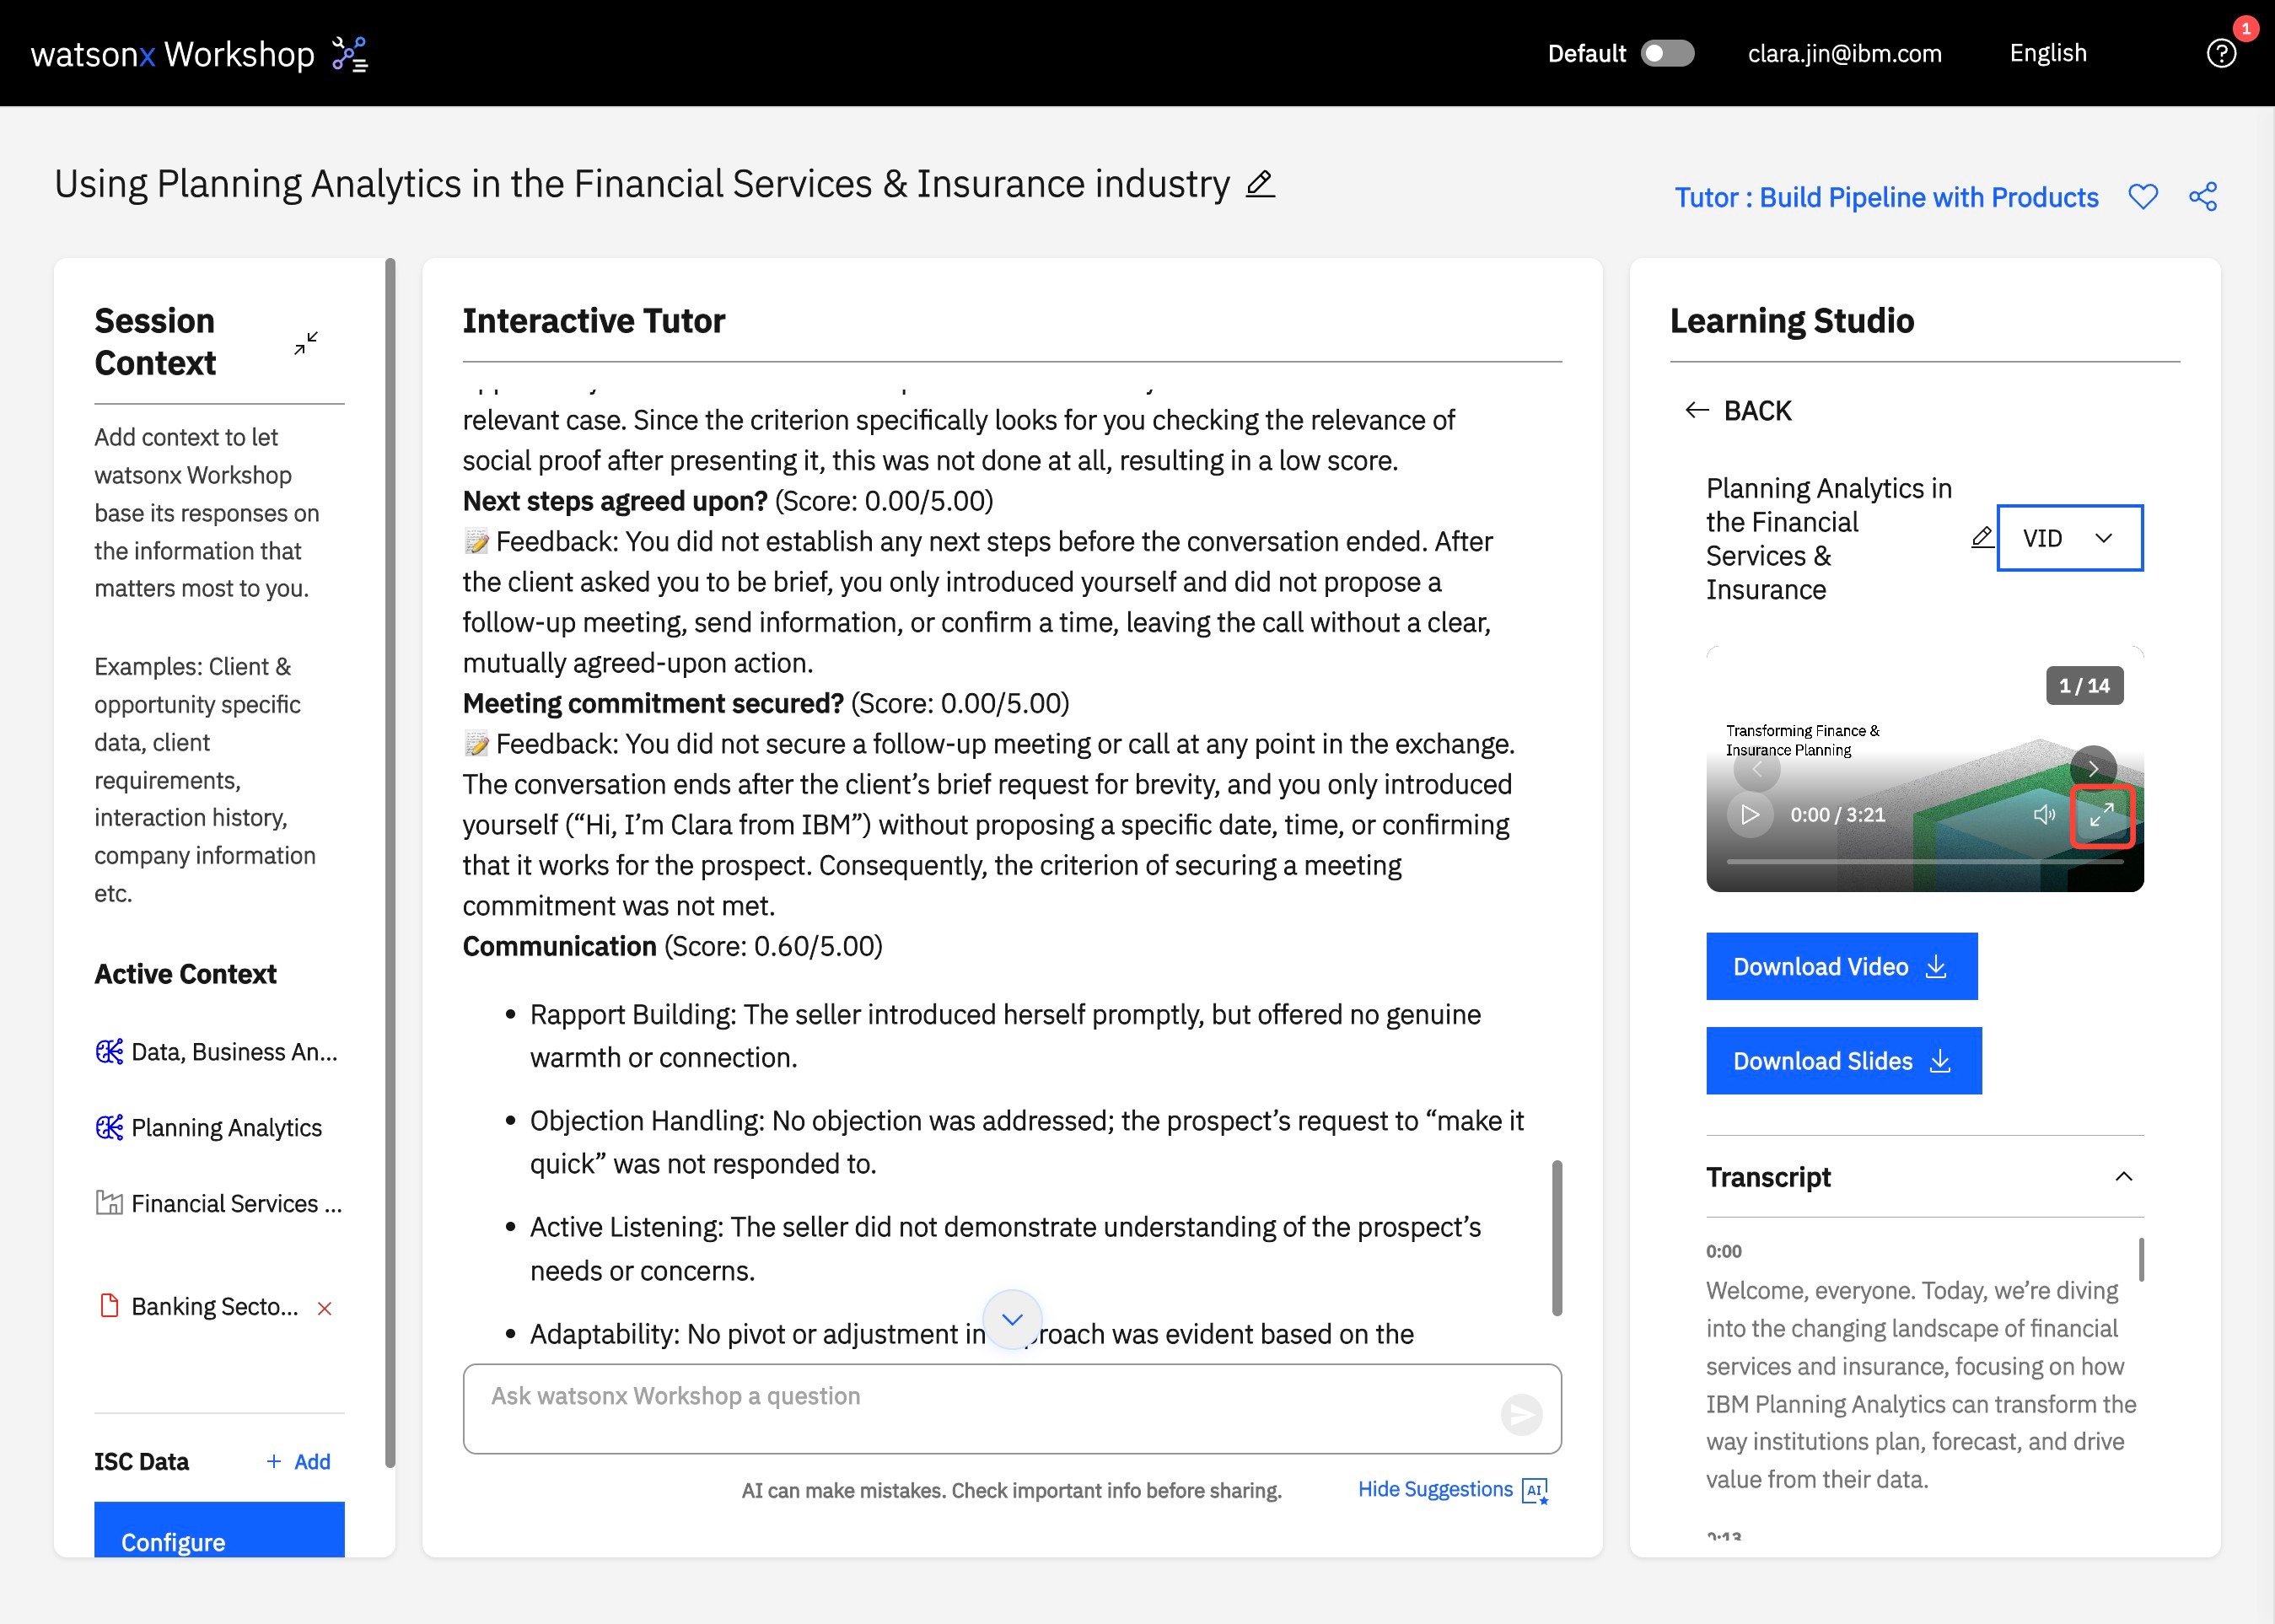
6. Click on the arrows to preview the powerpoint and play the video at your desired spot.
7. Click Download Video (A) or Download Slides (B) to save a copy of the generated video or slides to your device.

