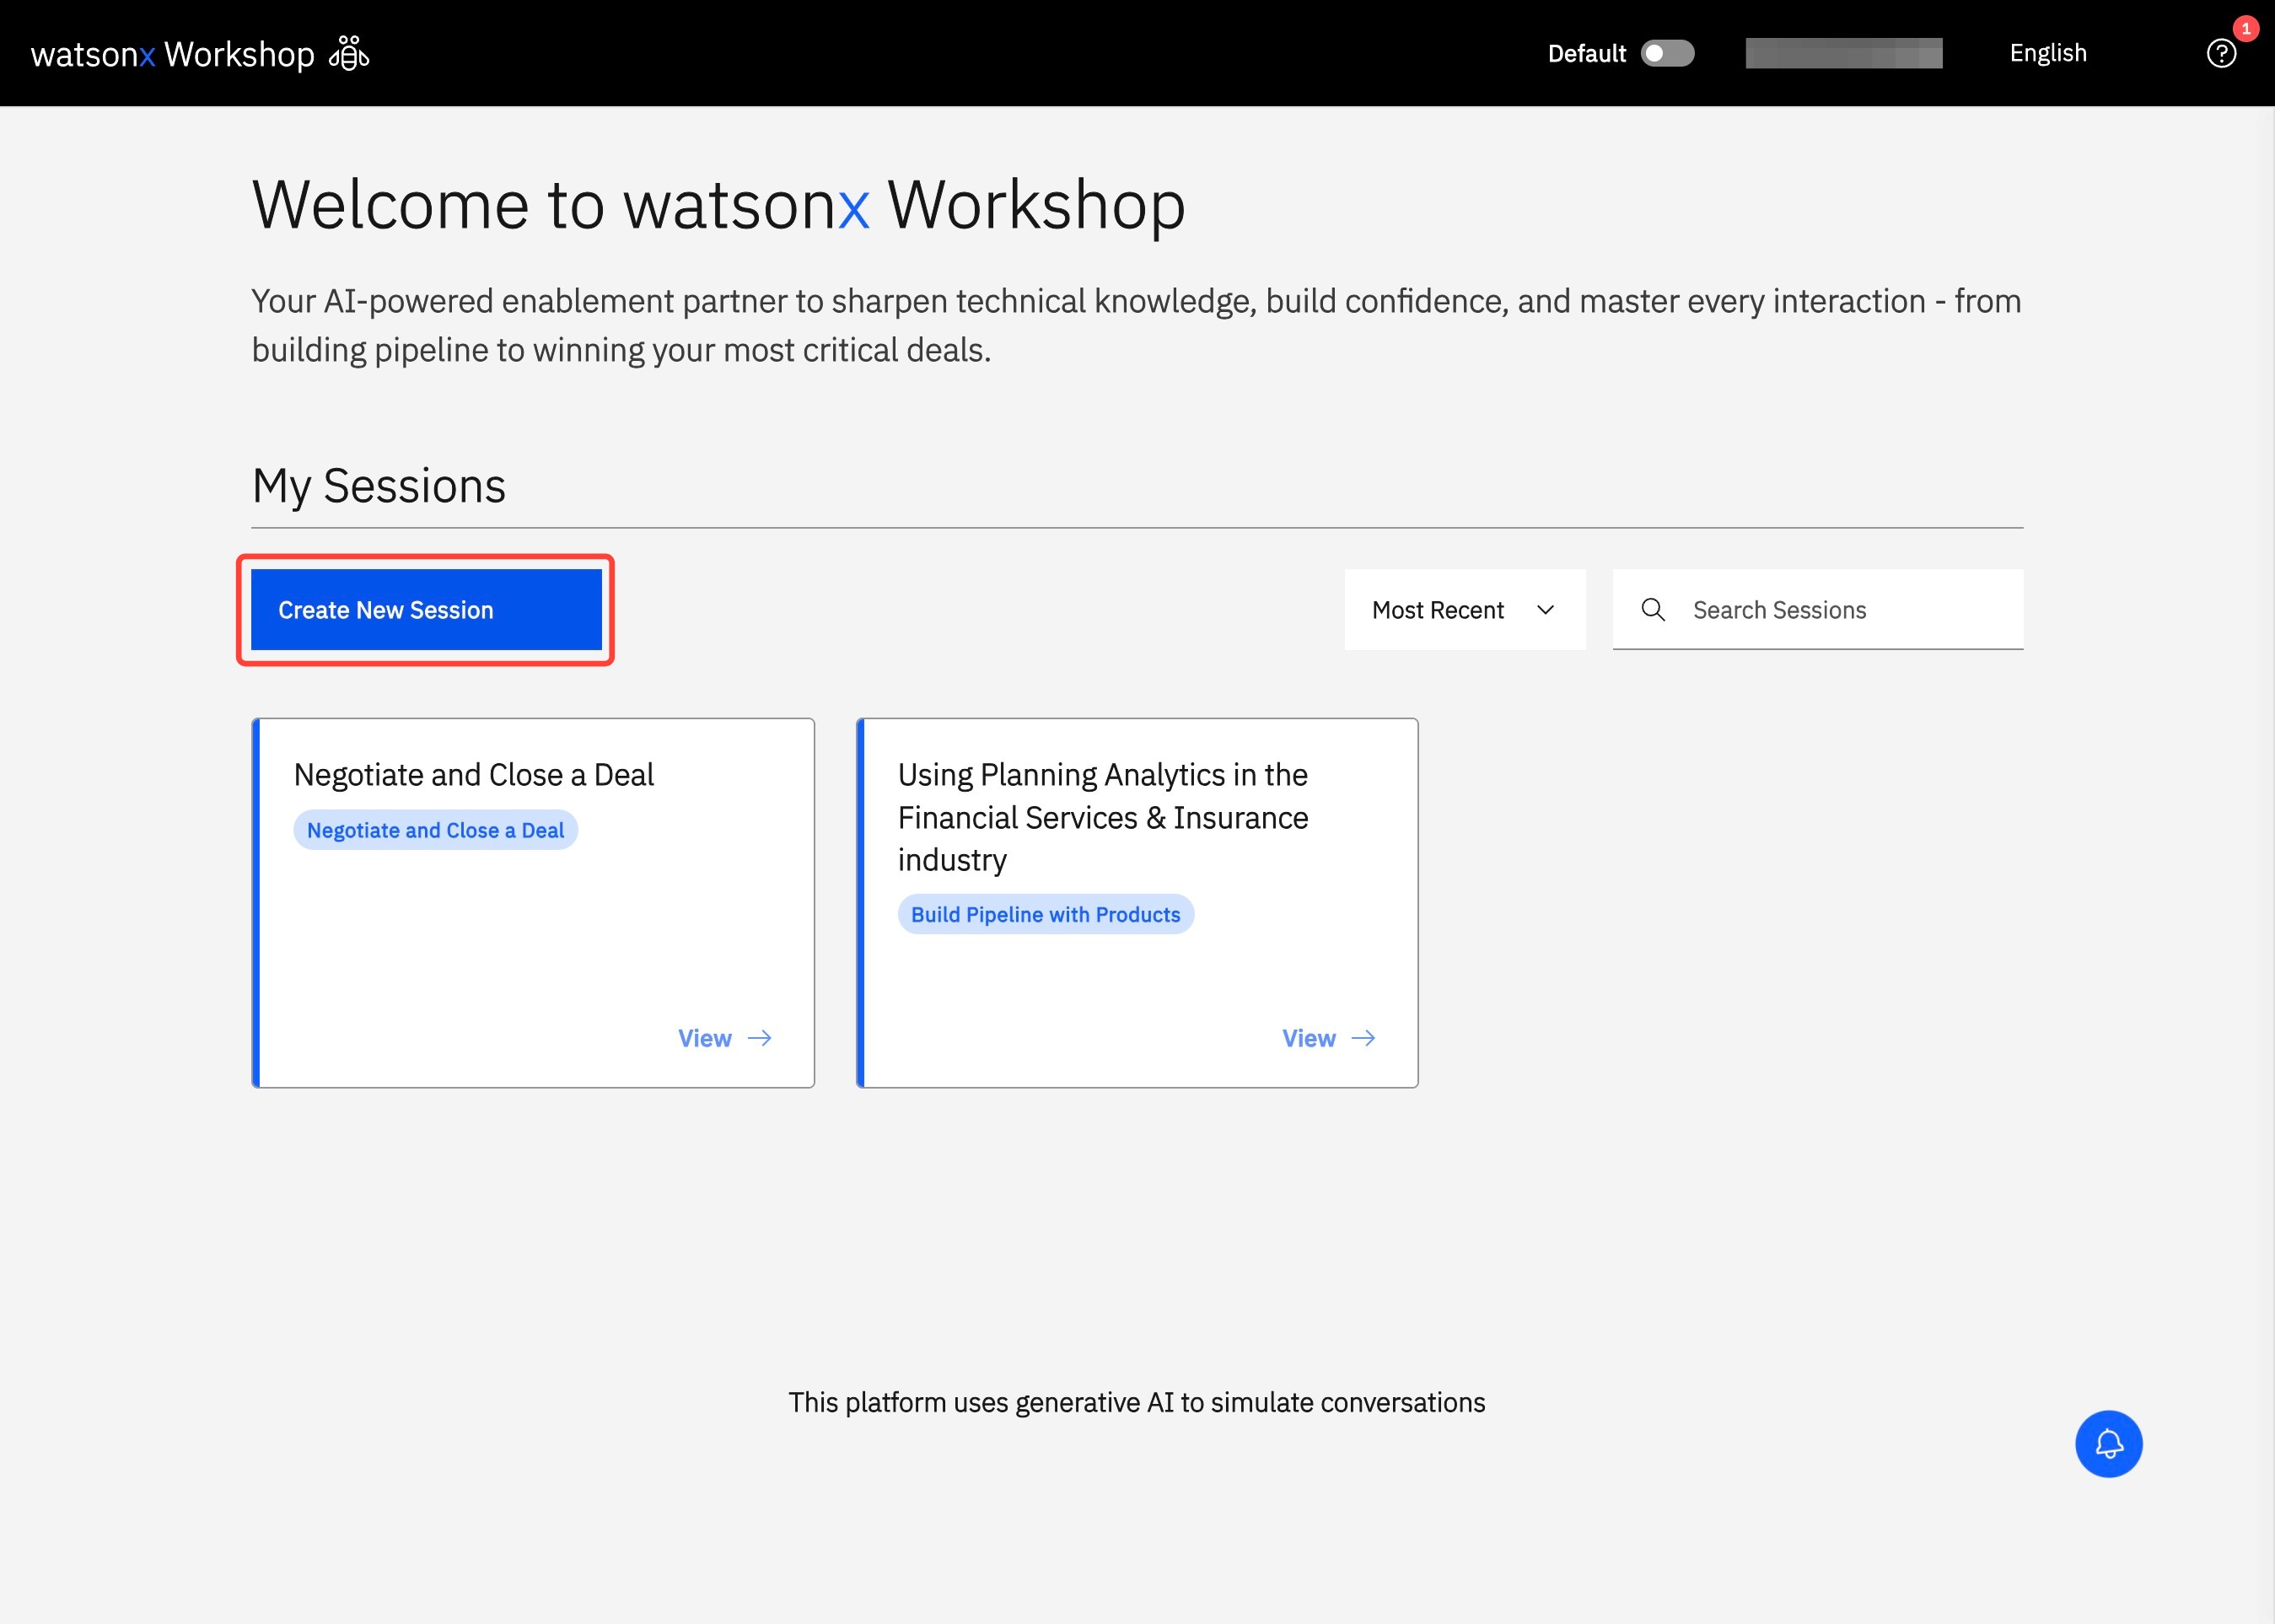
Creating a Session
Sessions form the foundation of your experience in watsonx Workshop. Each session is a personalized workspace designed to support you in accelerating your deals, focusing your learning, or expanding your product and industry knowledge. Create unlimited sessions, switch between them seamlessly, share them with colleagues, and automatically save your progress – so you can work smarter and stay organized throughout your watsonx Workshop journey.
How to Create a Session
- To get started, click Create New Session.
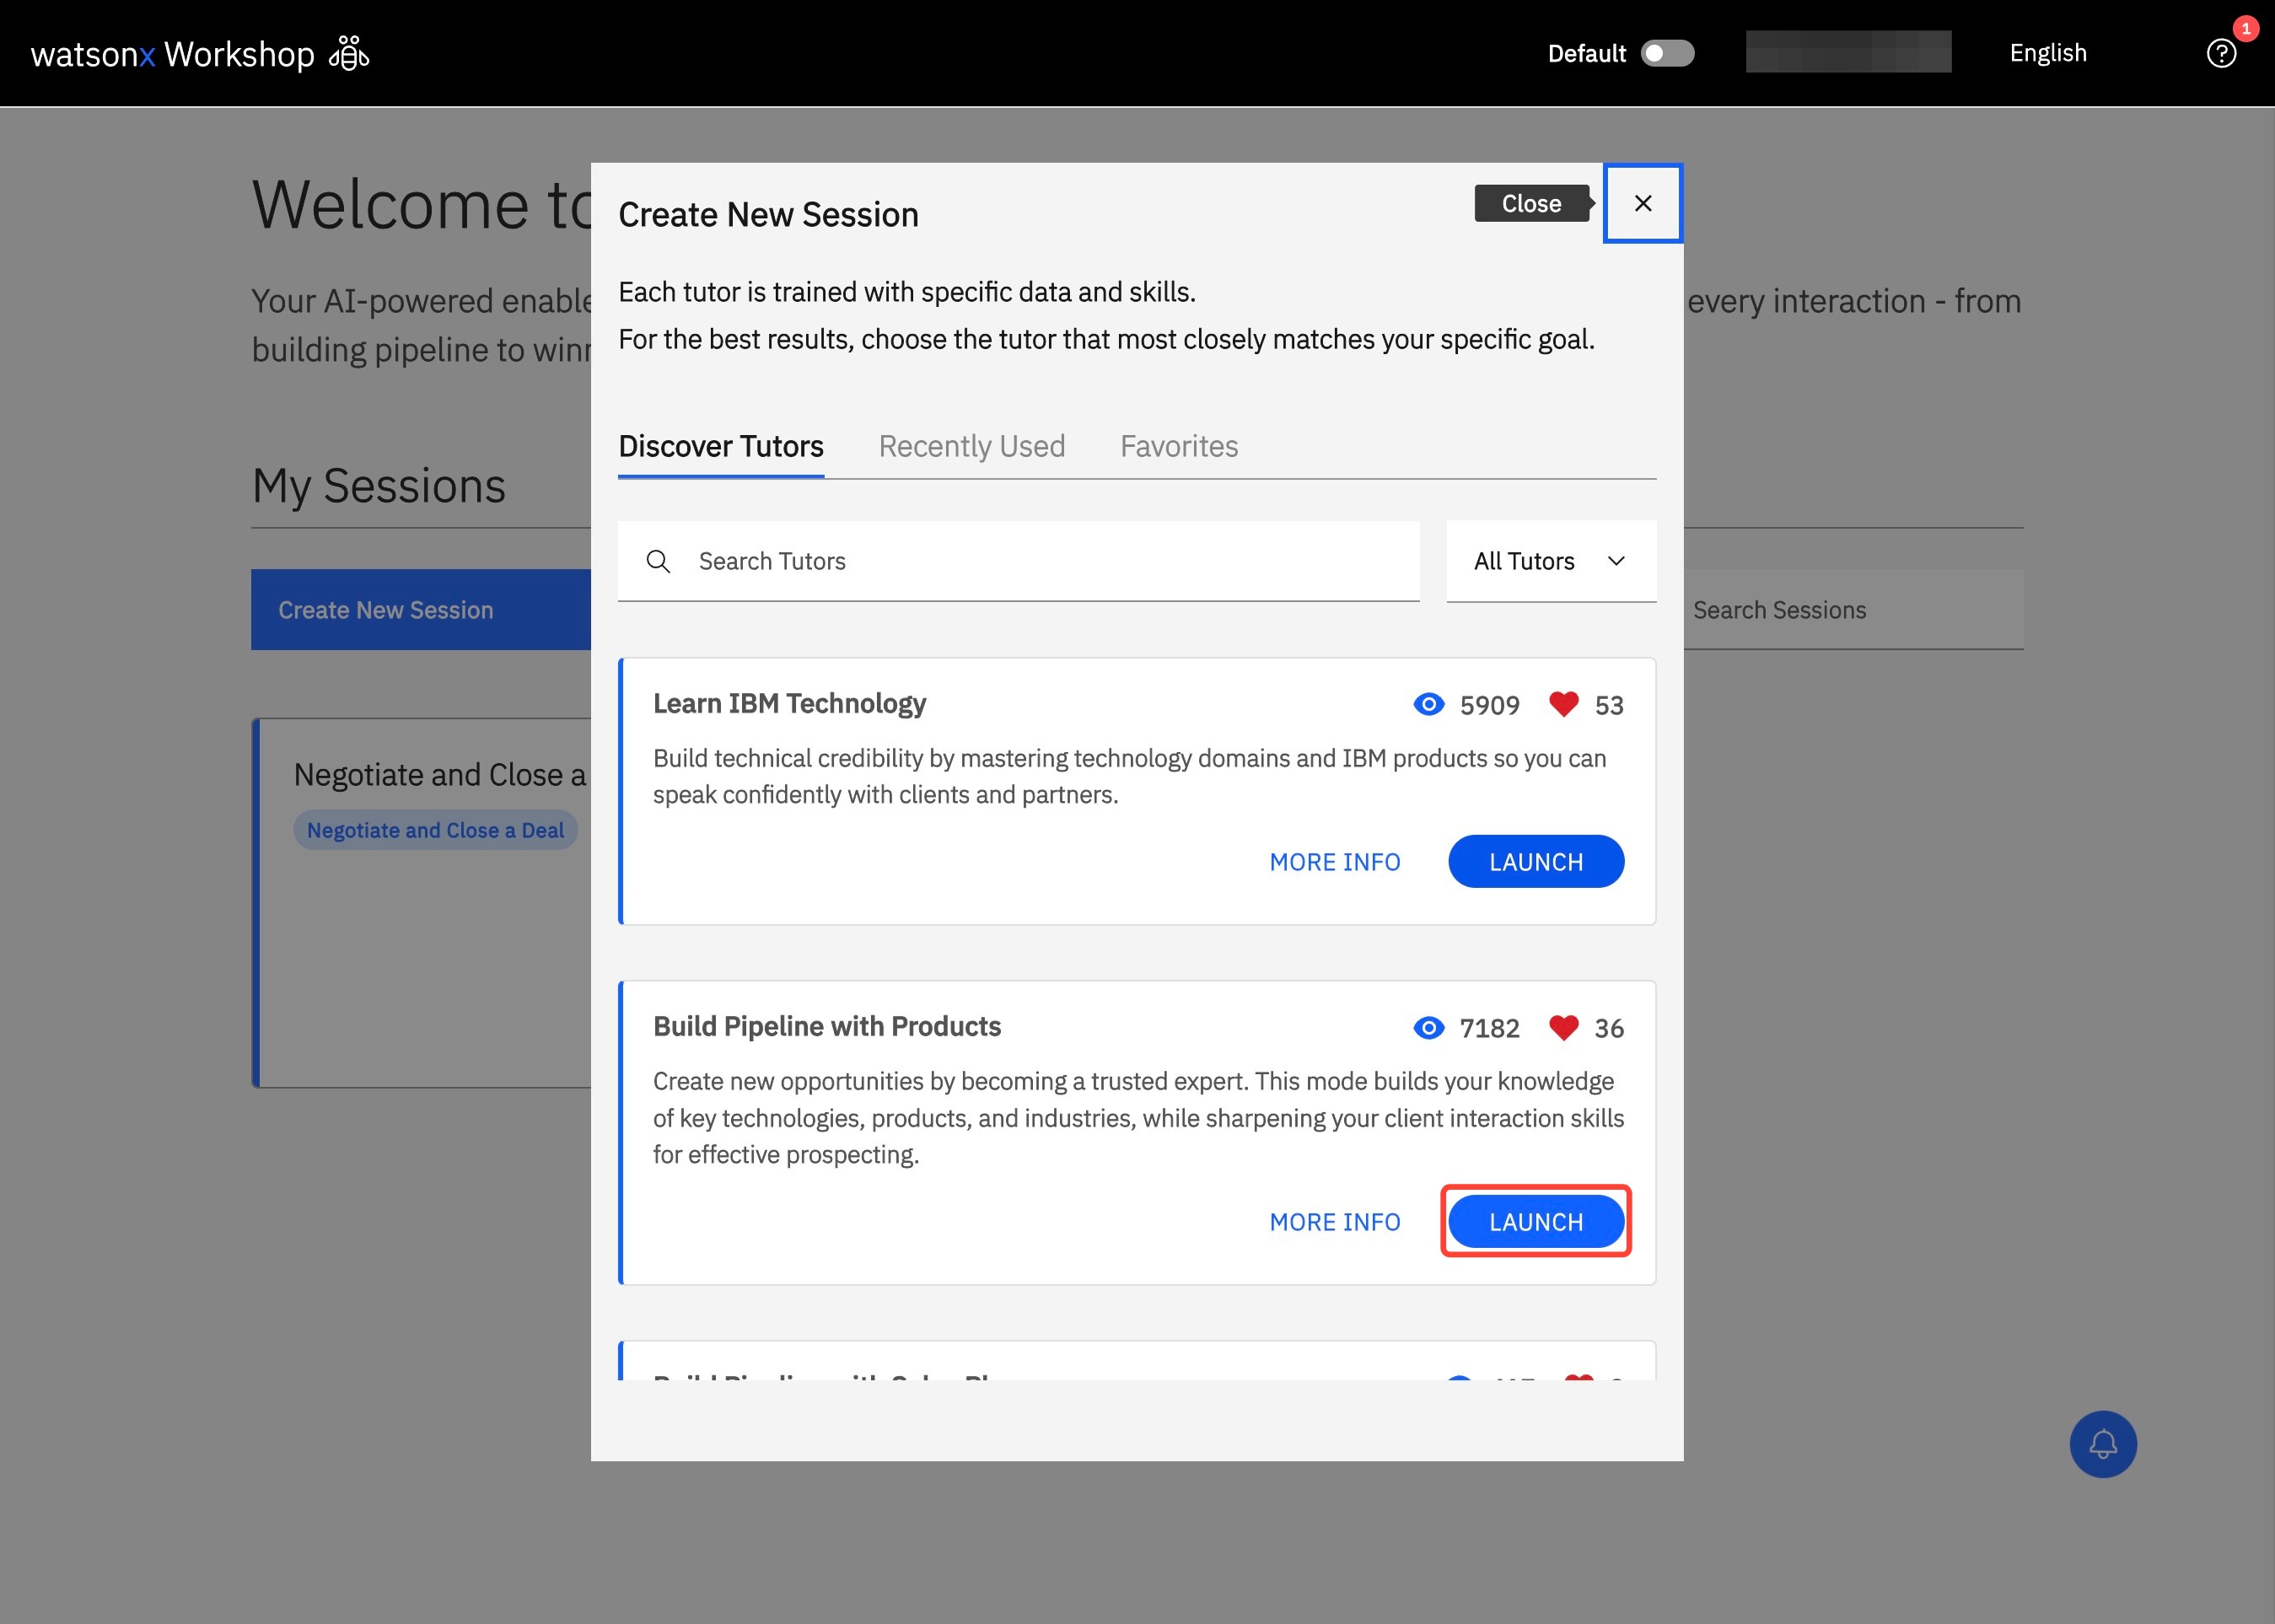
- Under Discover Agents, choose from the following list of available agents that is best suited to your intended use and click Launch. As you spend more time in watsonx Workshop, your experience becomes even more streamlined. Quickly return to your most used tutors under the Recently Used section or favorite the ones you rely on the most to access them any time from the Liked section.
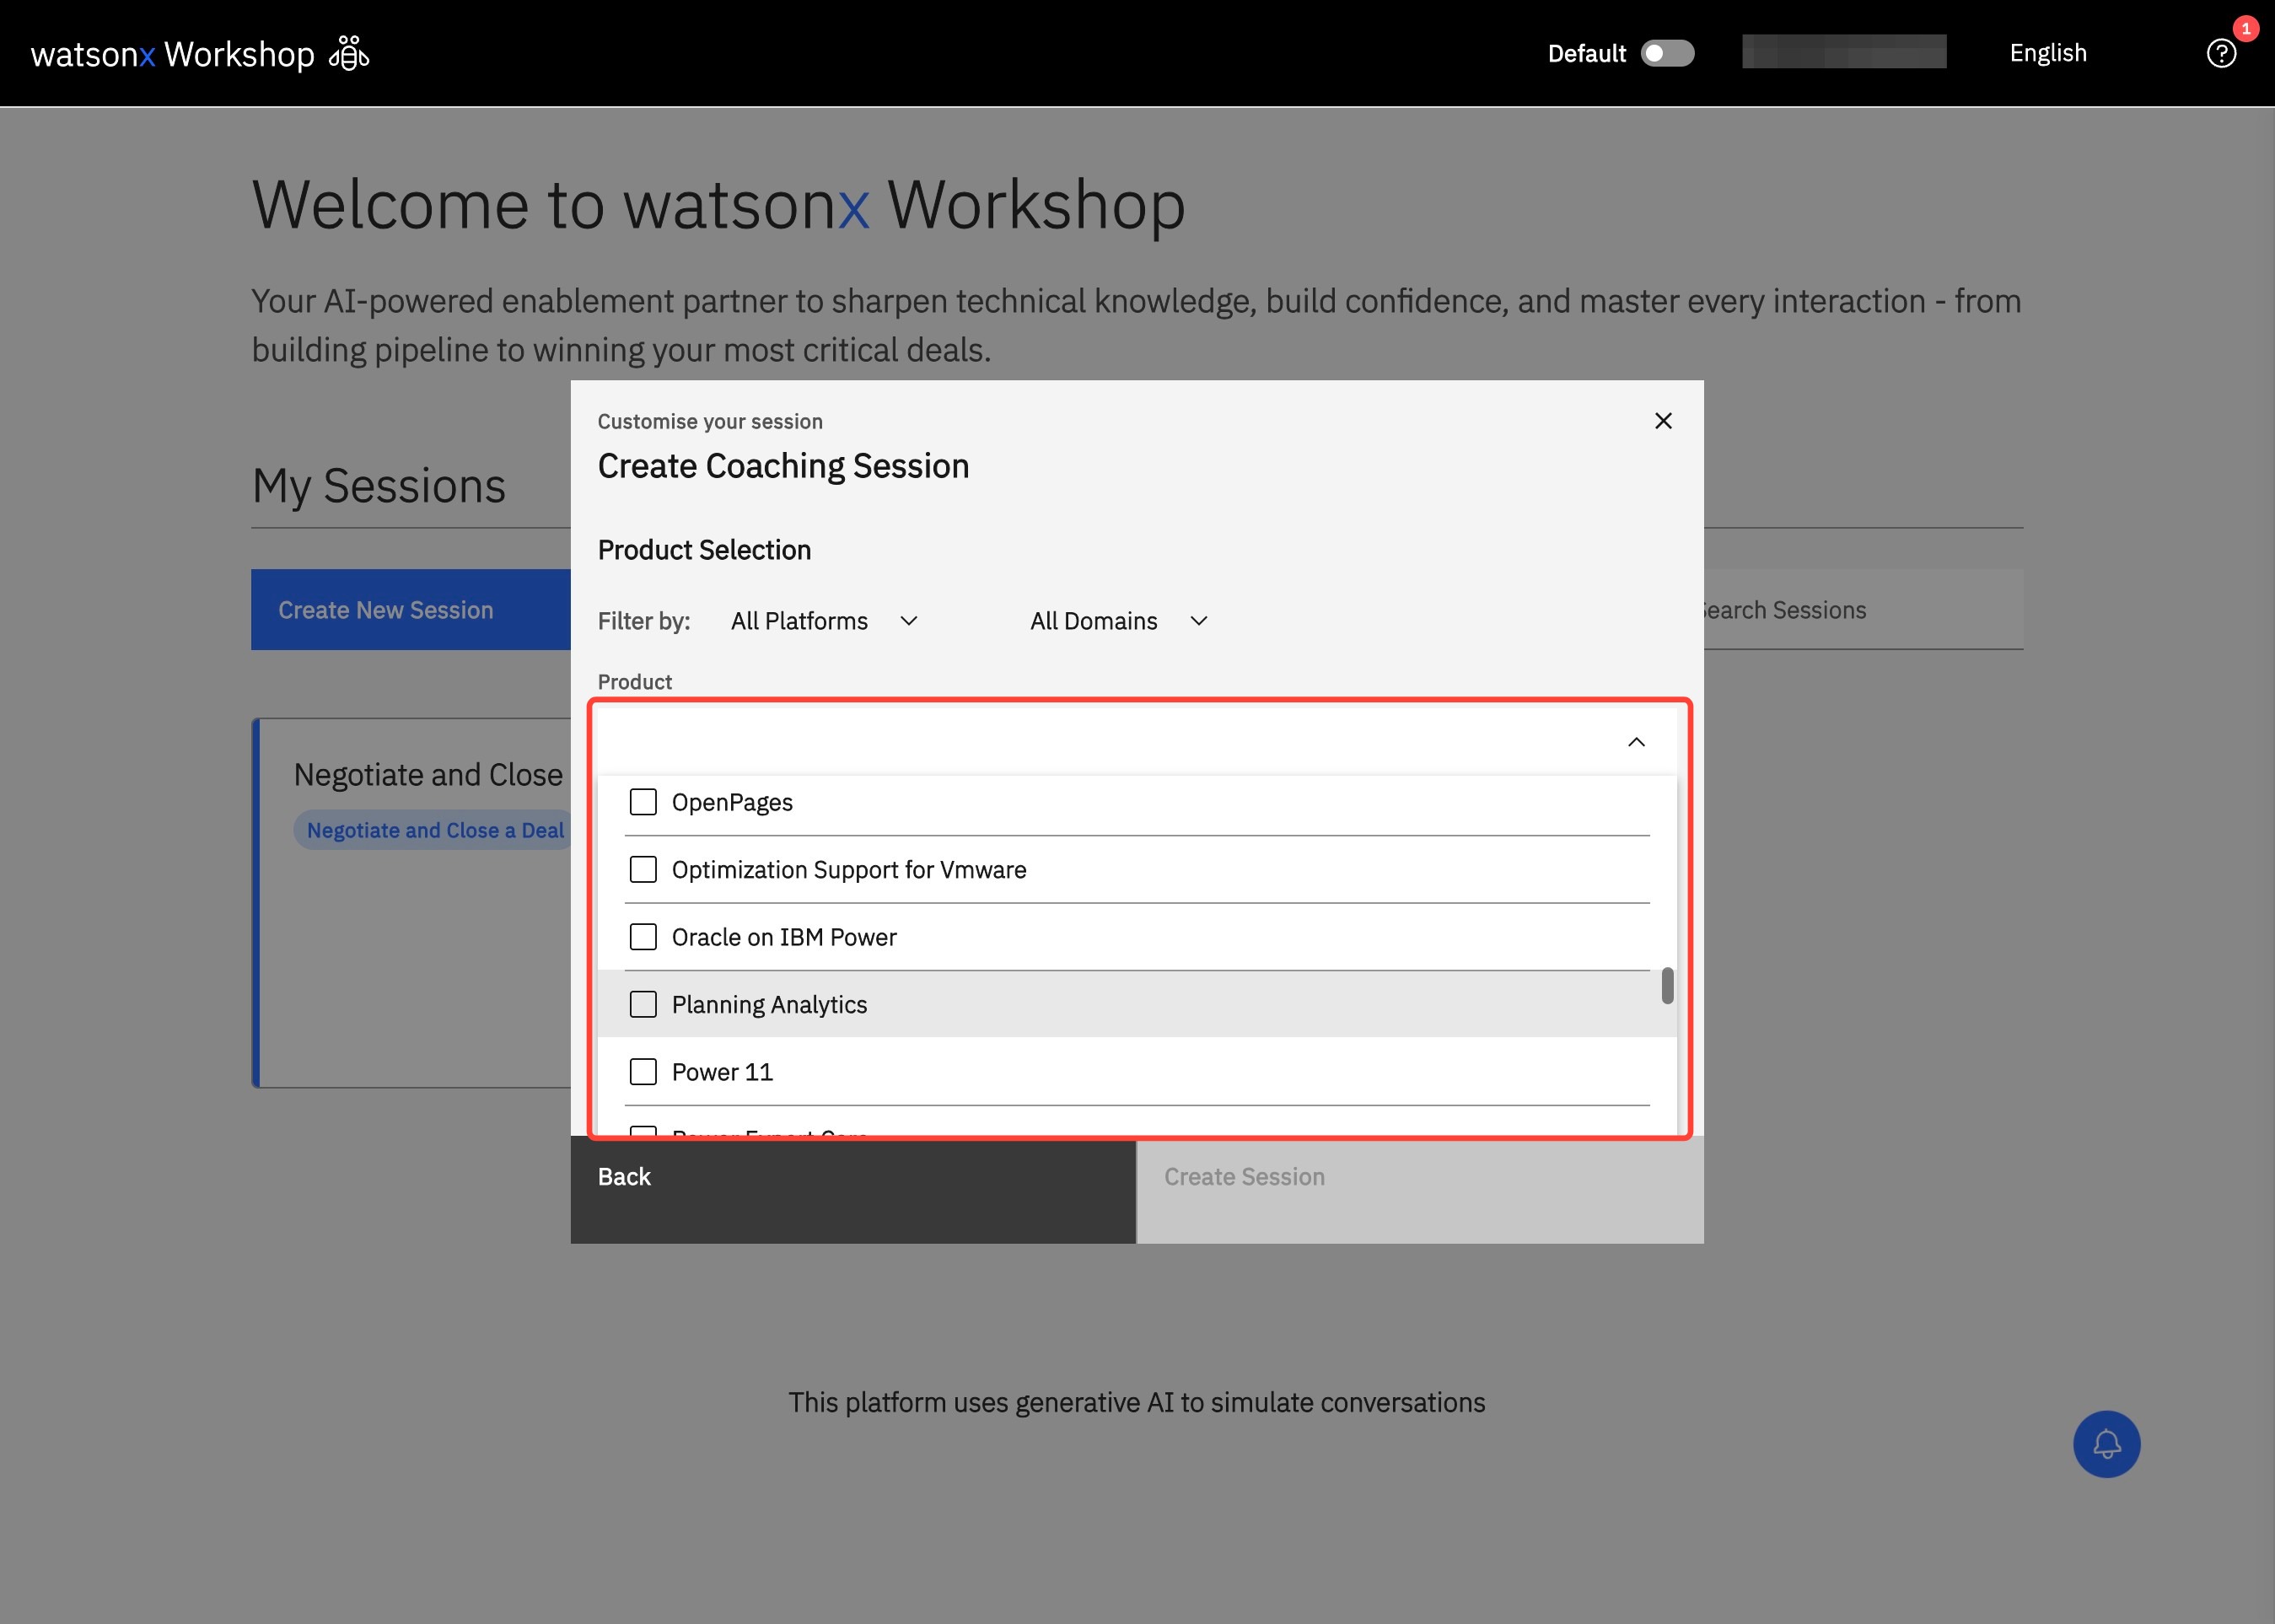
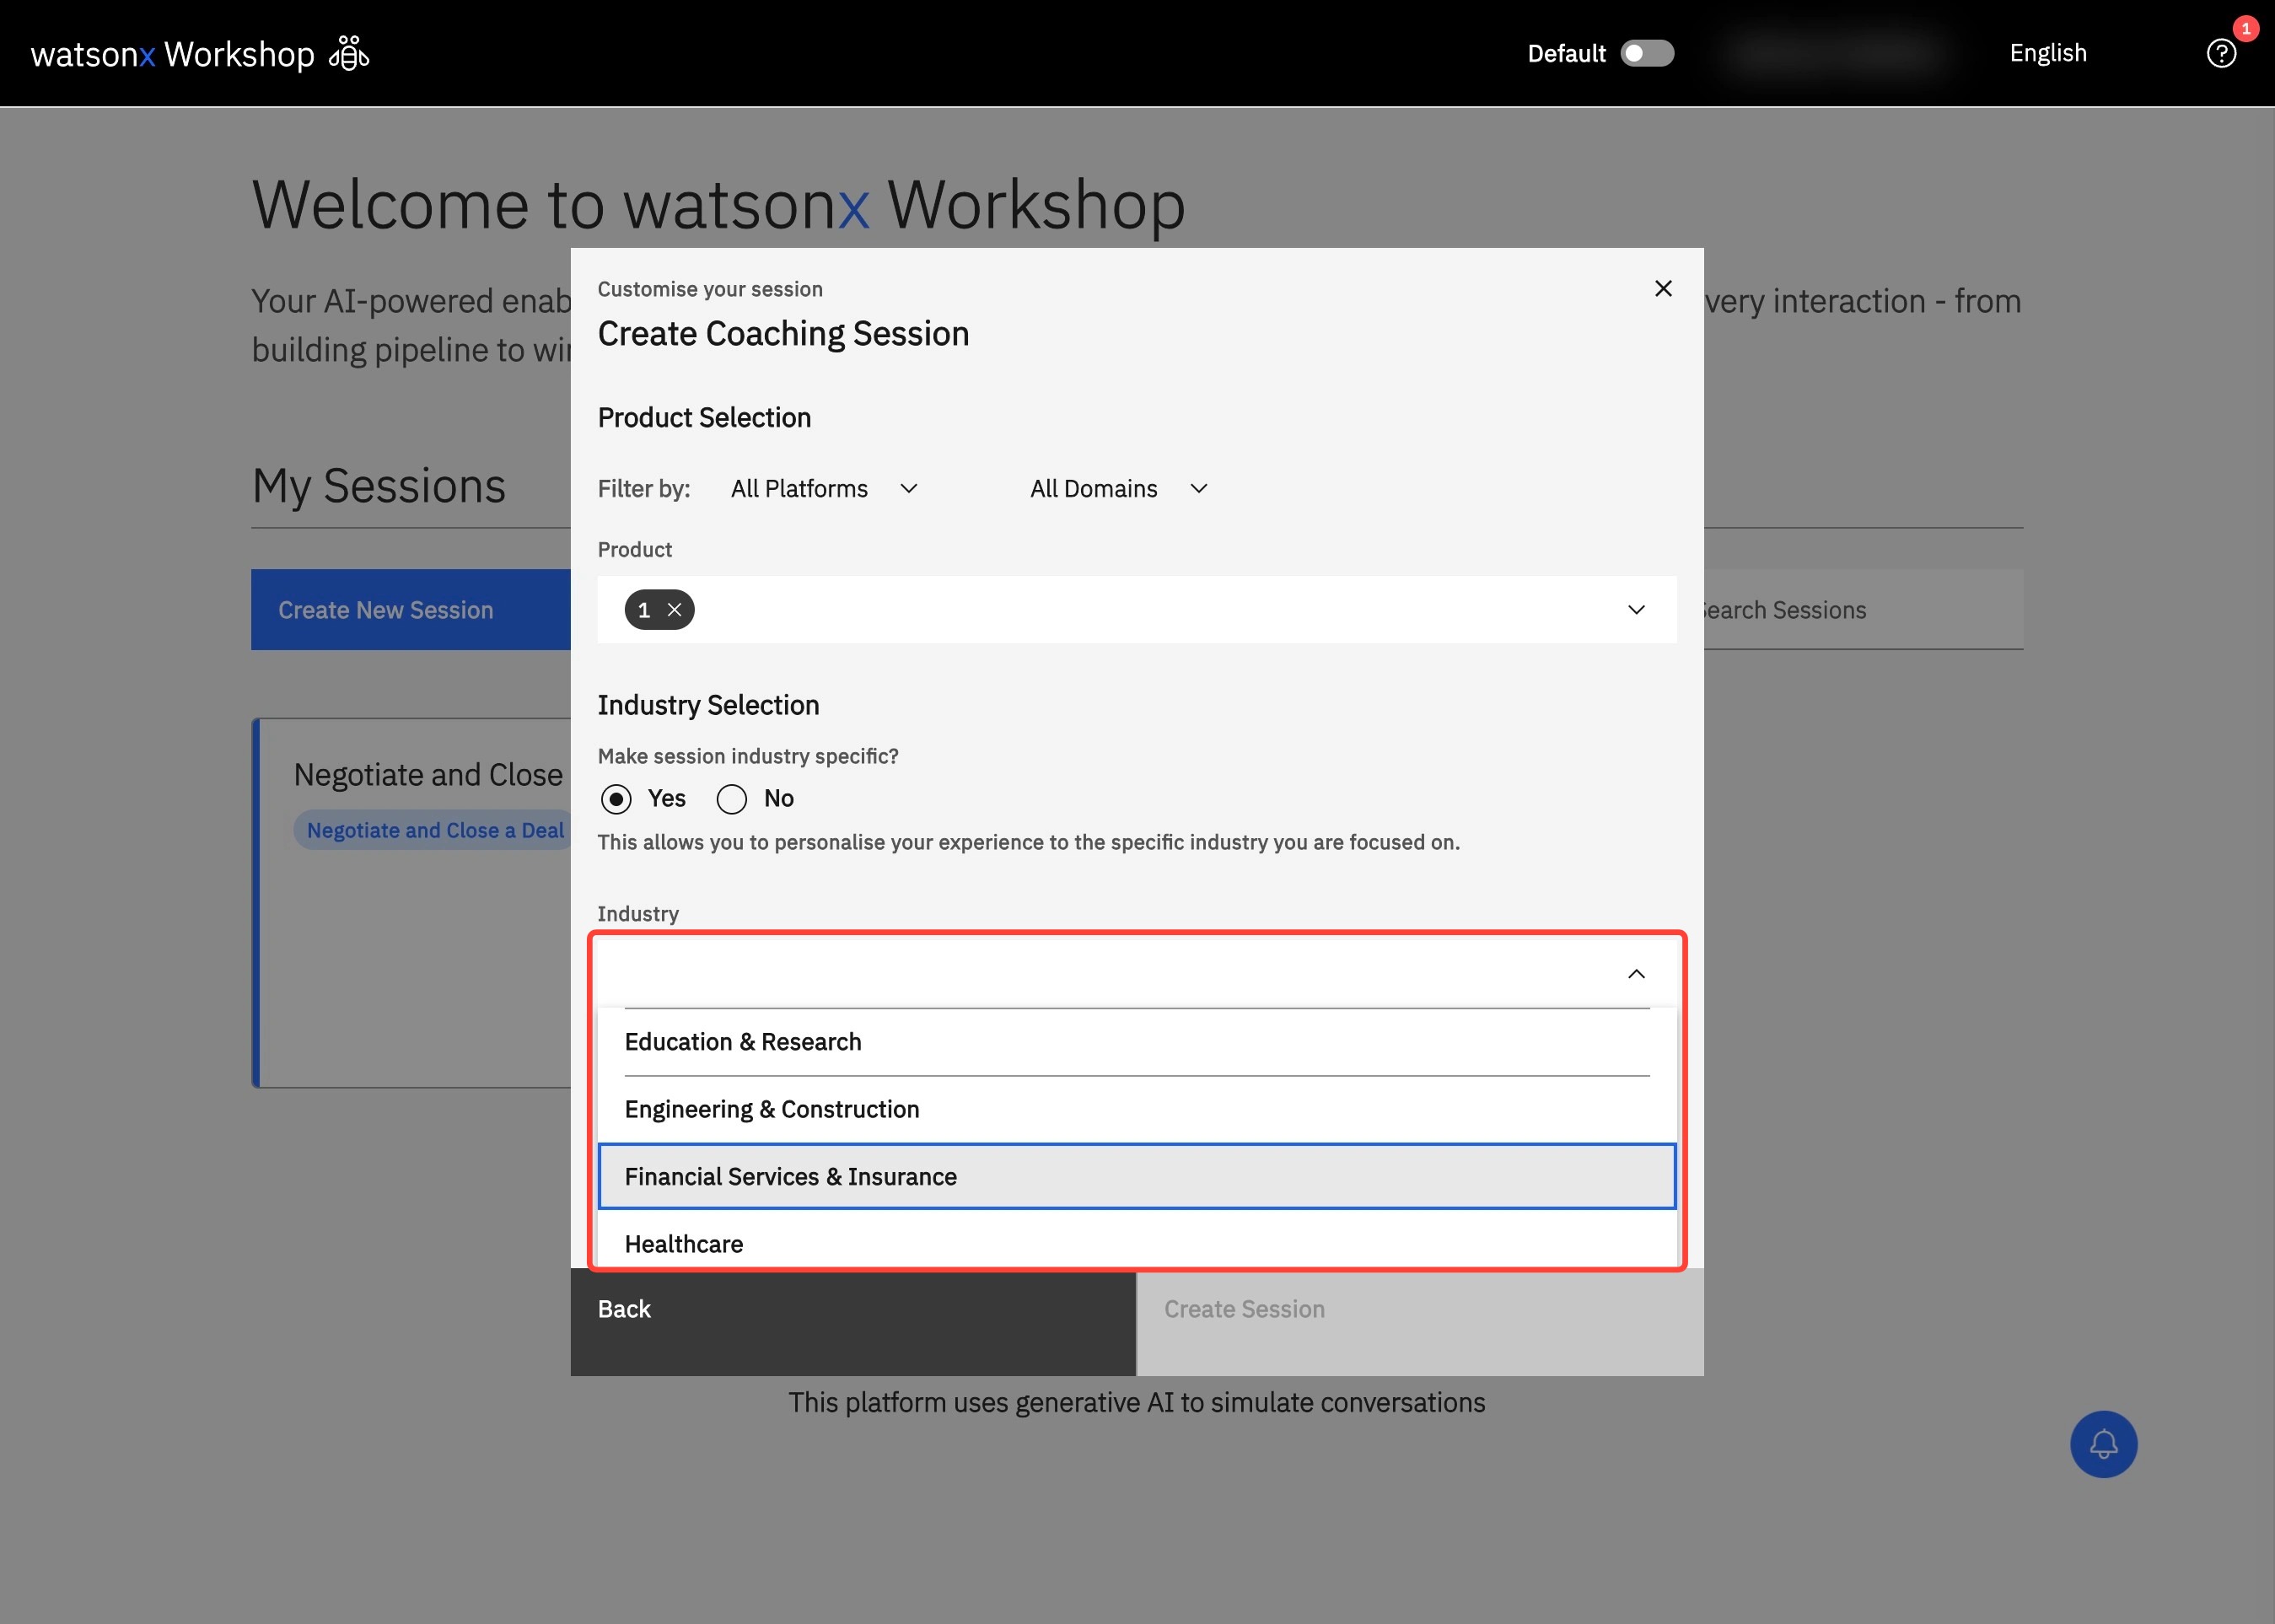
- Based on your selected agent, a Customize your session pop-up will be shown. You can select which IBM products to focus on either by searching the product name or filtering by Platform and Domain. Enable Industry Selection to tailor your session to a specific industry or turn it off to keep your session more general.
- Finally, select Create Session to start your session in watsonx Workshop.
Visual Walkthrough
1. Navigate to watsonx Workshop. Click Create New Session to begin learning a new product area.
2. Select a tutor and click LAUNCH.
3. Customize your session by choosing a product in the dropdown menu under Products.
4. Navigate down to the Industry Selection section and determine if you want your session to be industry specific. If you do, click Yes.
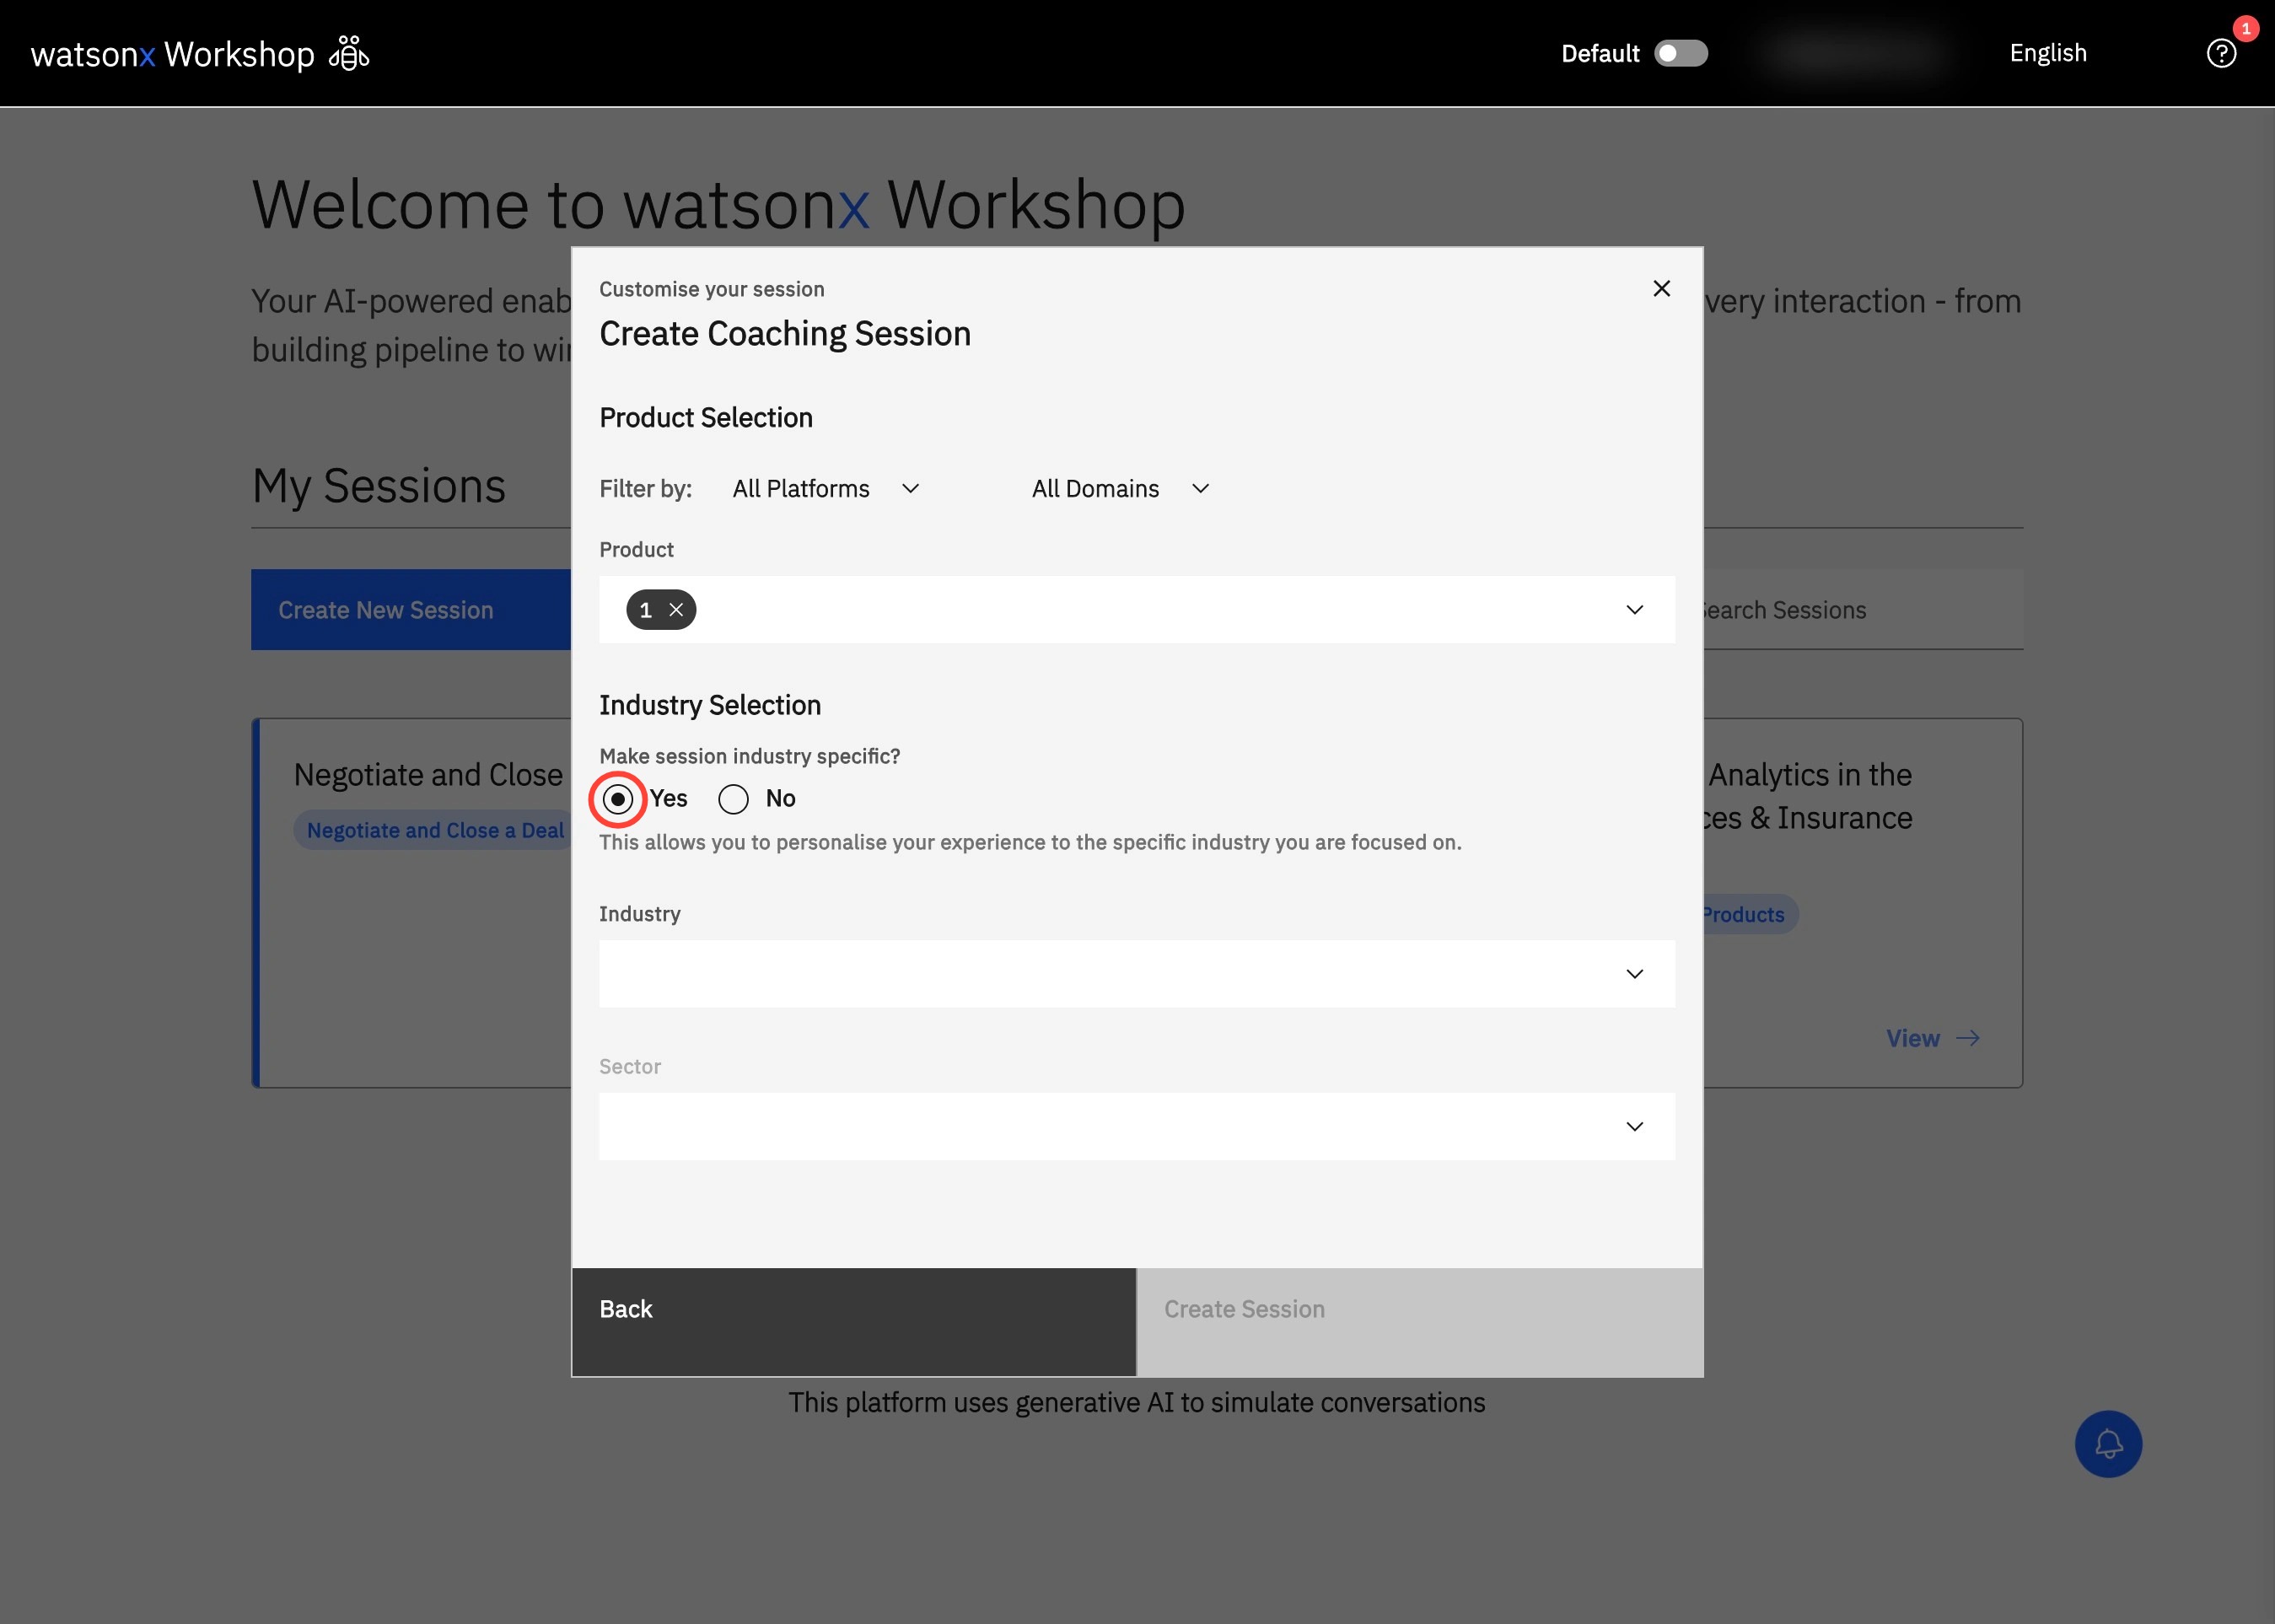
5. Choose the industry you want your session to be focused on in the dropdown menu under Industry.
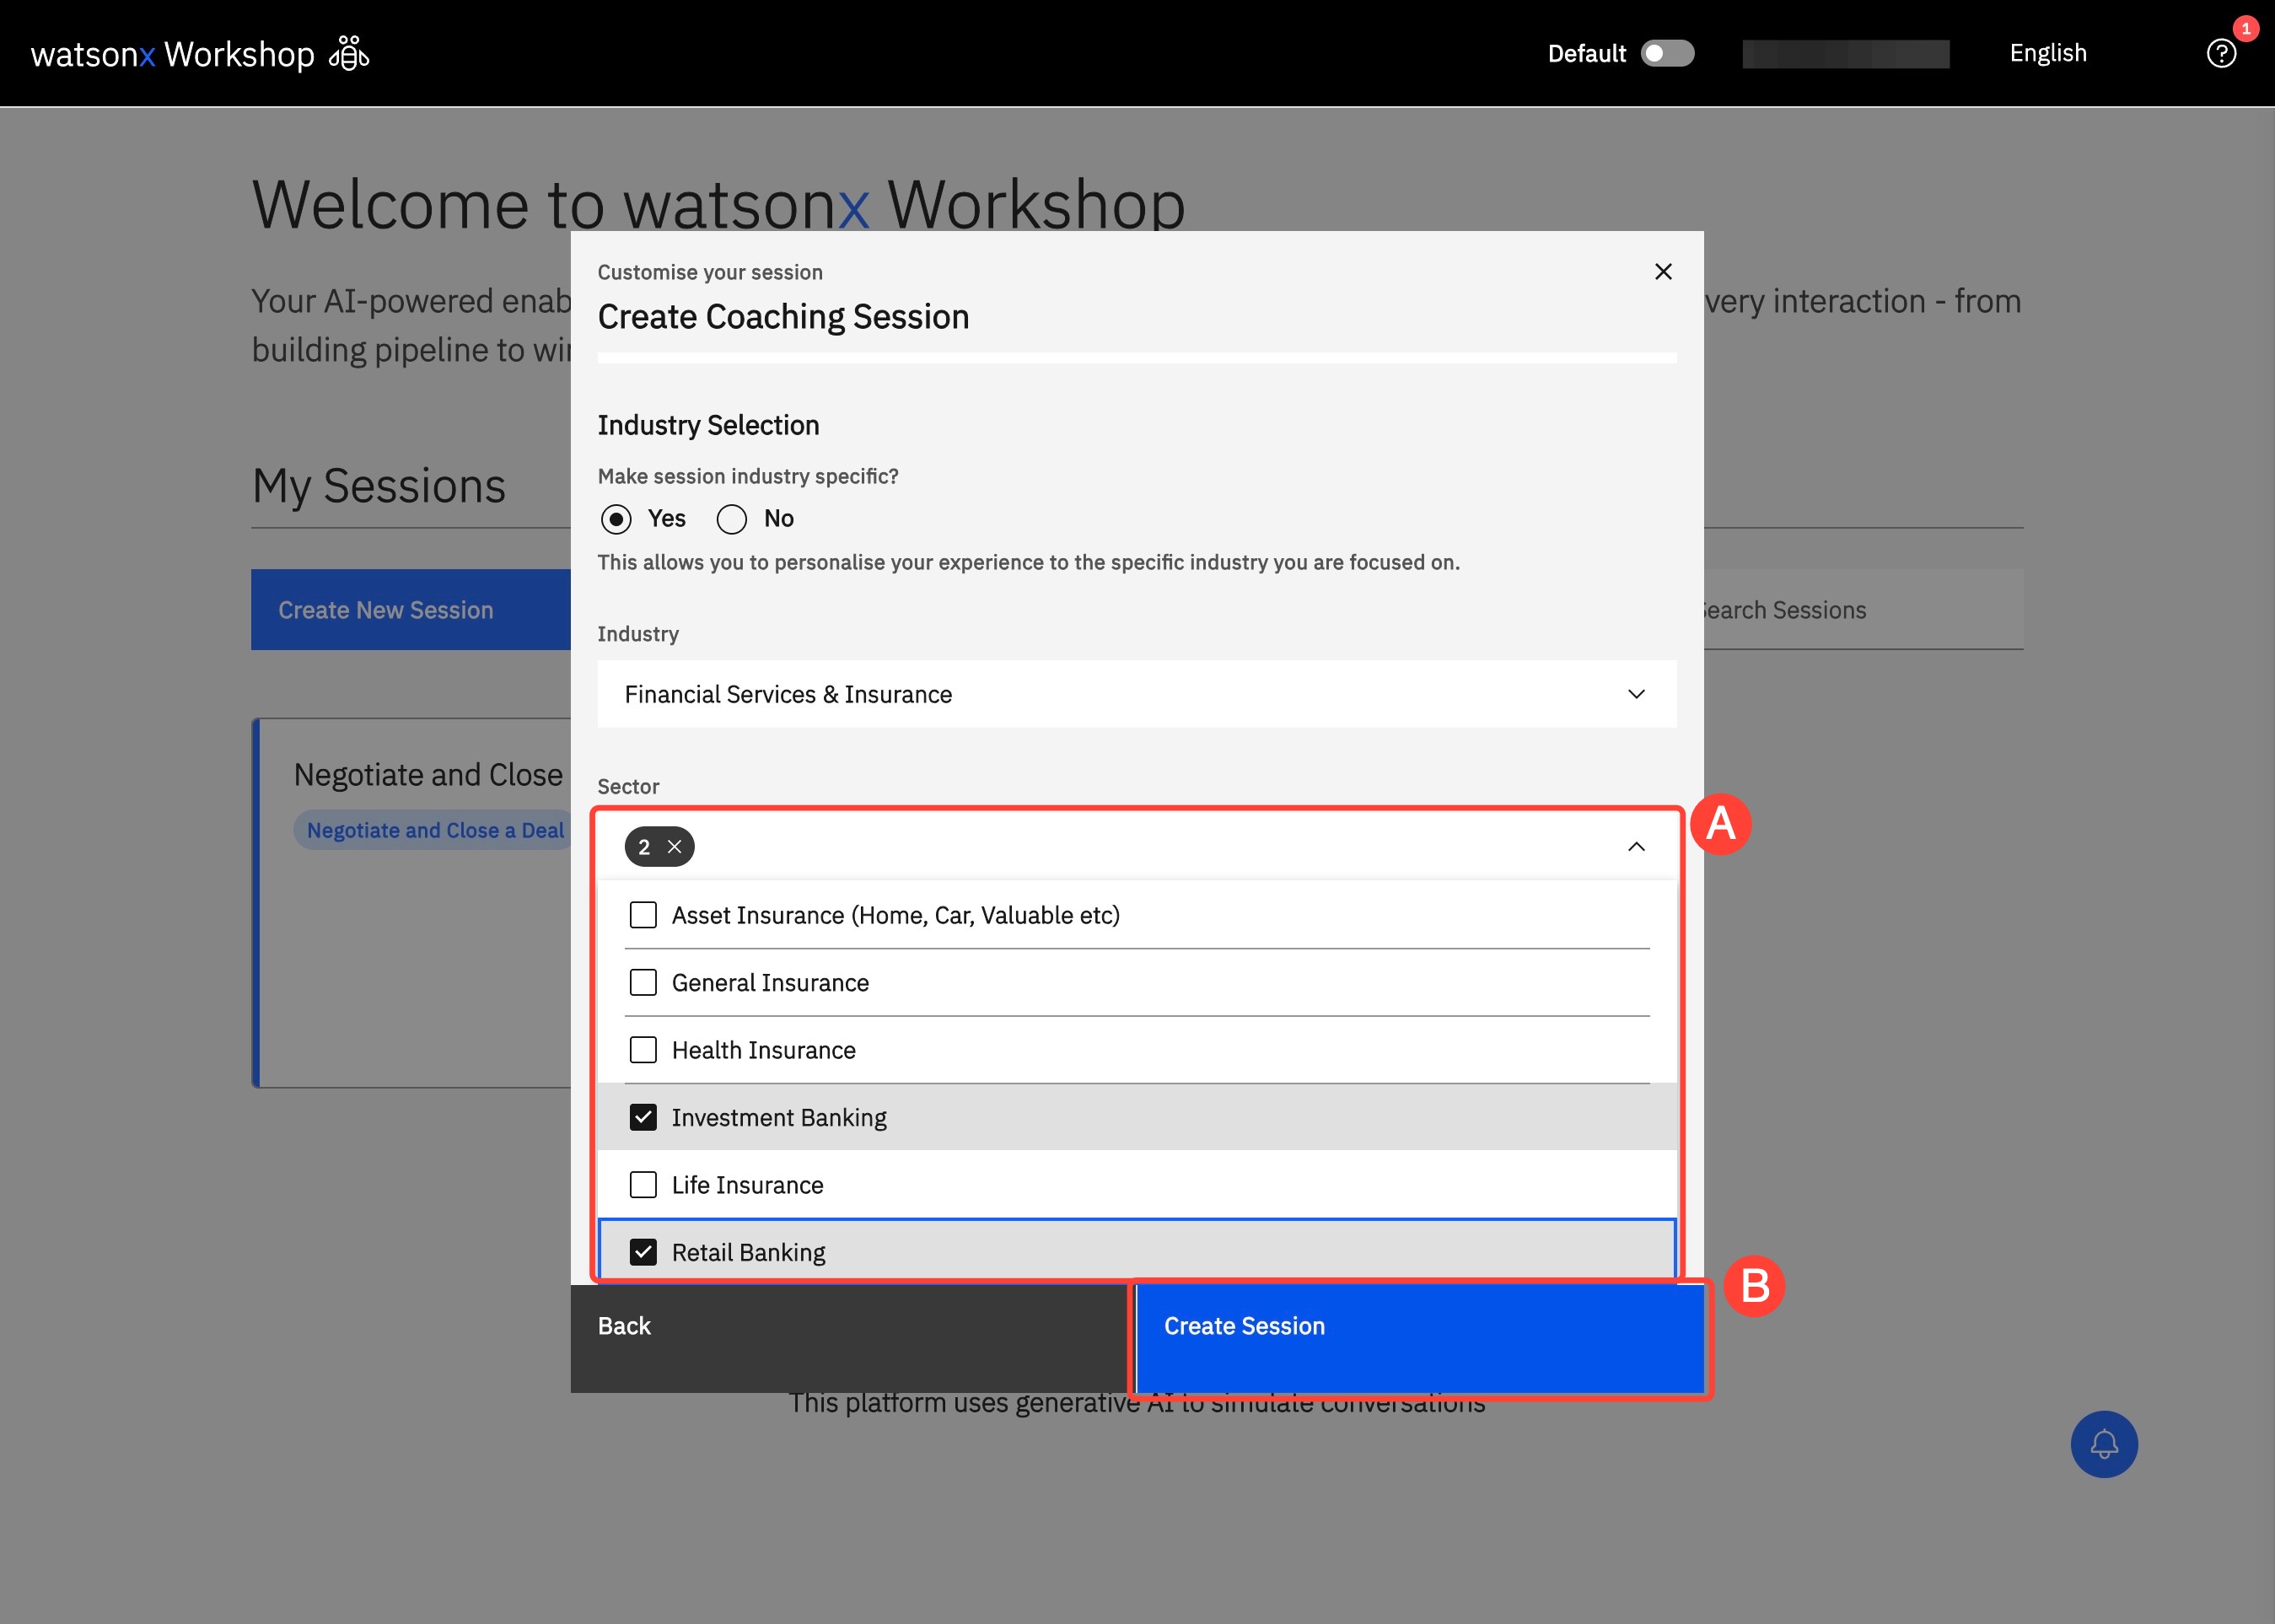
6. To further customize your learning experience, you can select the Sector (A) you want your product to be anchored in. Then, click Create Session (B) to begin your learning.
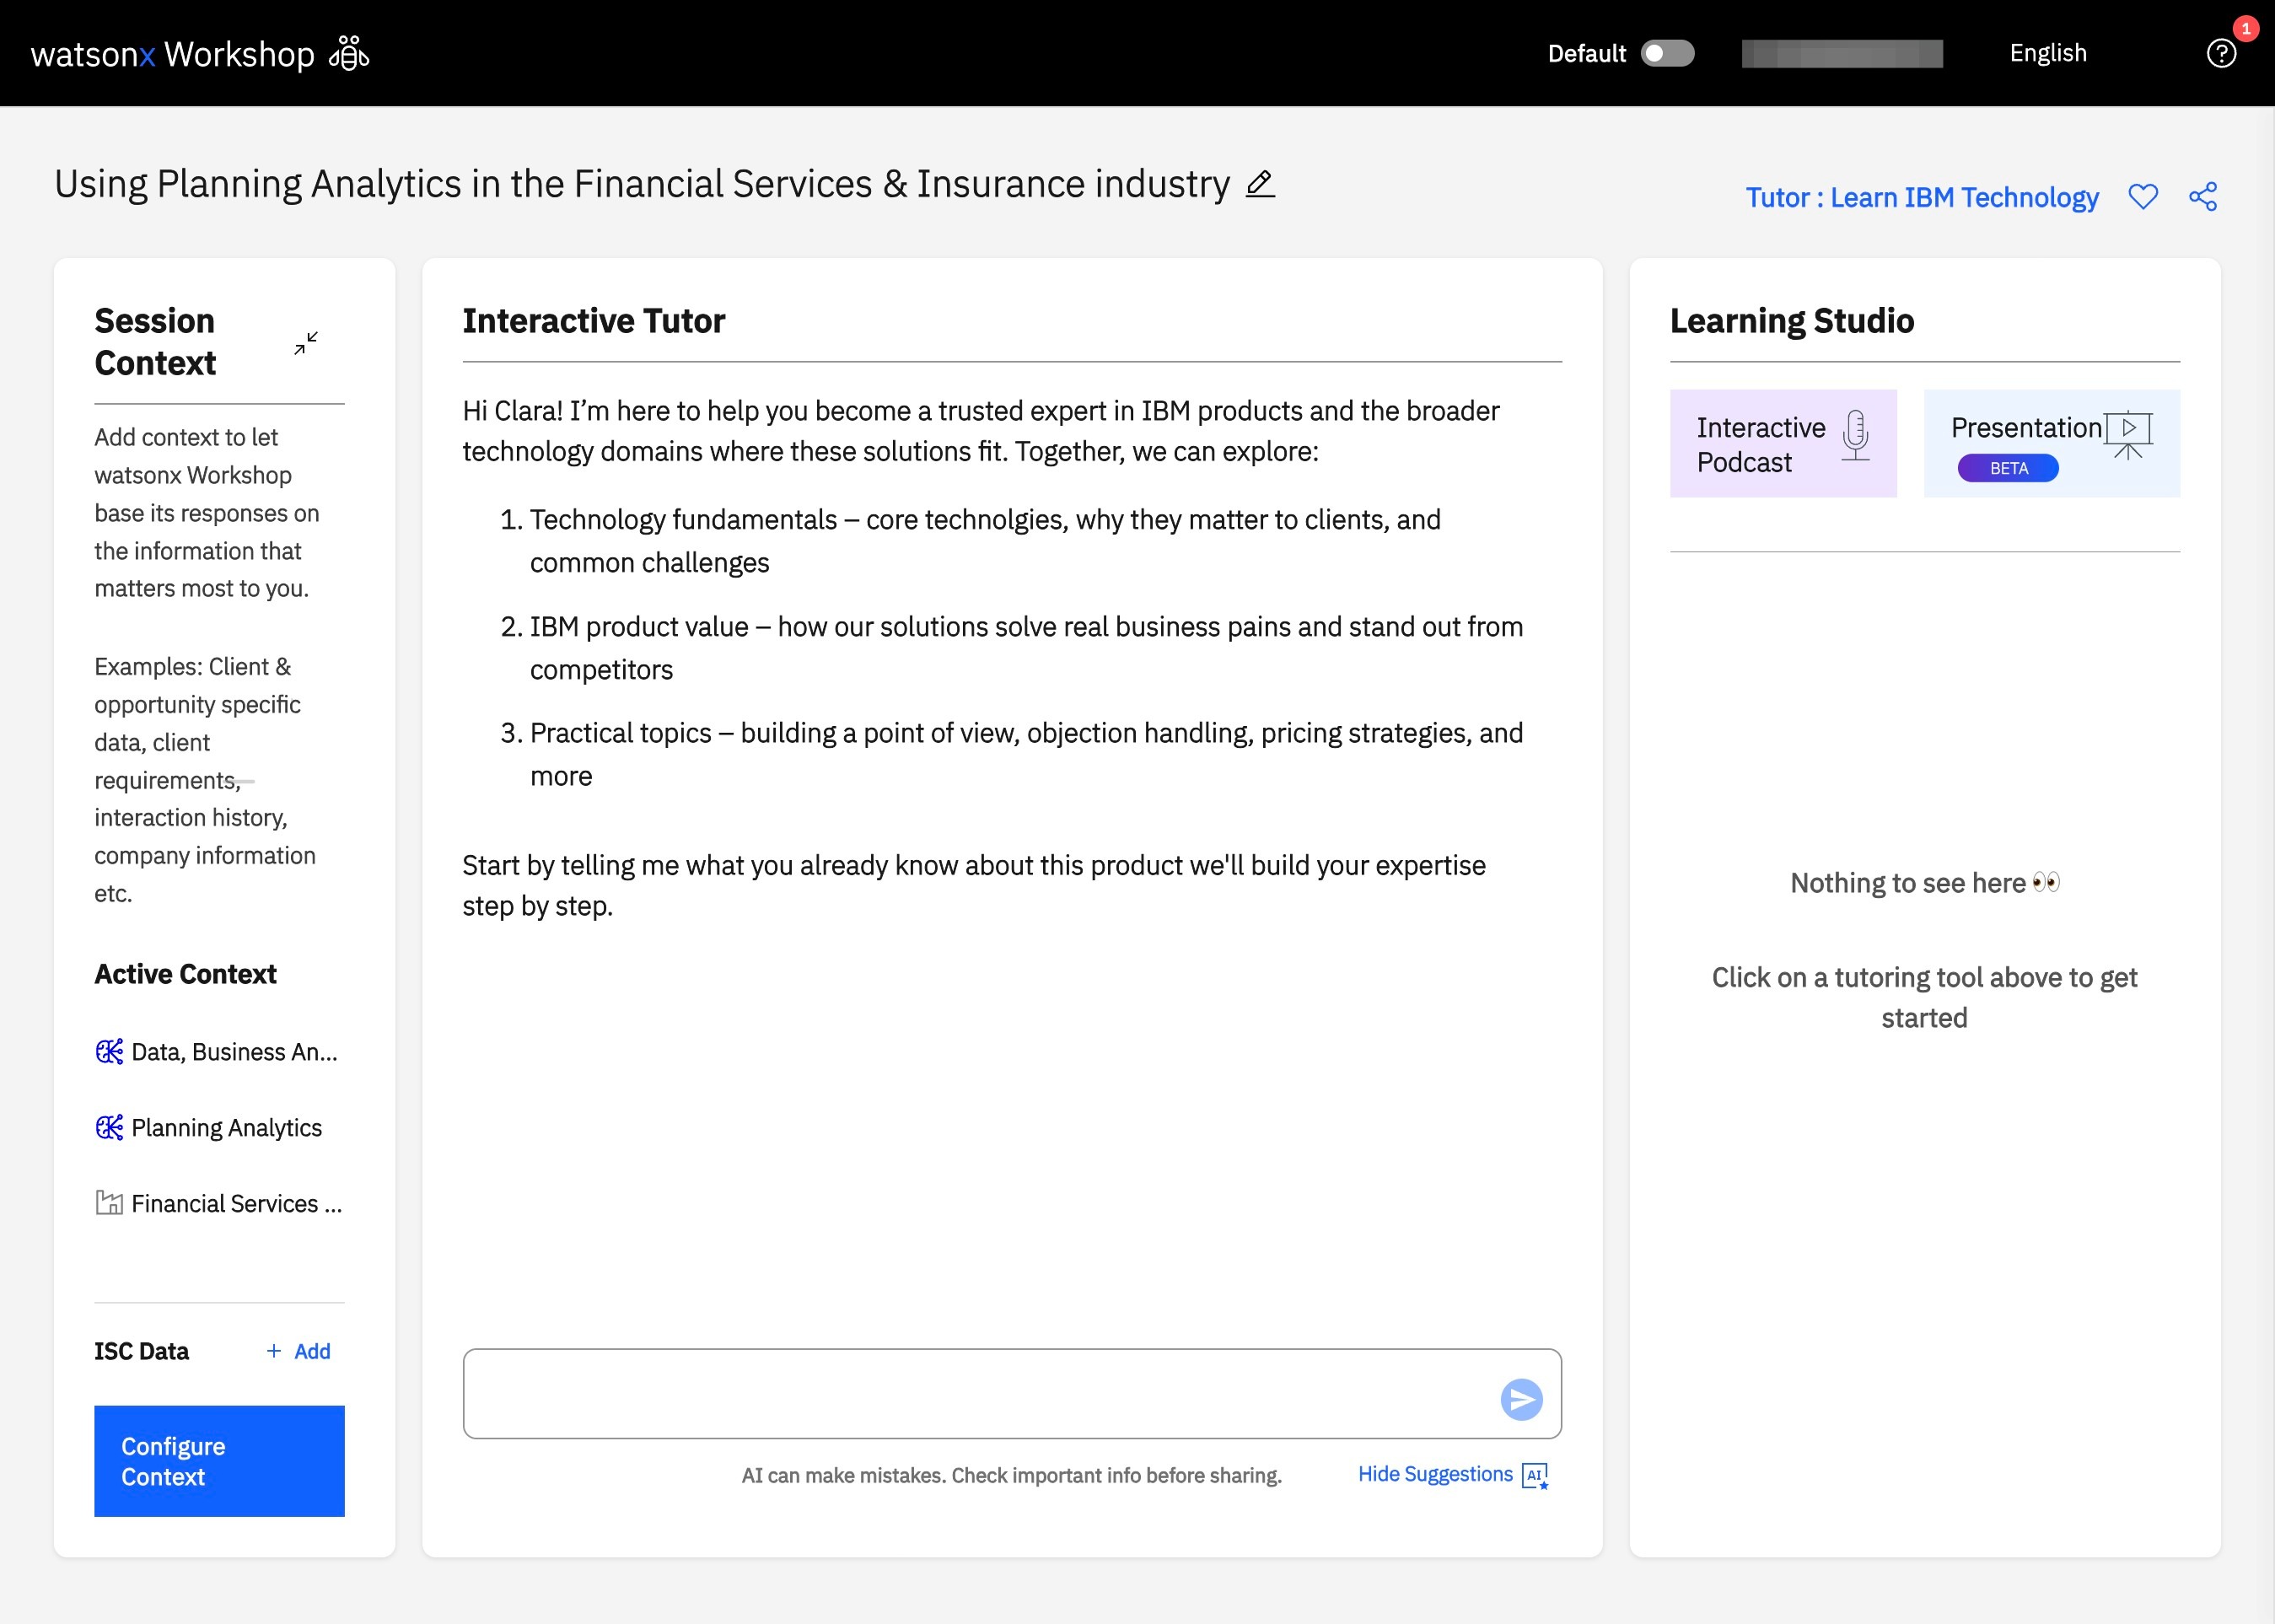
7. To begin your product learning session, prompt the Interactive Tutor to start your learning journey.
Context
Maximize your watsonx Workshop session by configuring context, adapting your agents' capabilities to your unique use case. Tailor each session to the specific client, deal, or topic you’re working on.
Configuring context helps watsonx Workshop understand the background of your session. This allows the AI agent to provide more relevant insights, personalized recommendations, and targeted content generation.
Whether you're responding to an RFP, preparing for a client meeting, or exploring a new product, adding context ensures your session is aligned with your goals.
How to Configure Context
- On the left side of the Chat panel, locate the Context panel and click My Assets. Upload relevant files under Upload a file such as RFPs, client requirements, strategy decks, company information, or interaction history. Additionally, add websites—such as Seismic or any public sites—of your choosing under Web content. Once you’ve made your changes, click Configure Session to apply them.
- Click Client Data to enter either an Account or Opportunity number from IBM Sales Cloud to bring into your session.
- Anchor your session by product or industry by navigating to Products & Industry. Select the relevant product(s) under Product. Refine your session to an industry by toggling on Industry: you can select the relevant industry and sector under their respective sections.

Pro Tip
The more specific your context, the more tailored and valuable watsonx Workshop’s responses will be. You don’t need to be an expert in prompting – there's Skills in the Chat to help. watsonx Workshop is designed to guide you through the process and respond intelligently based on the information you provide.